Client - Quick Start
Quick Start Guide
AnnouncementRecommended Setup Steps
When you first create and enter a company for the first time.
We recommend that you setup and create the following in the below list.
Start from 1 and work to 7.
- Setup wizard
- Company Settings
- Billing Terms
- Price Categories
- Add Customers
- Add Suppliers
- Add Inventory Items
A step by step guide on how to install the Tada client on Windows, Linux and MacOS devices
Adding / Importing A User To import a user, Click on the “Import Key” button. A new window will open were we can begin to import a user. we will fill in the required details as follows:
Server Address - This will be the address of the machine running the server. In this example, the server is running on a computer with the ip address 192.168.1.23. We also have to tell the client which port the server is listening on.
Welcome Page The new company wizard is used to quickly get your company up and running. It guides you through setting up the most important settings you will need to set to get started using Tada.
The first page you will see is the “Welcome” page, we will click next to continue the setup. Company Details Page The second page you will see is the company details page, Inputs marked with a * are required in order to continue to the next page.
Top Menu Bar The top menu holds all the tools you can use in easy to follow categories.
The Categories are as follows:
Files - Tools related to the Client application. Exit application Company - Tools related to the Company. Company Settings Billing Terms Accounts - Tools related to the accounts. Charts of Accounts Closing Books Inventory Inventory Items Price Categories Units of Measurements Suppliers Suppliers Purchase Orders Supplier Invoices Debit Notes Supplier Payments Customers Customers Invoices Quotations Receipts Credit Notes Debit Notes Reports Financial Reports
To access the “Company Settings” Click on the “Company” menu then select the “Settings” Option.
Company Info This is where you can change and set the main company details.
It is recommended to add the “Bank Account Details” as this will be displayed on quotations, invoices, debit notes etc.
Financial Years Here you can add and change the Companies financials years.
You can change the “Current Year” if you need to work on previous or future accounting years.
Where to find all Customers To access the “Customers” Click on the ““Customers”” menu then select the “Customers” Option.
The Customers dashboard will open showing all existing Customers.
Create a new Customer Click on the “Add” icon to open the “New Customer” window. Fill in all the desired details for your new “Customer” and click on the “Create” button to complete and save the new customers.
Where to find all Price Categories To access the “Price Categories” Click on the “Inventory” menu then select the “Price Categories” Option. The Price Categories dashboard will open showing all existing Price Categories. Create a new Price Category Click on the “Create” button, a new row will be created for you to enter in the name of the new category you would like to create. Click on the “Save” button to save the Price Categories.
Where to find all Suppliers To access the “Suppliers” Click on the ““Suppliers”” menu then select the “Suppliers” Option.
The Suppliers dashboard will open showing all existing Suppliers.
Create a new Customer Click on the “Add” icon to open the “New Supplier” window. Fill in all the desired details for your new “Supplier” and click on the “Create” button to complete and save the new Supplier.
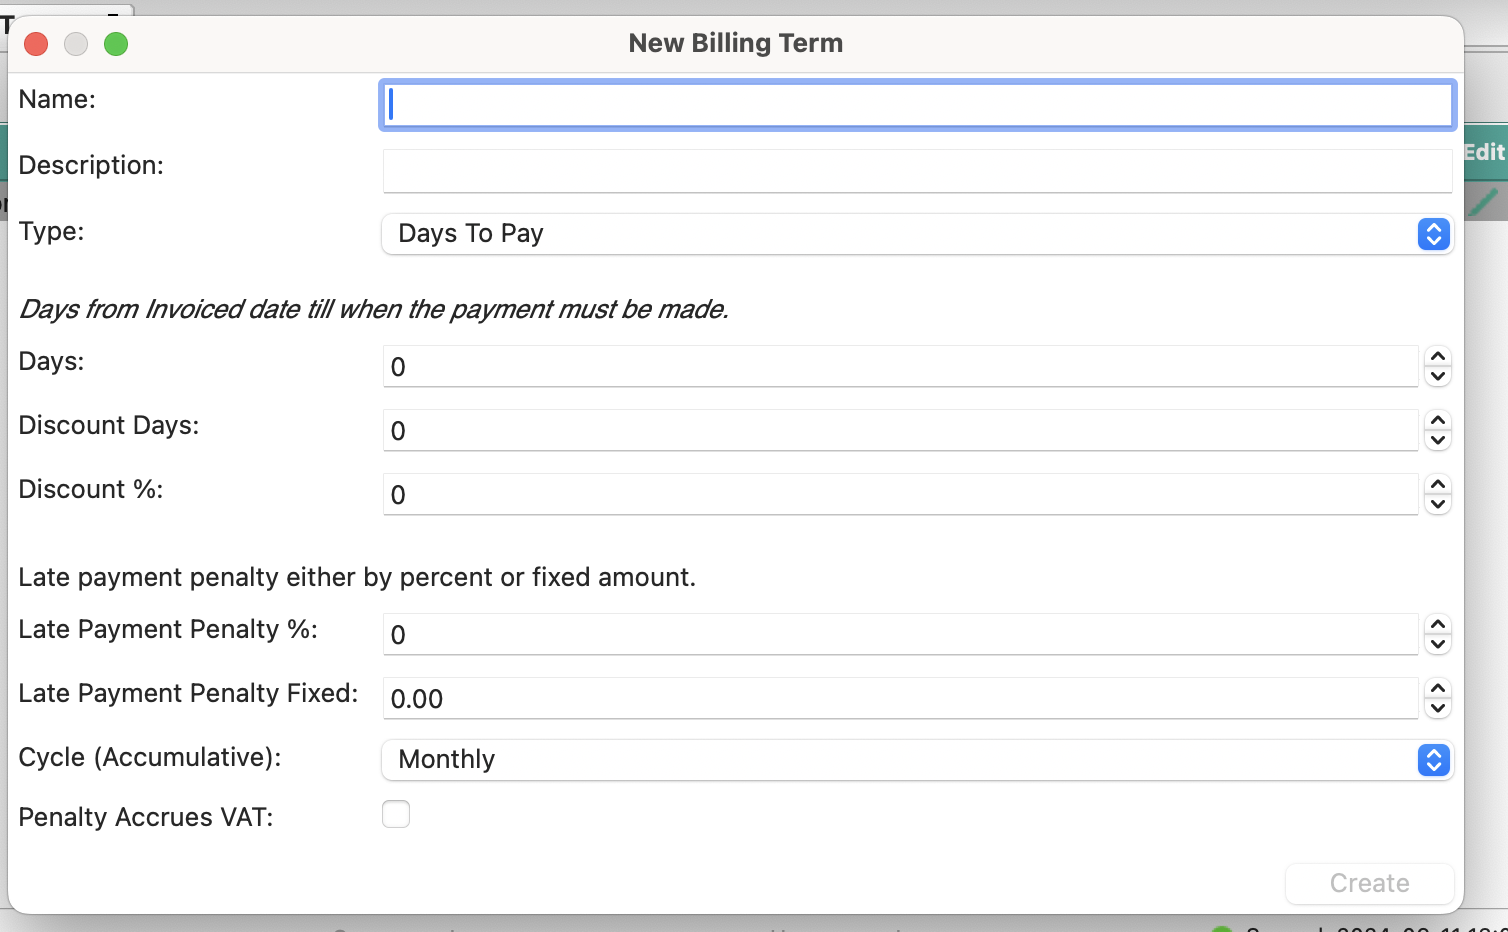
Where to find all Billing Terms To access the “Billing Terms” Click on the “Company” menu then select the “Billing Terms” Option. The Billing Terms dashboard will open showing all existing billing terms. Create a new Billing Term Click on the “Add” icon to open the “New Billing Term” window. When selecting the “Type” filed. You will be presented with options and inputs for that specific “Type”. Fill in all the desired details for your new “Billing Term” and click on the “Create” button to create the Term.
Subsections of Client - Quick Start
Installation
Windows
-
Download the latest version of the “Tada Client” application from the following:
https://tada.center/


-
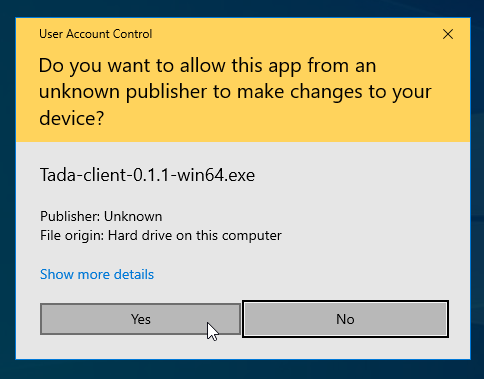
Once downloaded, run it to begin the installation.

-
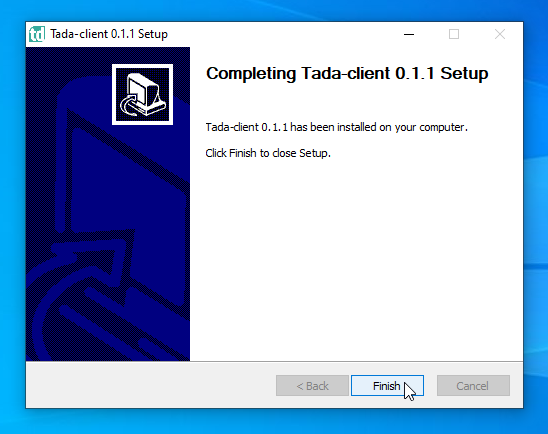
Go through all the steps, We will leave all the options as default.

-
Nice, Tada Client is now installed.
Ubuntu / Debian based distros
-
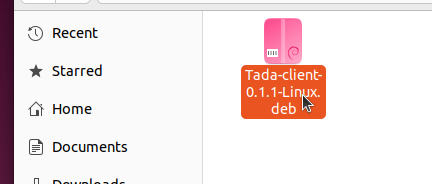
Download the latest version of the “Tada Client” application from the following:
https://tada.center/

-
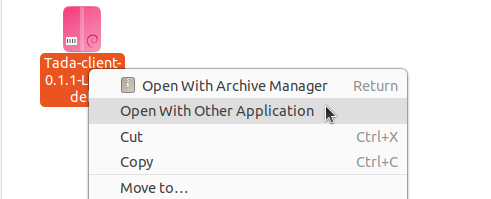
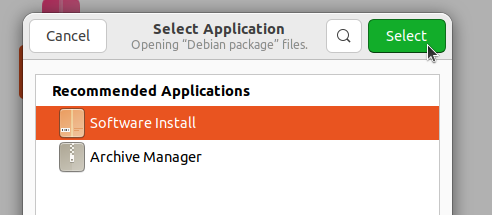
Right click on the files and chose the “Open With Other Application” option.

-
Chose the “Software Installer” option, then click on the “Select” button.

-
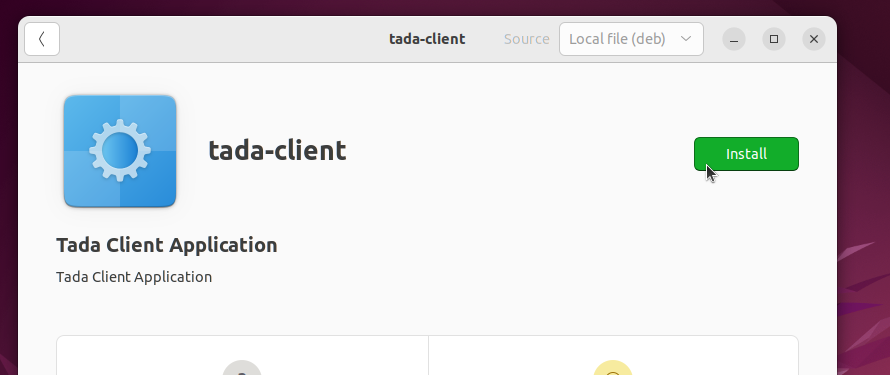
Click on the “Install” button.

-
Nice, Tada Client is now installed. you can now open Tada Client in the “Application” menu
MacOS
-
Download the latest version of the “Tada Client” application from the following:
https://tada.center/
-
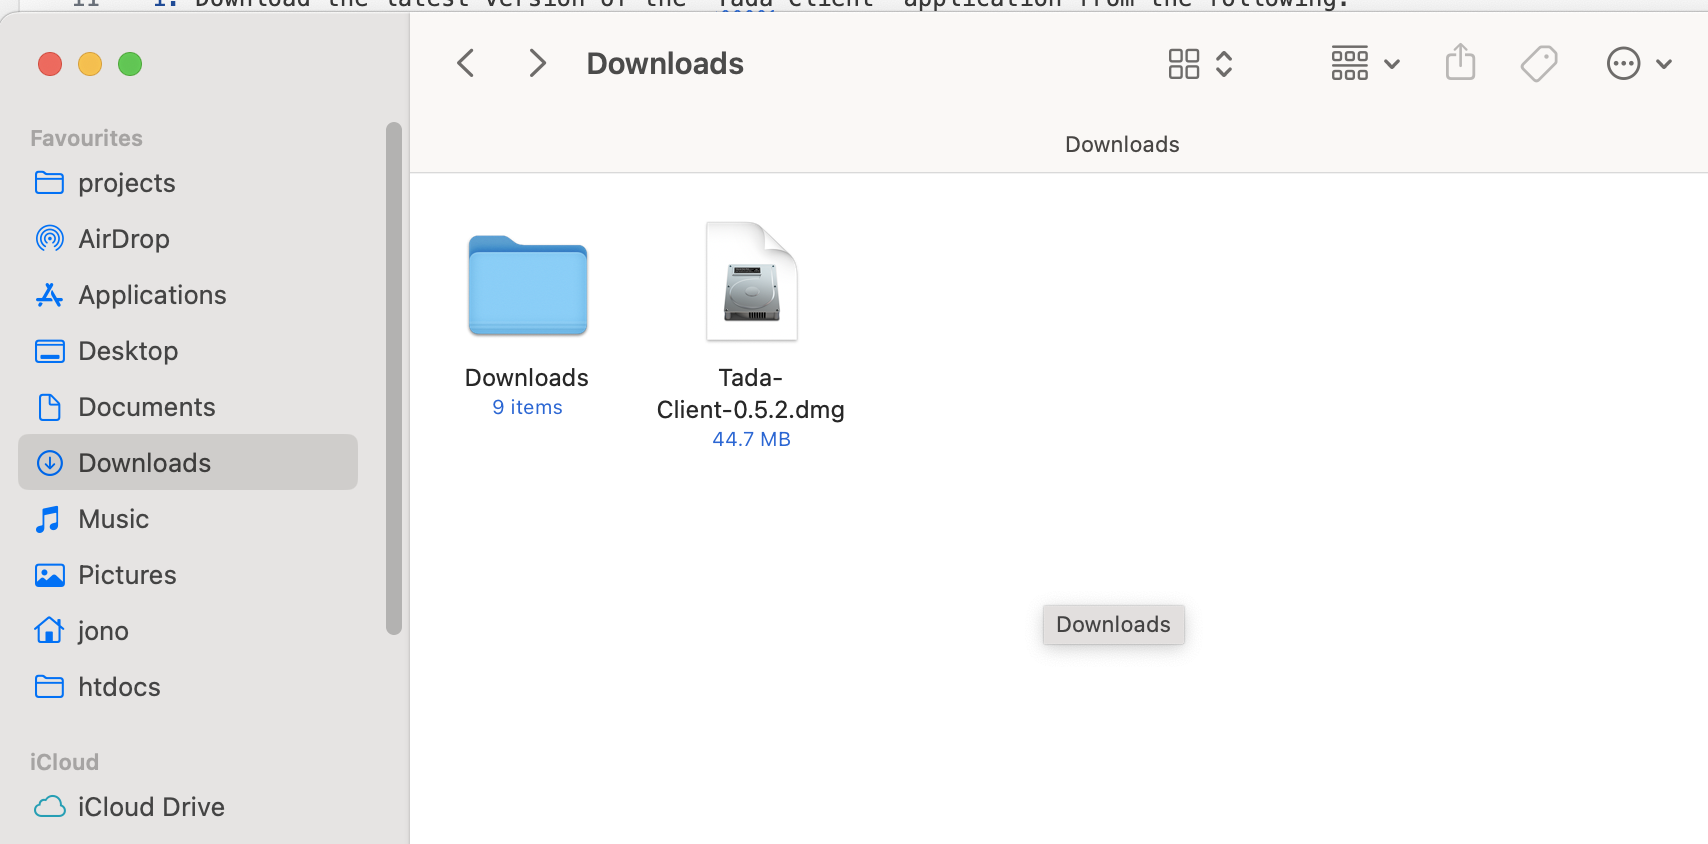
Once downloaded, double click on it to open it up.

-
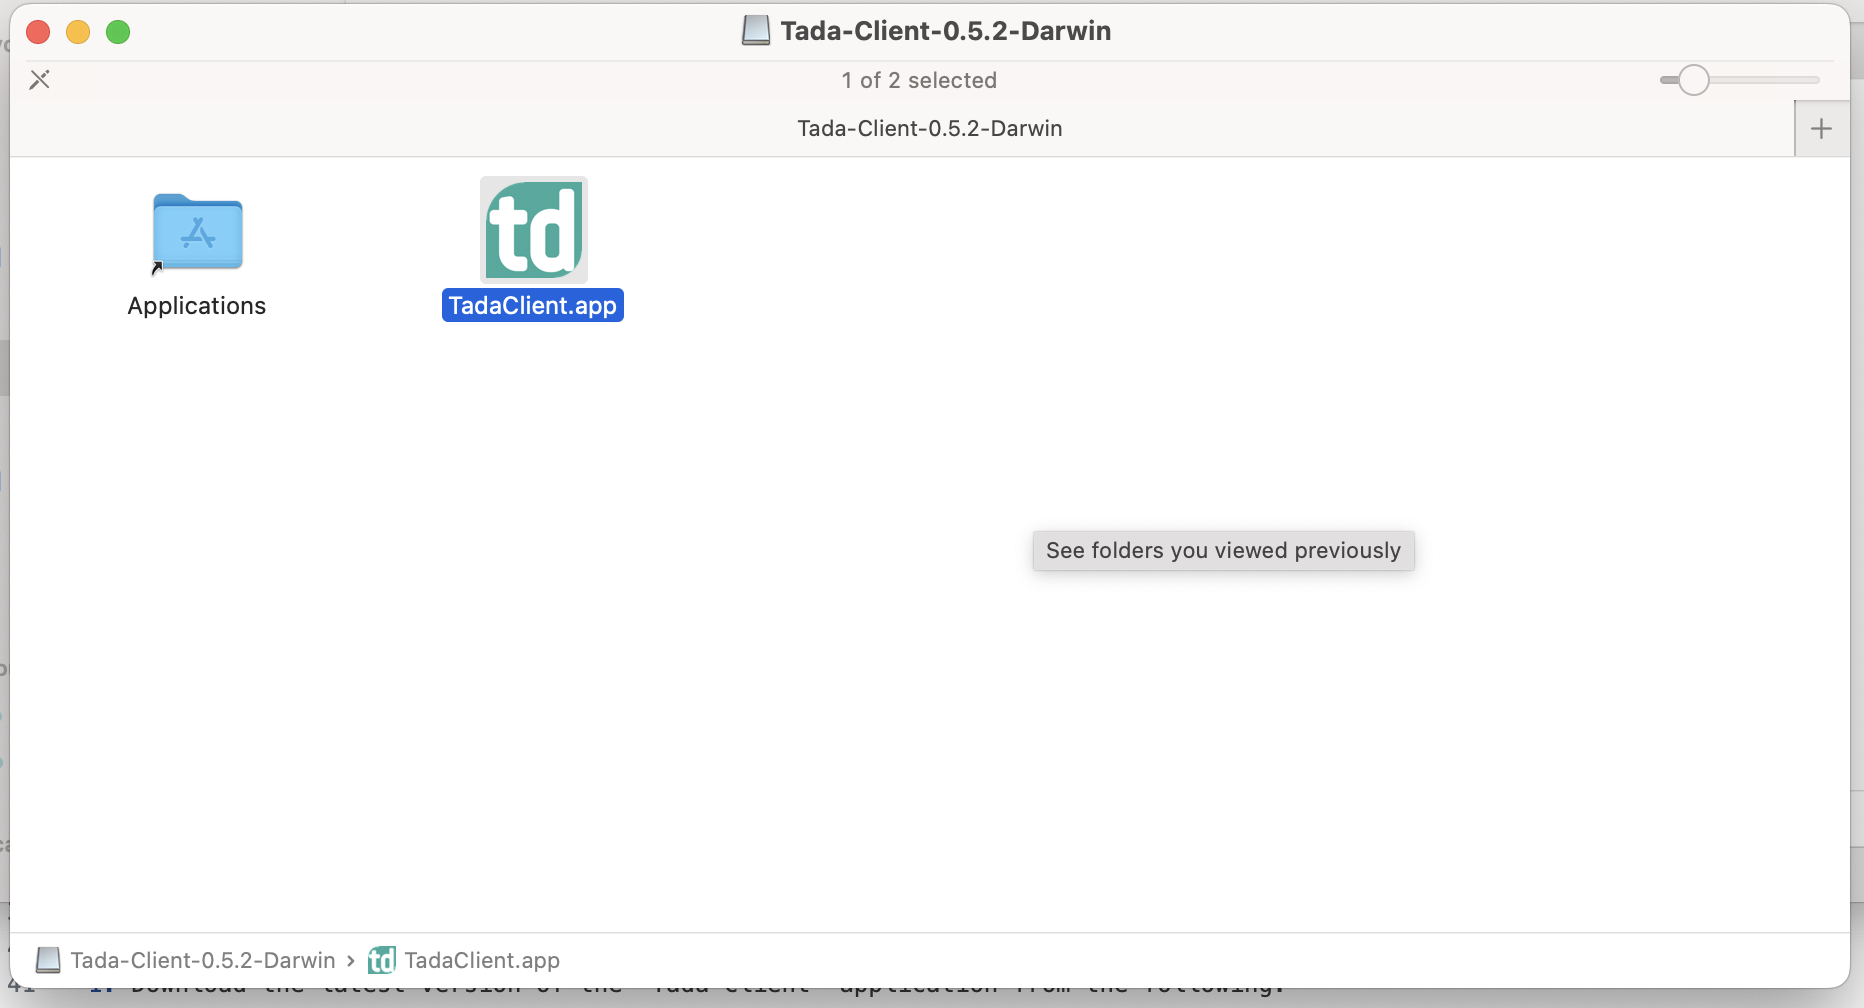
Drag and drop the “TadaClient.app” file on the “Applications” folder next to it.
You have completed the installation, you will find the “TadaClient” app in your “LaunchPad”.

If you run into an issue where MacOS blocks you from opening the application.
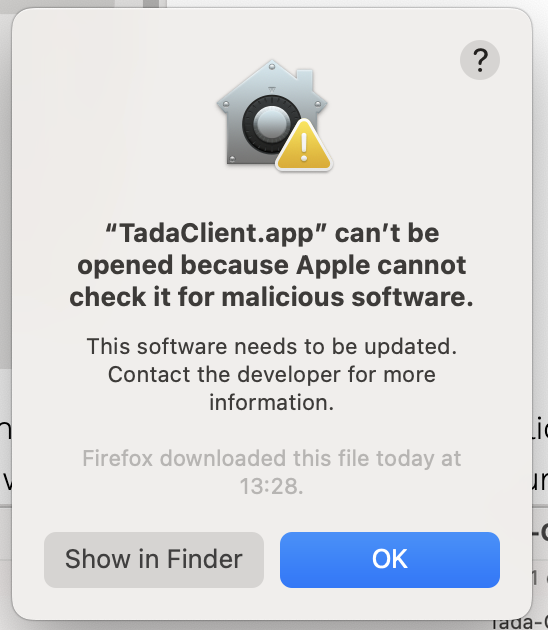

You can do the following:
-
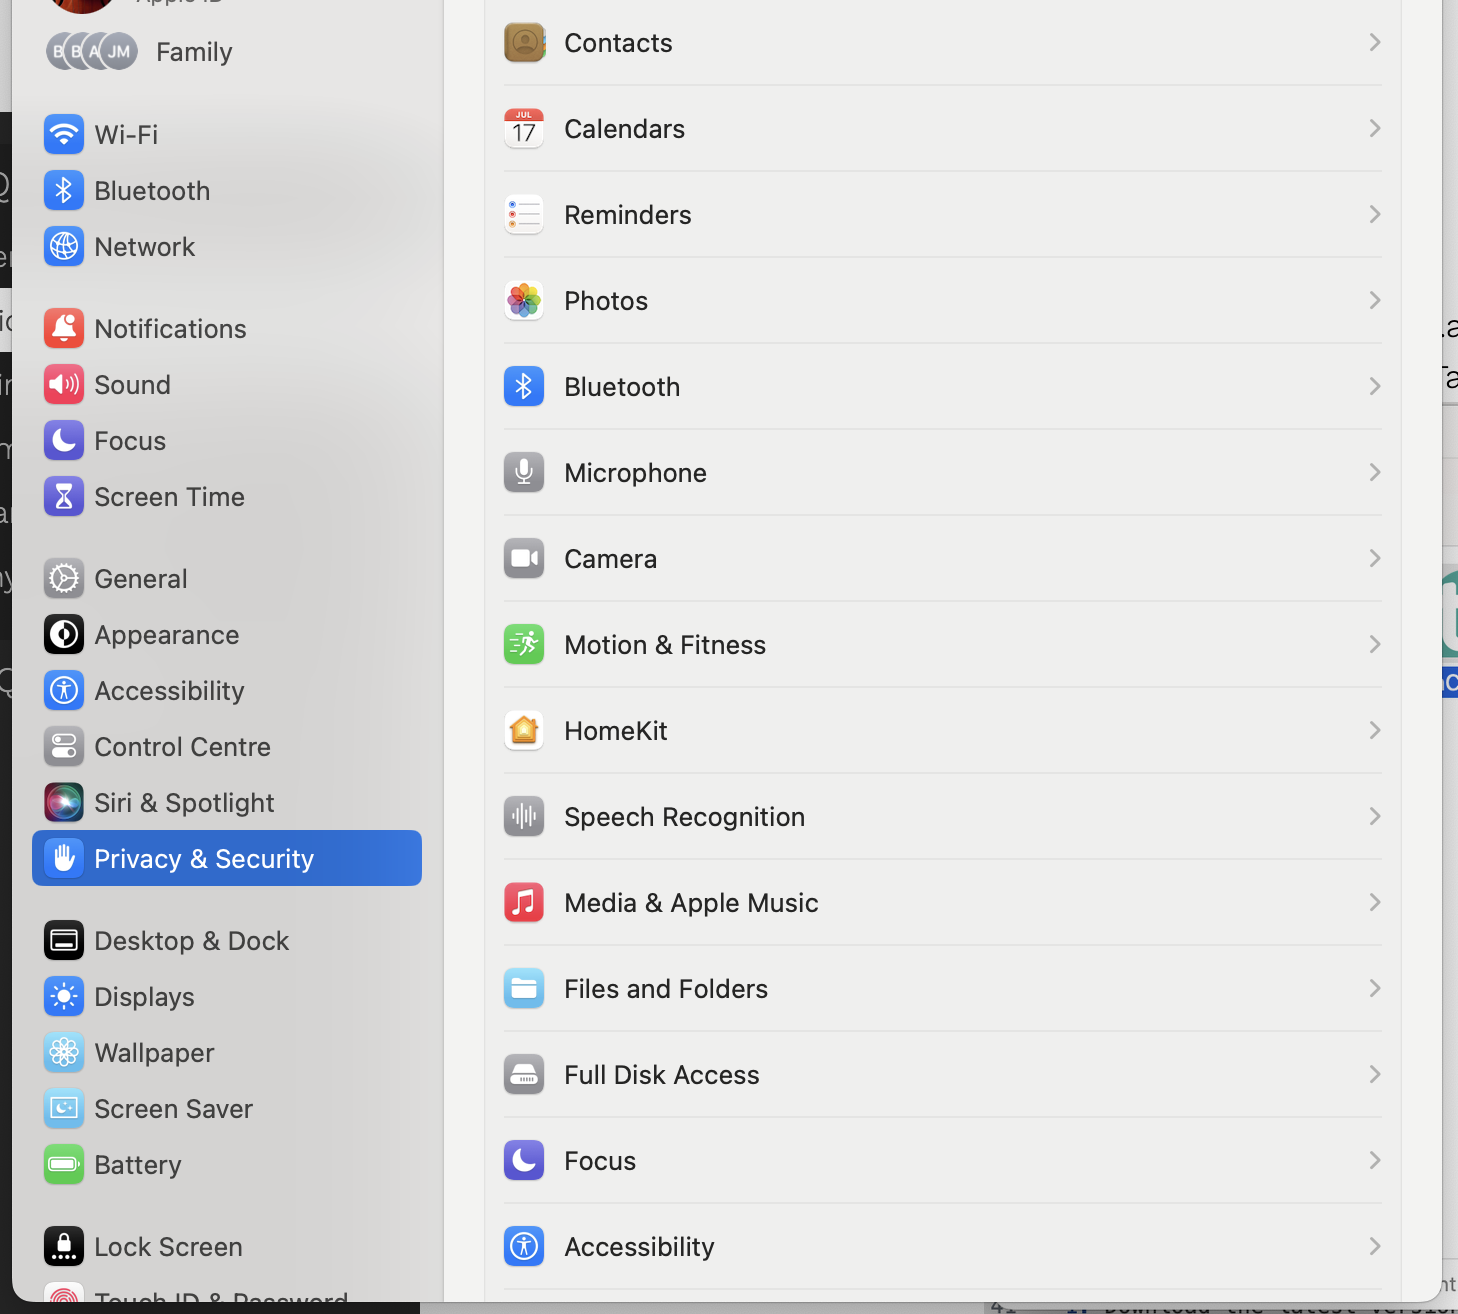
Open up your “Settings” and click on the “Privacy & Security” menu

-
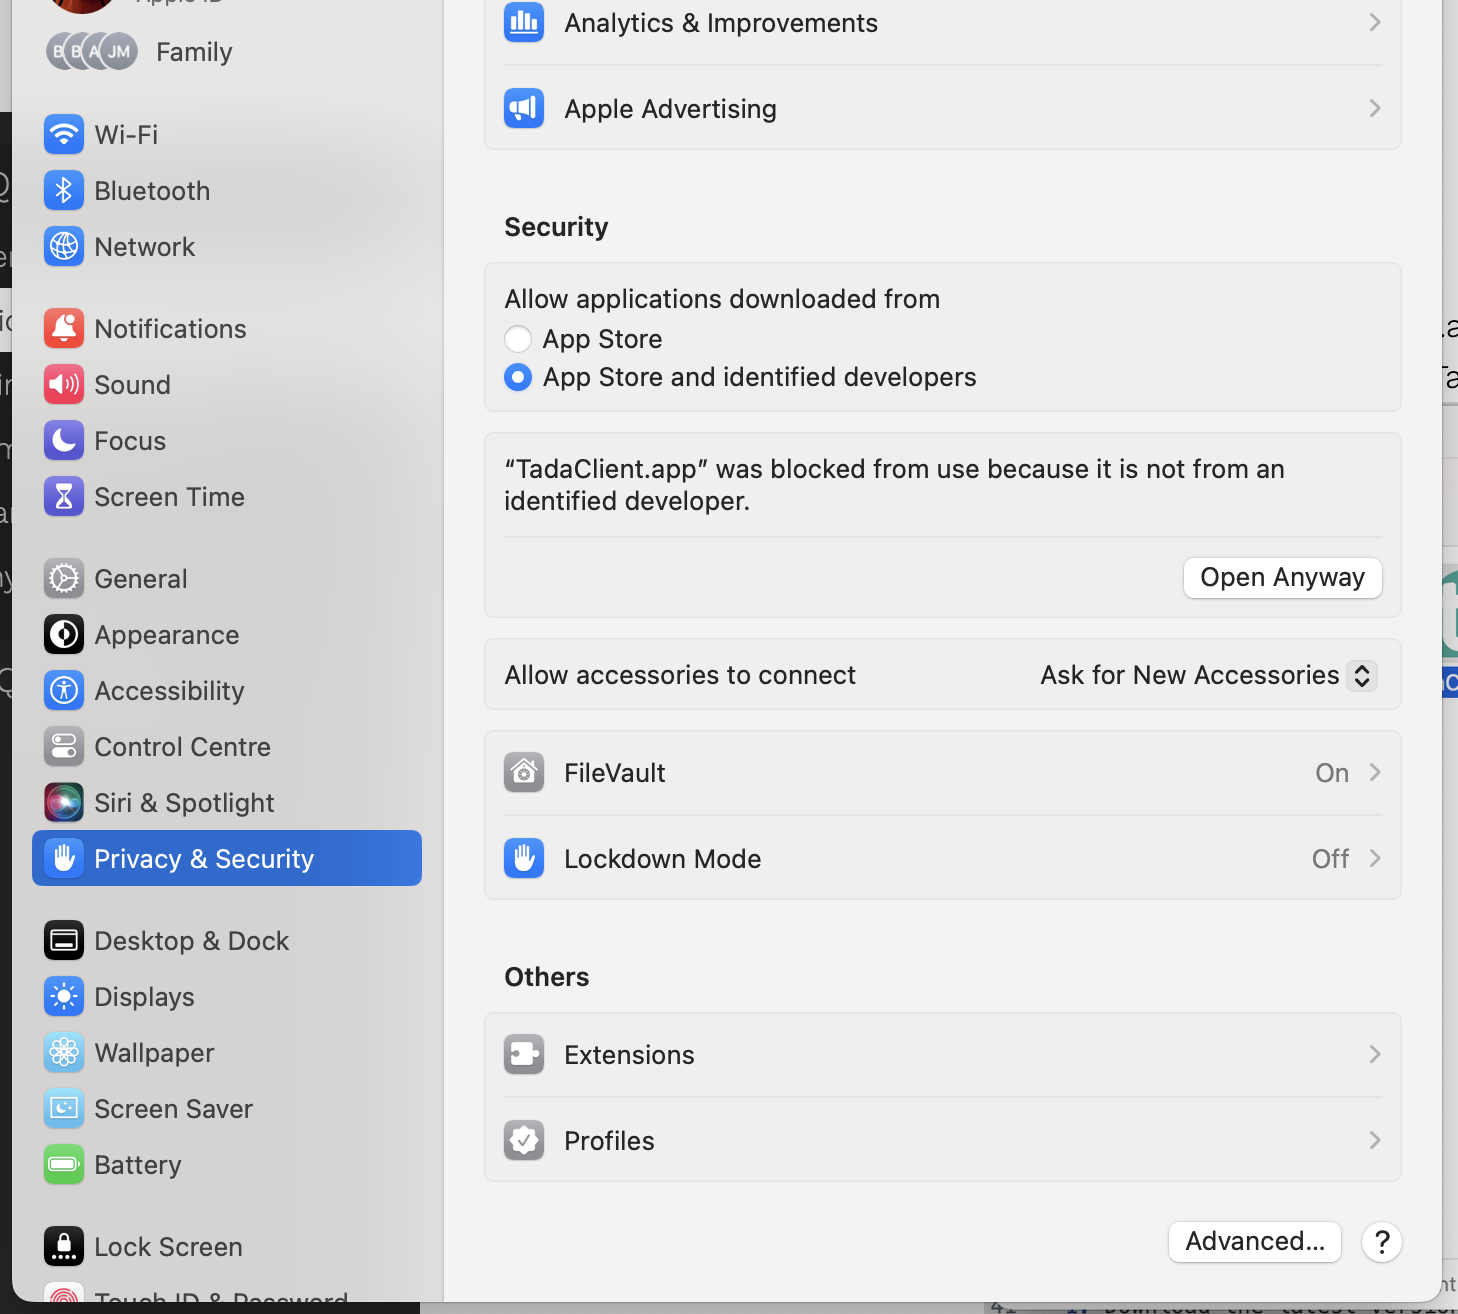
Scroll to the bottom till you get to the “Security Section”

-
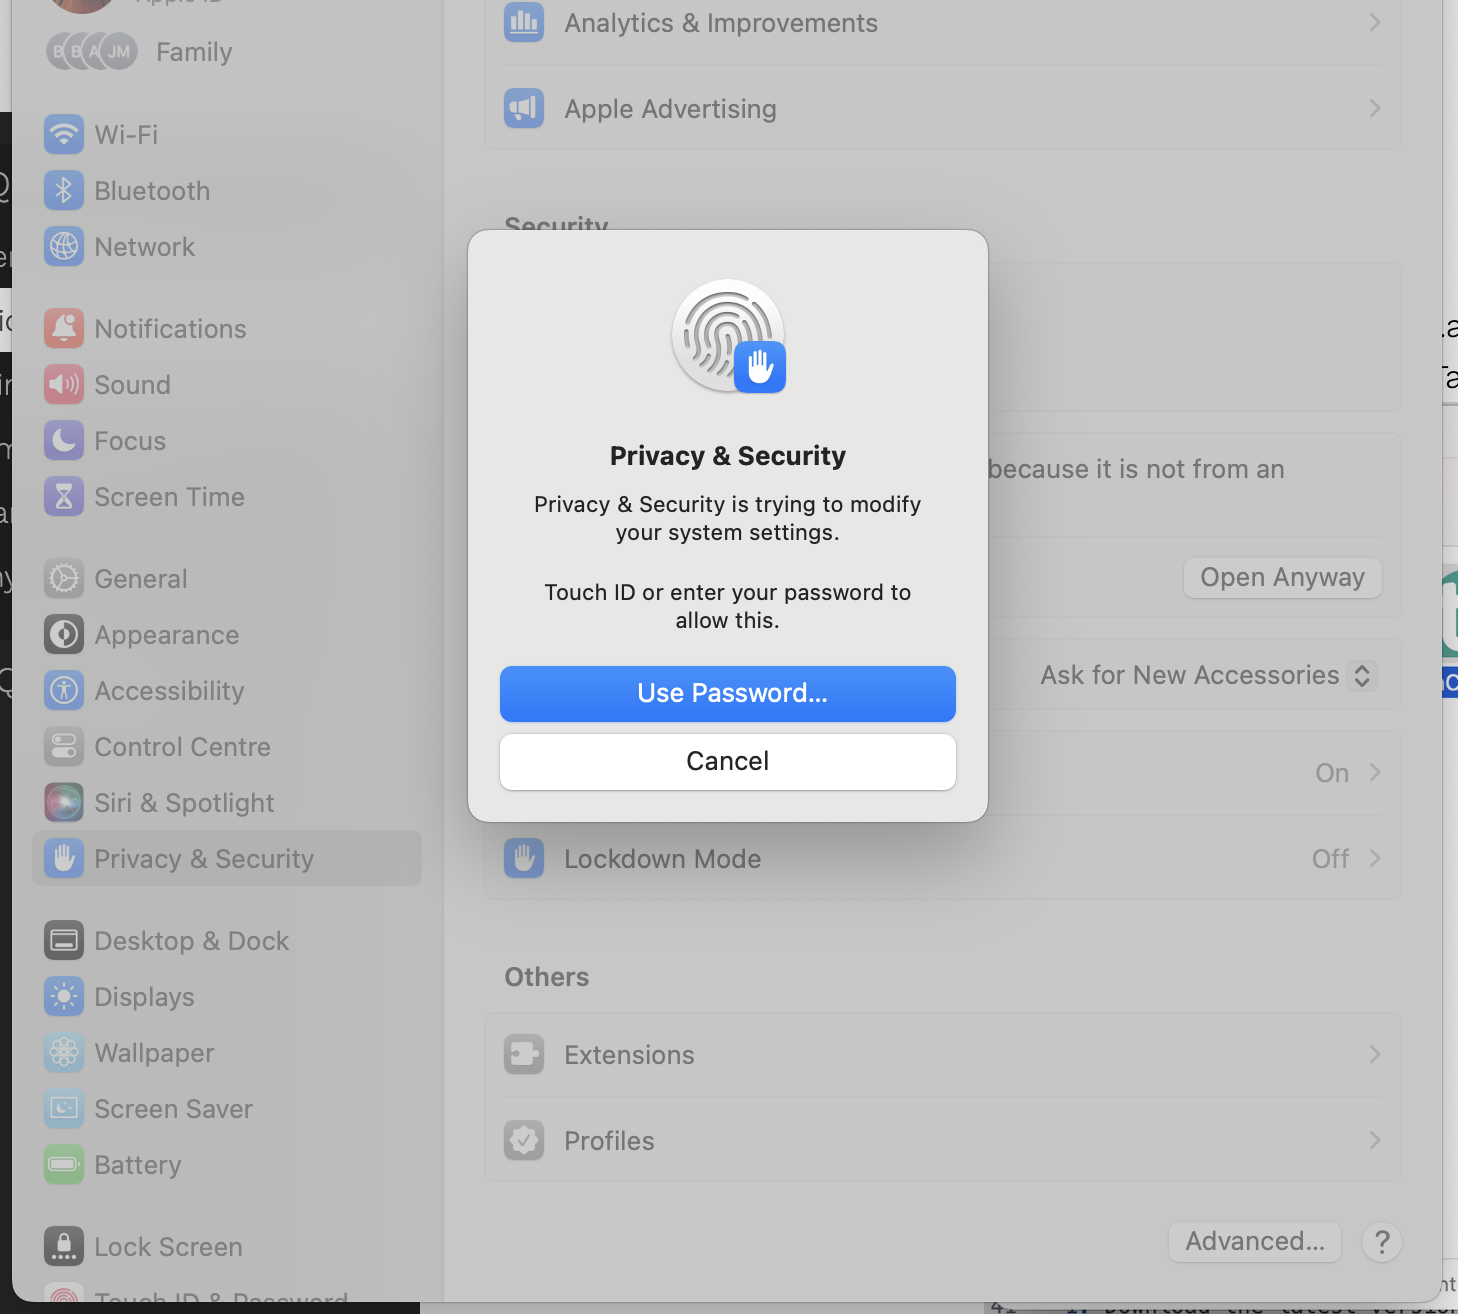
Click on the “Open Anyway” button. You will be asked to enter your password.

-
You can now click on the “Open” button to open the Application. You will not have to do this again until you upgrade the application
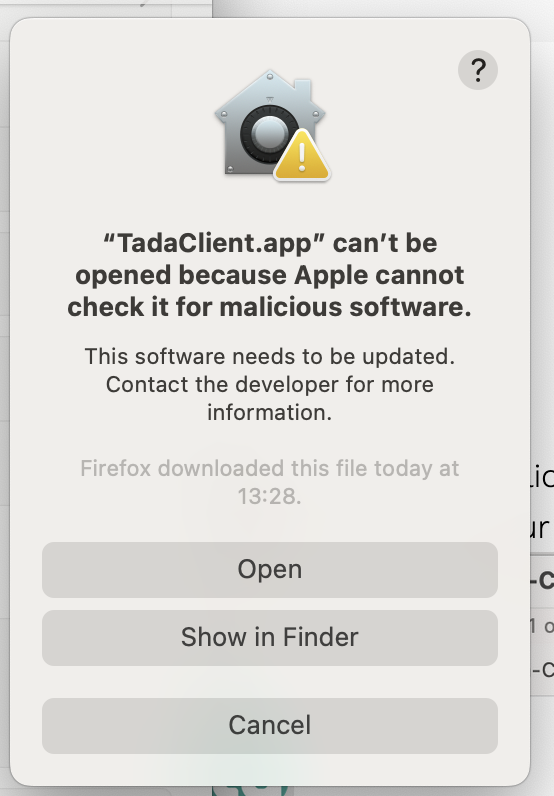

Login Window
Adding / Importing A User
To import a user, Click on the “Import Key” button.
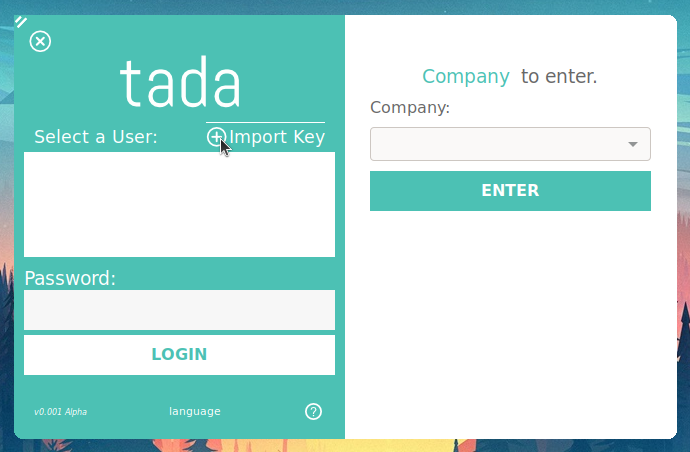

A new window will open were we can begin to import a user.
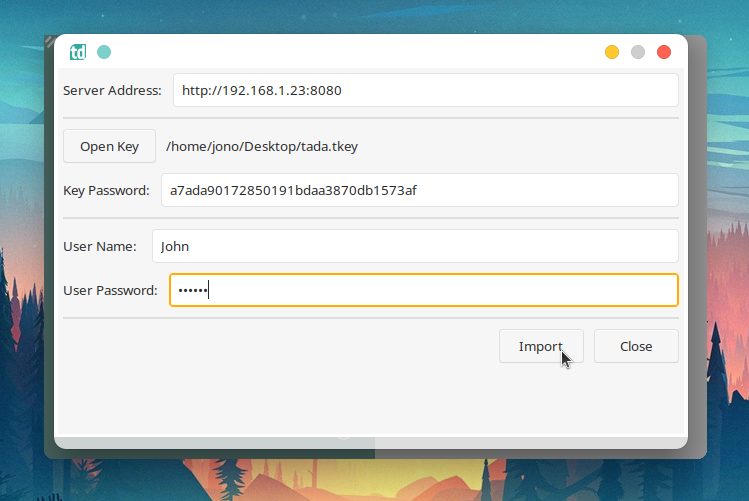
 we will fill in the required details as follows:
Server Address - This will be the address of the machine running the server. In this example, the server is running on a computer with the ip address 192.168.1.23. We also have to tell the client which port the server is listening on. In this case it is port 8080. So the address we will use is http://192.168.1.23:8080
These details are taken from the server “Connection” settings. server-settings
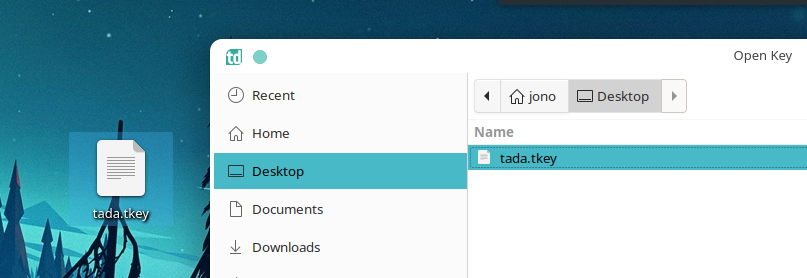
Next we will open users “Access Token” that we created in the “Creating A User Token” section of the manual Users. Click on the “Open Key” button and select the “.tkey” file. In this example it is on the Desktop saved as “tada.tkey”.
 Key Password - This will be the once off password that we were presented with when we created the “Access Token” Users.
User Name - Fill in the users name, in this example it is John.
User Password - Fill in the users password that you created.
Click on the “Import” button when you are ready. If everything was correct, you will get a success message.
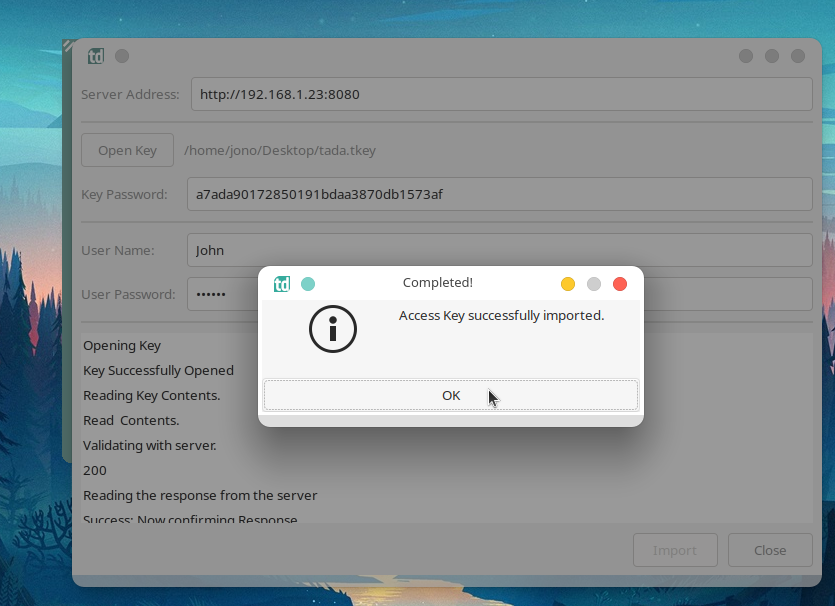
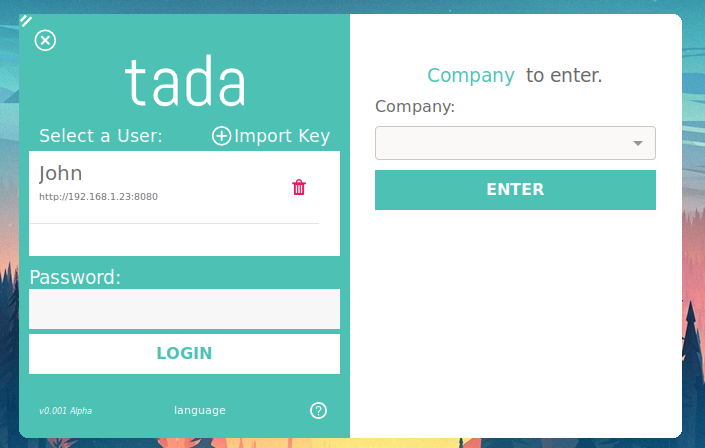
 Click on the “OK” button to continue. We will see that the user is now available to be used on the client device.

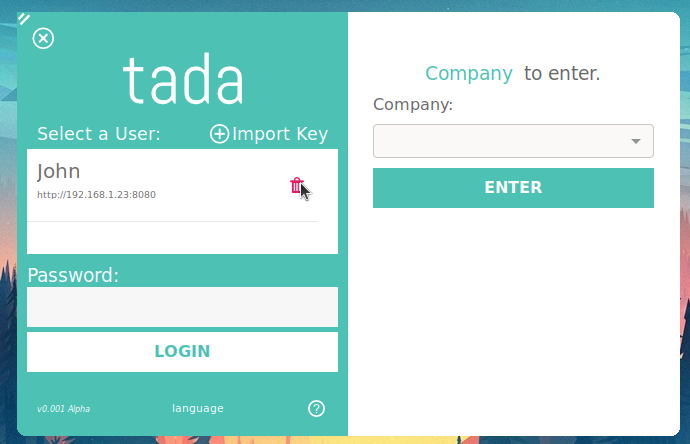
Delete A User
To delete a user, simply click on the “Dustbin / trash” icon next to the user. Confirm the deletion.
 How To Login
First select the user you would like to use to login. I this example we will choose “John”
Then fill in the users password and click on the “Login” button to continue.
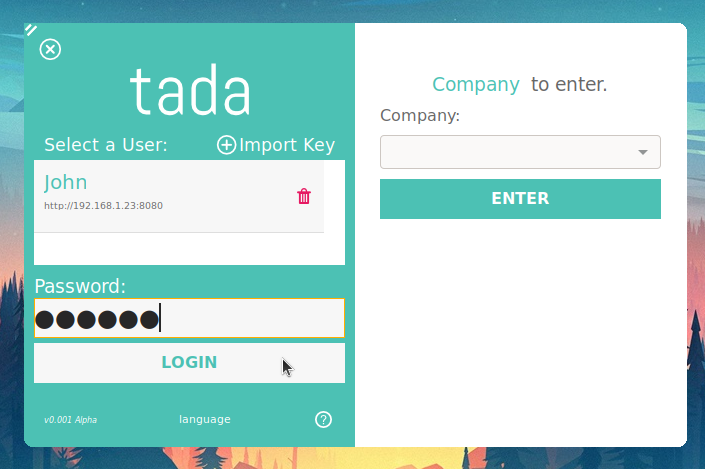
 If you were successful, A list of companies that the user has permissions to access will appear in the “Company” drop down.
Select the company you would like to enter and click on the “Enter” button to continue.
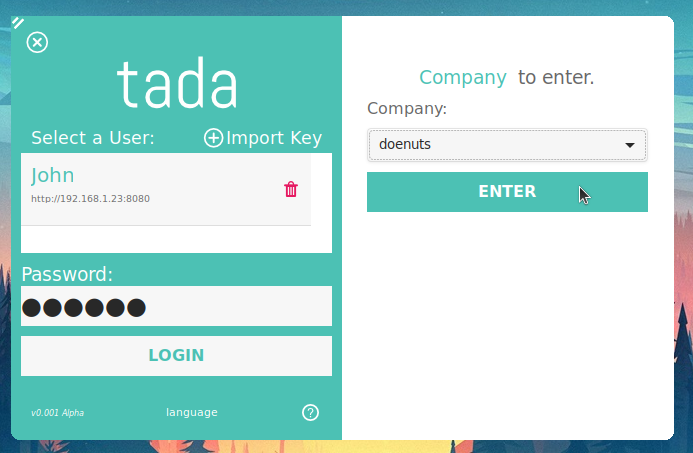
 If it is the first time logging in into a newly created company. A “Company Setup Wizard” window will open. If not, you will be logged into the client dashboard.
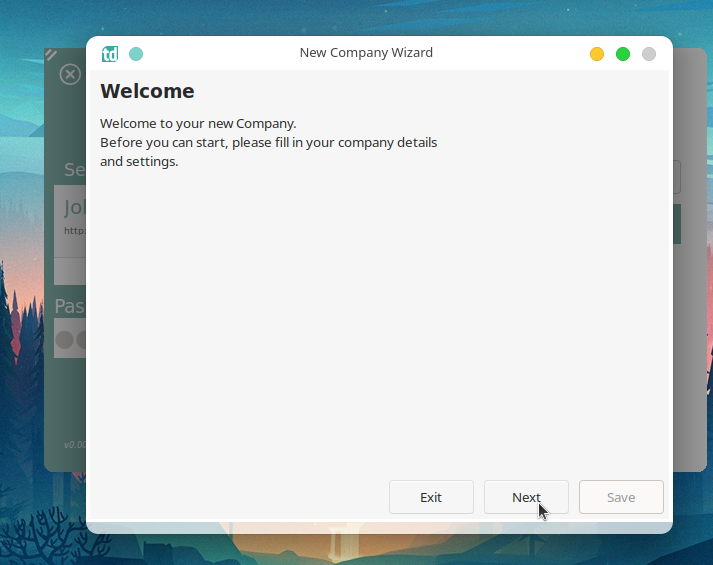

New Company Wizard
Welcome Page
The new company wizard is used to quickly get your company up and running.
It guides you through setting up the most important settings you will need to set to get started using Tada.


- The first page you will see is the “Welcome” page, we will click next to continue the setup.
Company Details Page
The second page you will see is the company details page, Inputs marked with a * are required in order to continue to the next page. We will fill the following details:
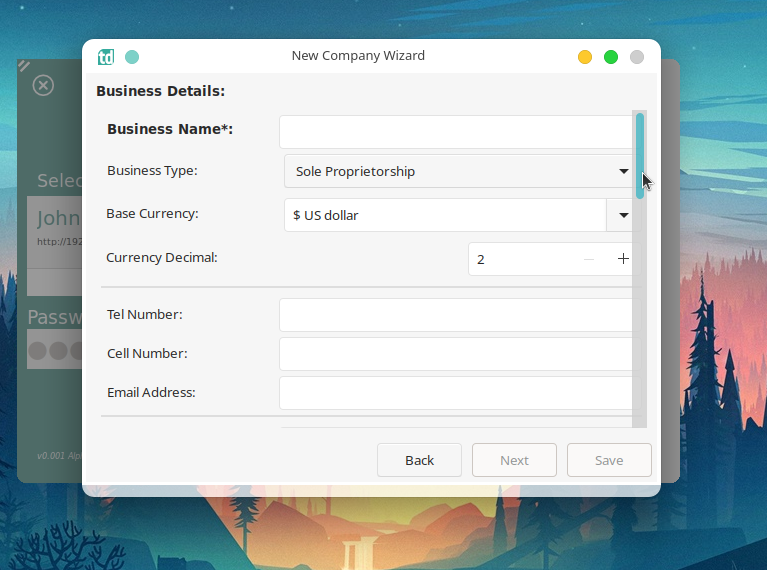

- Business Name - The name of the business, This will be used on reports, quotes, invoices etc.
- Business Type - The Legal type the business is registered as, eg Sole Proprietorship, LTD etc.
- Base Currency - The main currency the business uses.
- Currency Decimal - Fiat currencies use 2 decimals (cents), but you can change it if need be.
- Tel Number - The companies main landline number, will be used on quotes, invoices etc.
- Cel Number - The companies main Cellphone number, will be used on quotes, invoices etc.
- Email Address - The companies main email address, will be used on quotes, invoices etc.
- Tax Number - The companies Tax number. This is mainly used only for Sole Proprietors
- Registration Number - The companies registration number.
- Vat Number - The companies registered Vat number.
- First Tax Period End Date - The last day in which the companies must submit its first Tax payment.
- Current Financial Year Start - The first day of the companies current financial year.
- Tax Period Frequency (Months) - How often does the company have to supply and pay tax. Default is every 6 months (twice a financial year).
- Business Logo - upload the business logo, will be used on quotes, invoices etc.
- Business Address Section - Fill in the desired company address. This will be used on quotes, invoices etc.
- Postal Address Section - Fill in the desired postal address. This will be used on quotes, invoices etc.
Tax Settings Page
Here you can set the type of Tax system the company uses as well as create all the tax types to use.
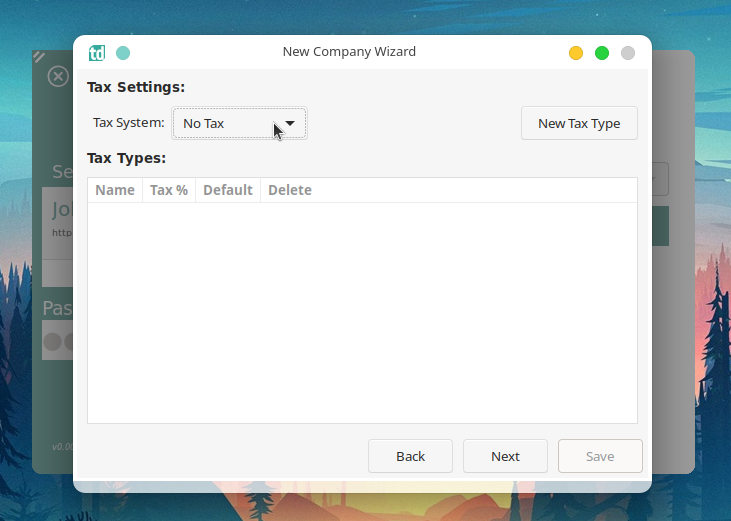

To add a “New Tax Type”. Click on the “New Tax Type” button. A window will open were you can fill in the details of the tax type.
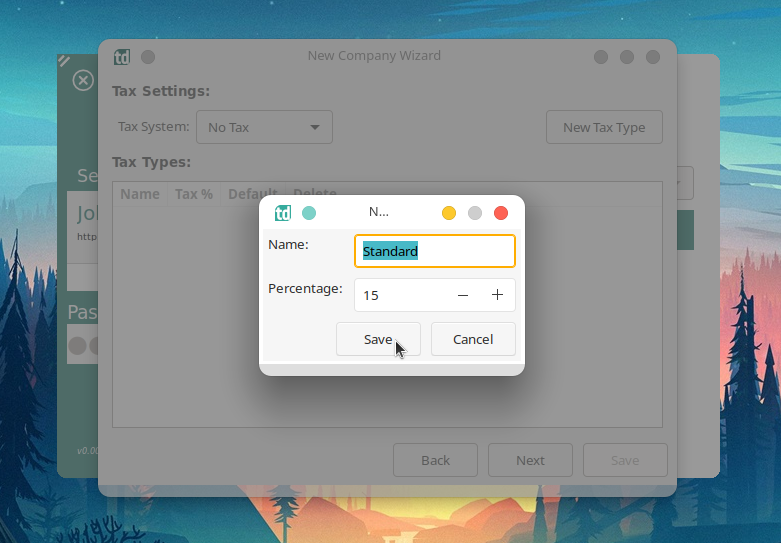

Click the “Save” button to continue.
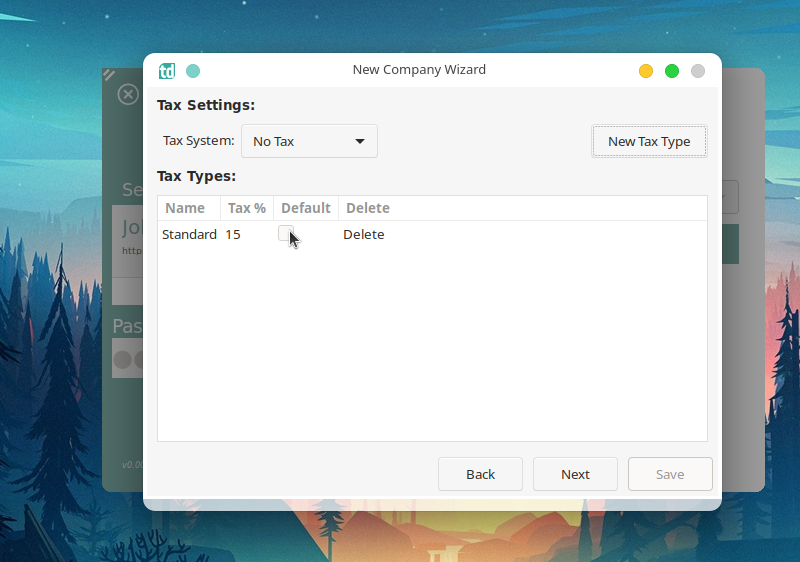

To set the tax type as the company default, simply enable the “Default” check box of the desired tax type.
Charts Of Accounts Page
Here you can choose the Charts of accounts you will start with. There are three templates to choose from:
- Basic
- Personal
- Business
All theses can be changed once you have completed the setup wizard.
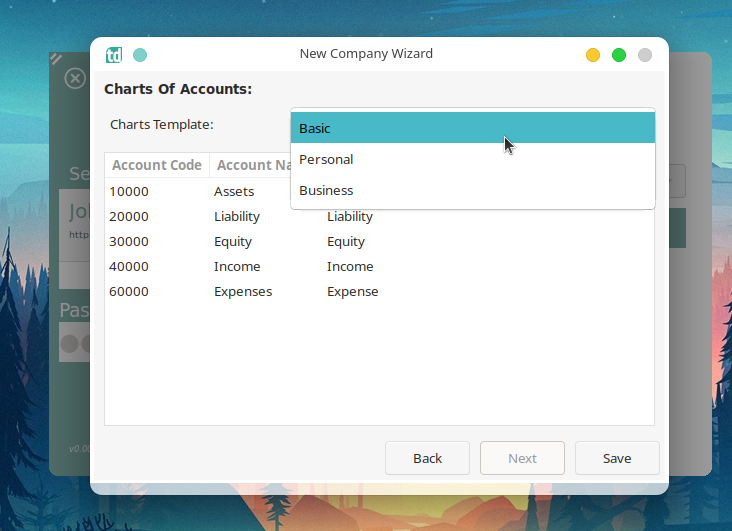

Click on the “Save” button to complete the setup process.
Dashboard
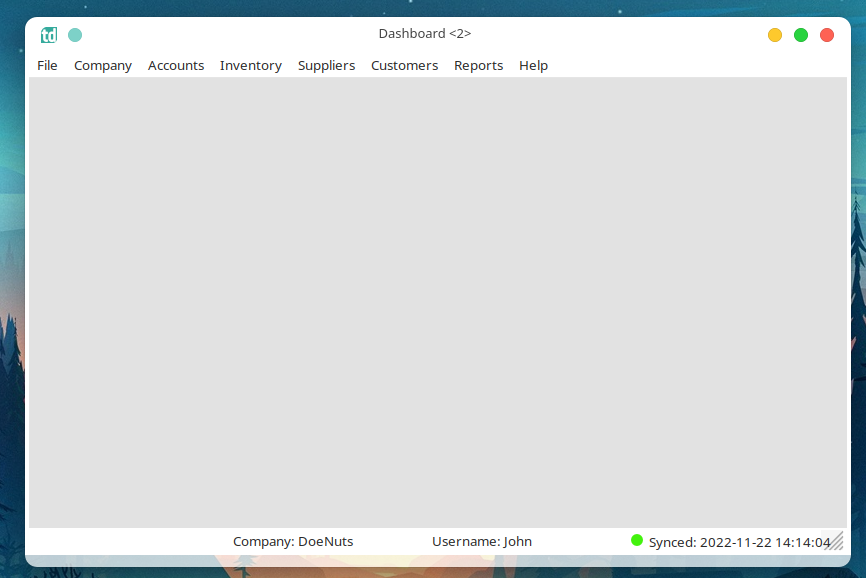

The top menu holds all the tools you can use in easy to follow categories.


The Categories are as follows:
- Files - Tools related to the Client application.
- Company - Tools related to the Company.
- Company Settings
- Billing Terms
- Accounts - Tools related to the accounts.
- Charts of Accounts
- Closing Books
- Inventory
- Inventory Items
- Price Categories
- Units of Measurements
- Suppliers
- Suppliers
- Purchase Orders
- Supplier Invoices
- Debit Notes
- Supplier Payments
- Customers
- Customers
- Invoices
- Quotations
- Receipts
- Credit Notes
- Debit Notes
- Reports
- Financial Reports
– Balance Sheet
– Income Statement
– More to come in future releases
- Inventory
- Help
Bottom Status Bar


The bottom status bar show the following information
- Company - The current company the user is logged in to.
- Username - The User name used to login to the company.
- Synced - Shows the sync status of the client to the server. Displays the date and time of when the client last synced data with the server. If the client fails to sync, The green dot will turn red and the client will attempt to sync again. If the client fails to sync three times in a row. It will display a warning and will exit your session. The dot will change into a cloud icon when a sync is in progress.
Tabs ordering and moving
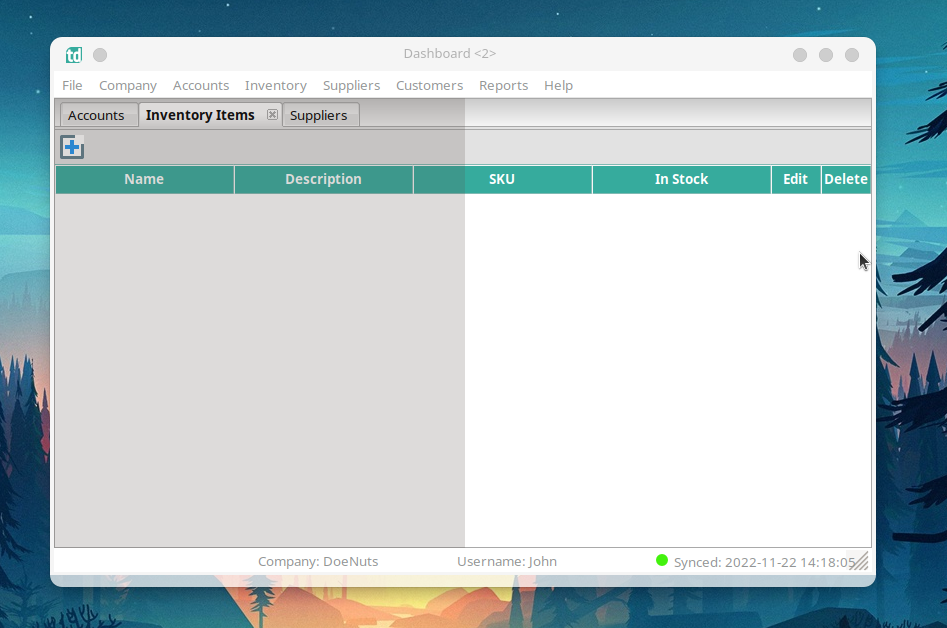
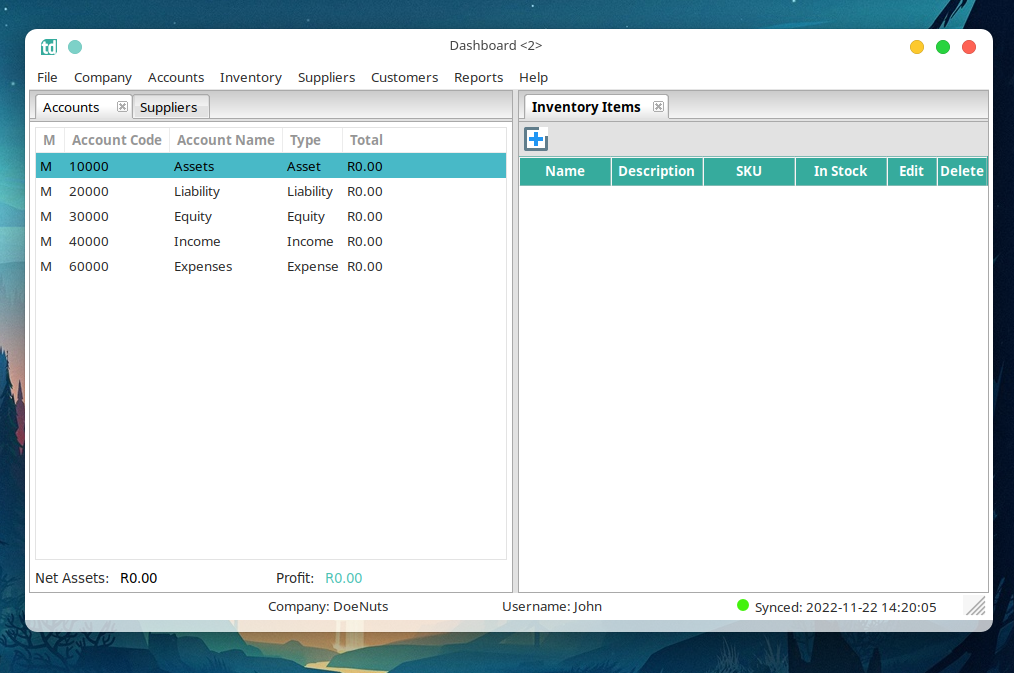
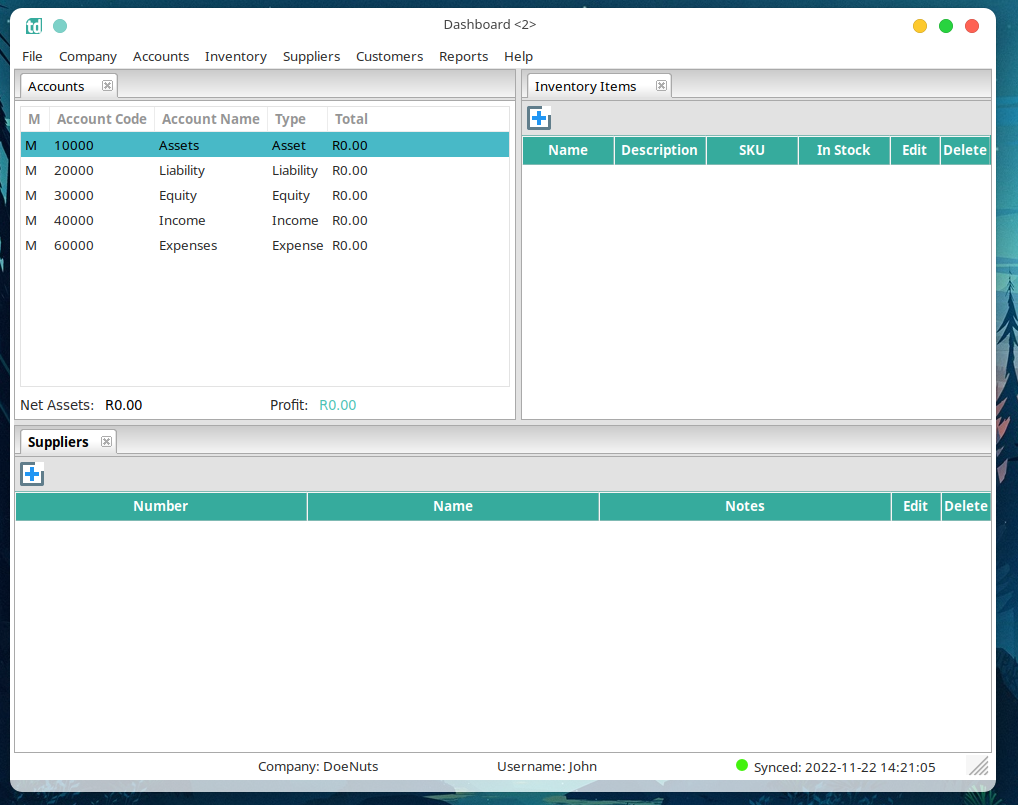
The dashboard is the main window that you will work in. Tabs open in the dashboard can me moved, reordered and tiled to give you a custom experience.
To do this, all you need to do is drag the tabs around and the interface will show you were it will be moved to.
As the below example shows, dragging the “Inventory Items” tab to the right side of the dashboard will split the view.


Dragging the “Suppliers” tab to the bottom will split the view into three section.

Company Settings
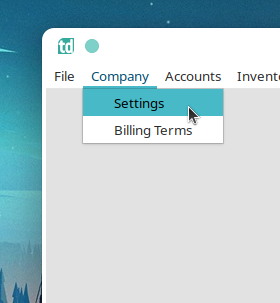
To access the “Company Settings” Click on the “Company” menu then select the “Settings” Option.

Company Info
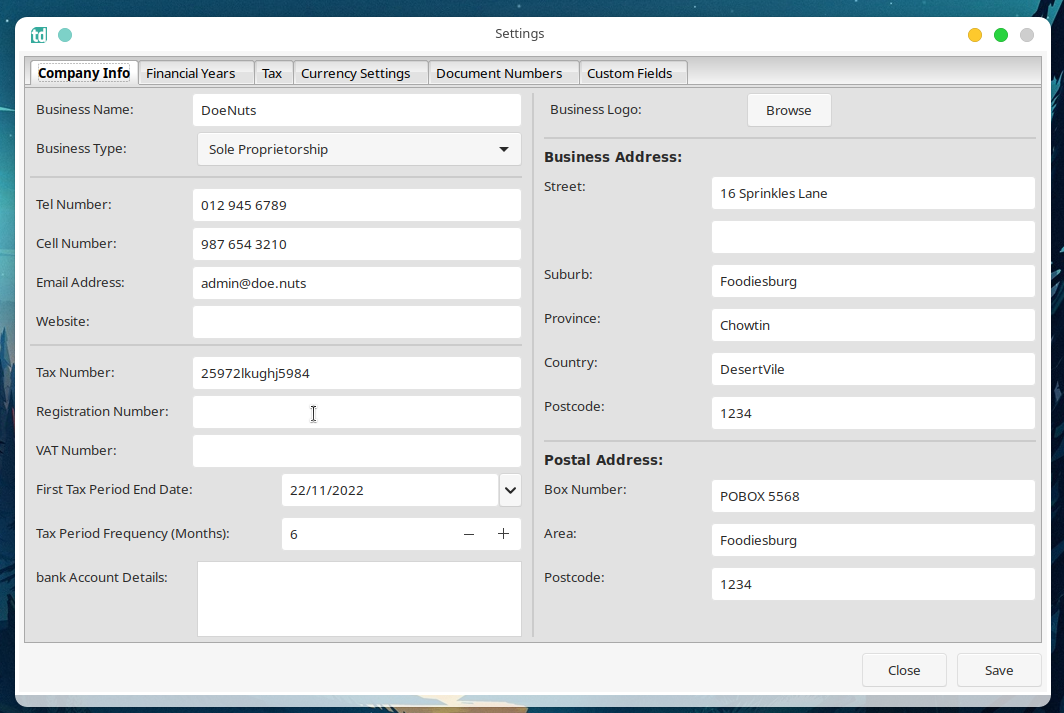

This is where you can change and set the main company details.
It is recommended to add the “Bank Account Details” as this will be displayed on quotations, invoices, debit notes etc.
Financial Years
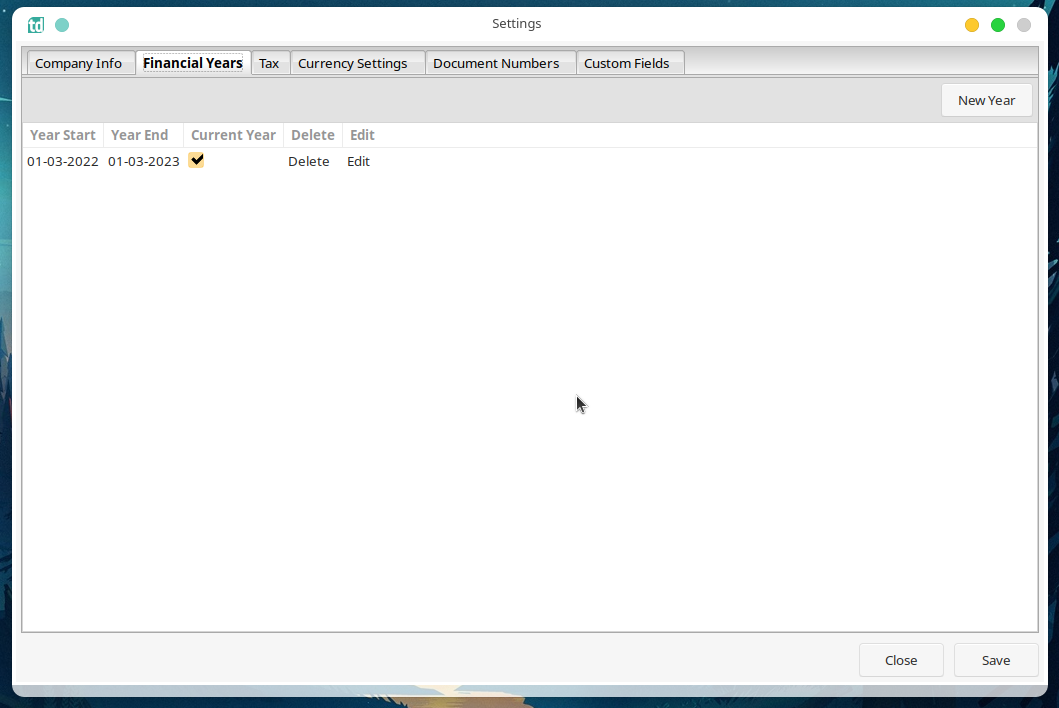

Here you can add and change the Companies financials years.
You can change the “Current Year” if you need to work on previous or future accounting years.
Tax
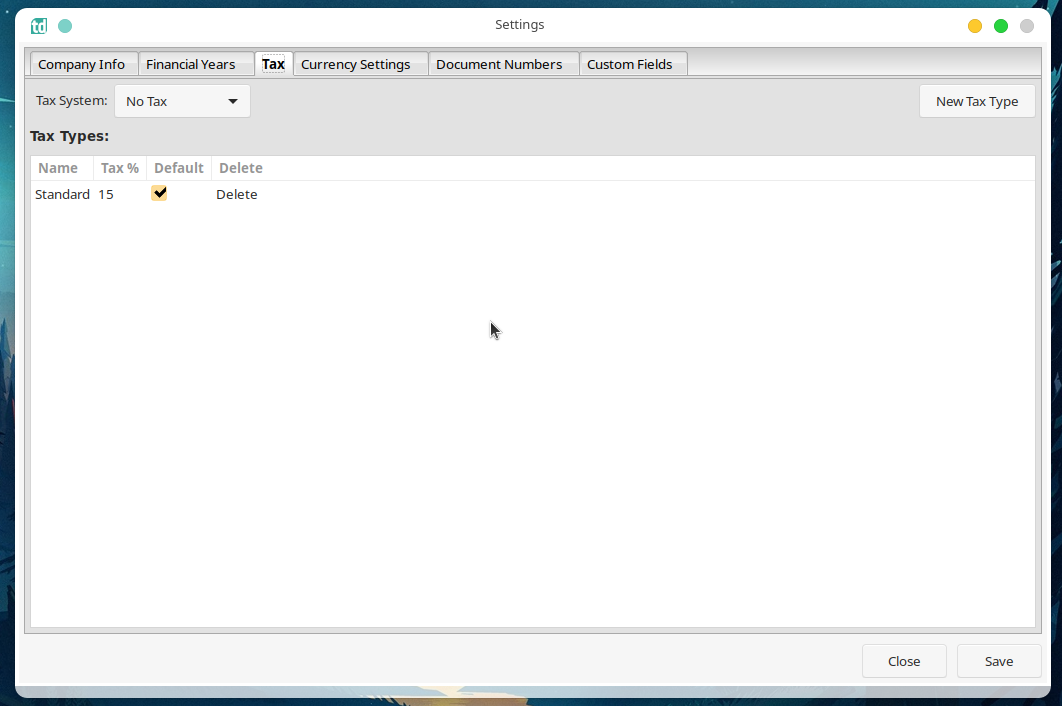

Here you can add and edit “Tax Systems” and “Tax Types”
Currency Settings
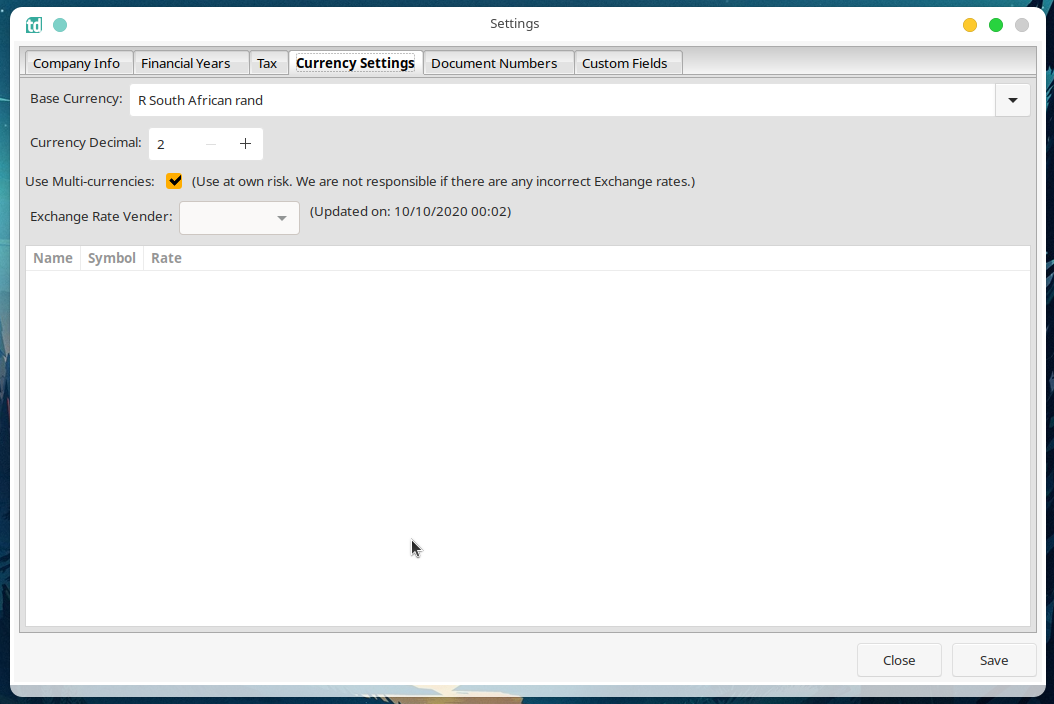

Here you can change the companies base currency and decimal system.
The Multi-currency system might be implemented in a feature release. It is planned but is not high on the list.
Document Numbers
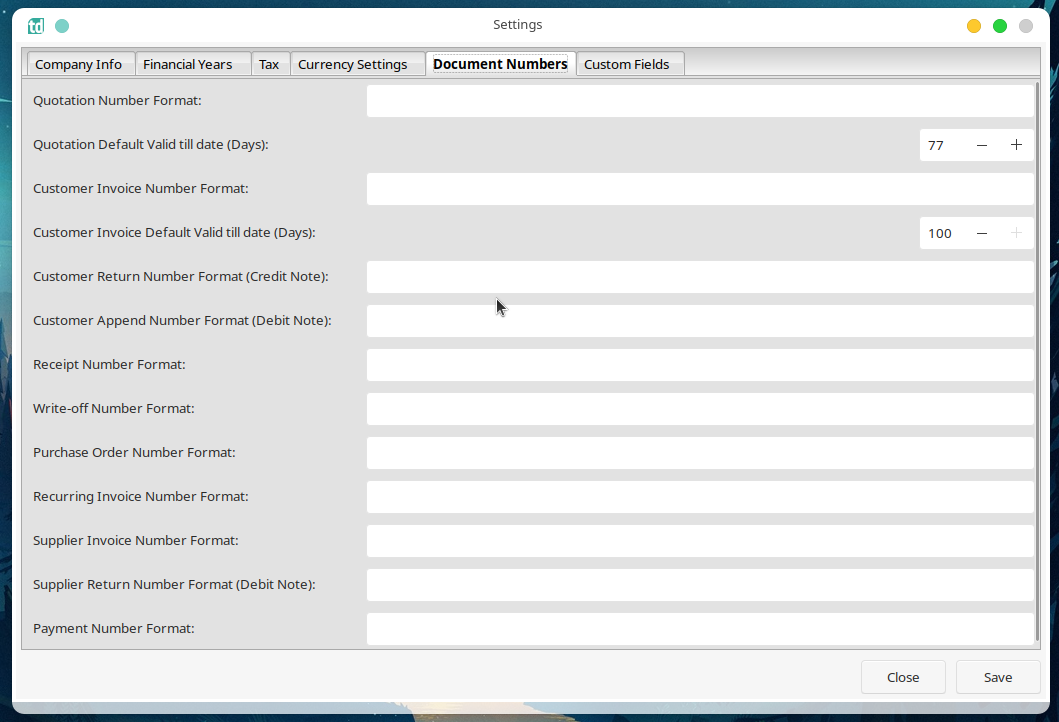

Here you can set up the Number Formats of the specific documents.
For example: You can set the quotation numbers to be Q2022. Then when you create quotes, the quotation numbers will be as follows: Q20221, Q20222, Q20223 etc.
Custom Fields
Available in future releases
Customers
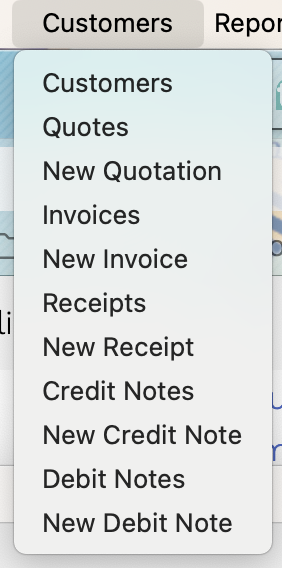
Where to find all Customers
To access the “Customers” Click on the ““Customers”” menu then select the “Customers” Option.

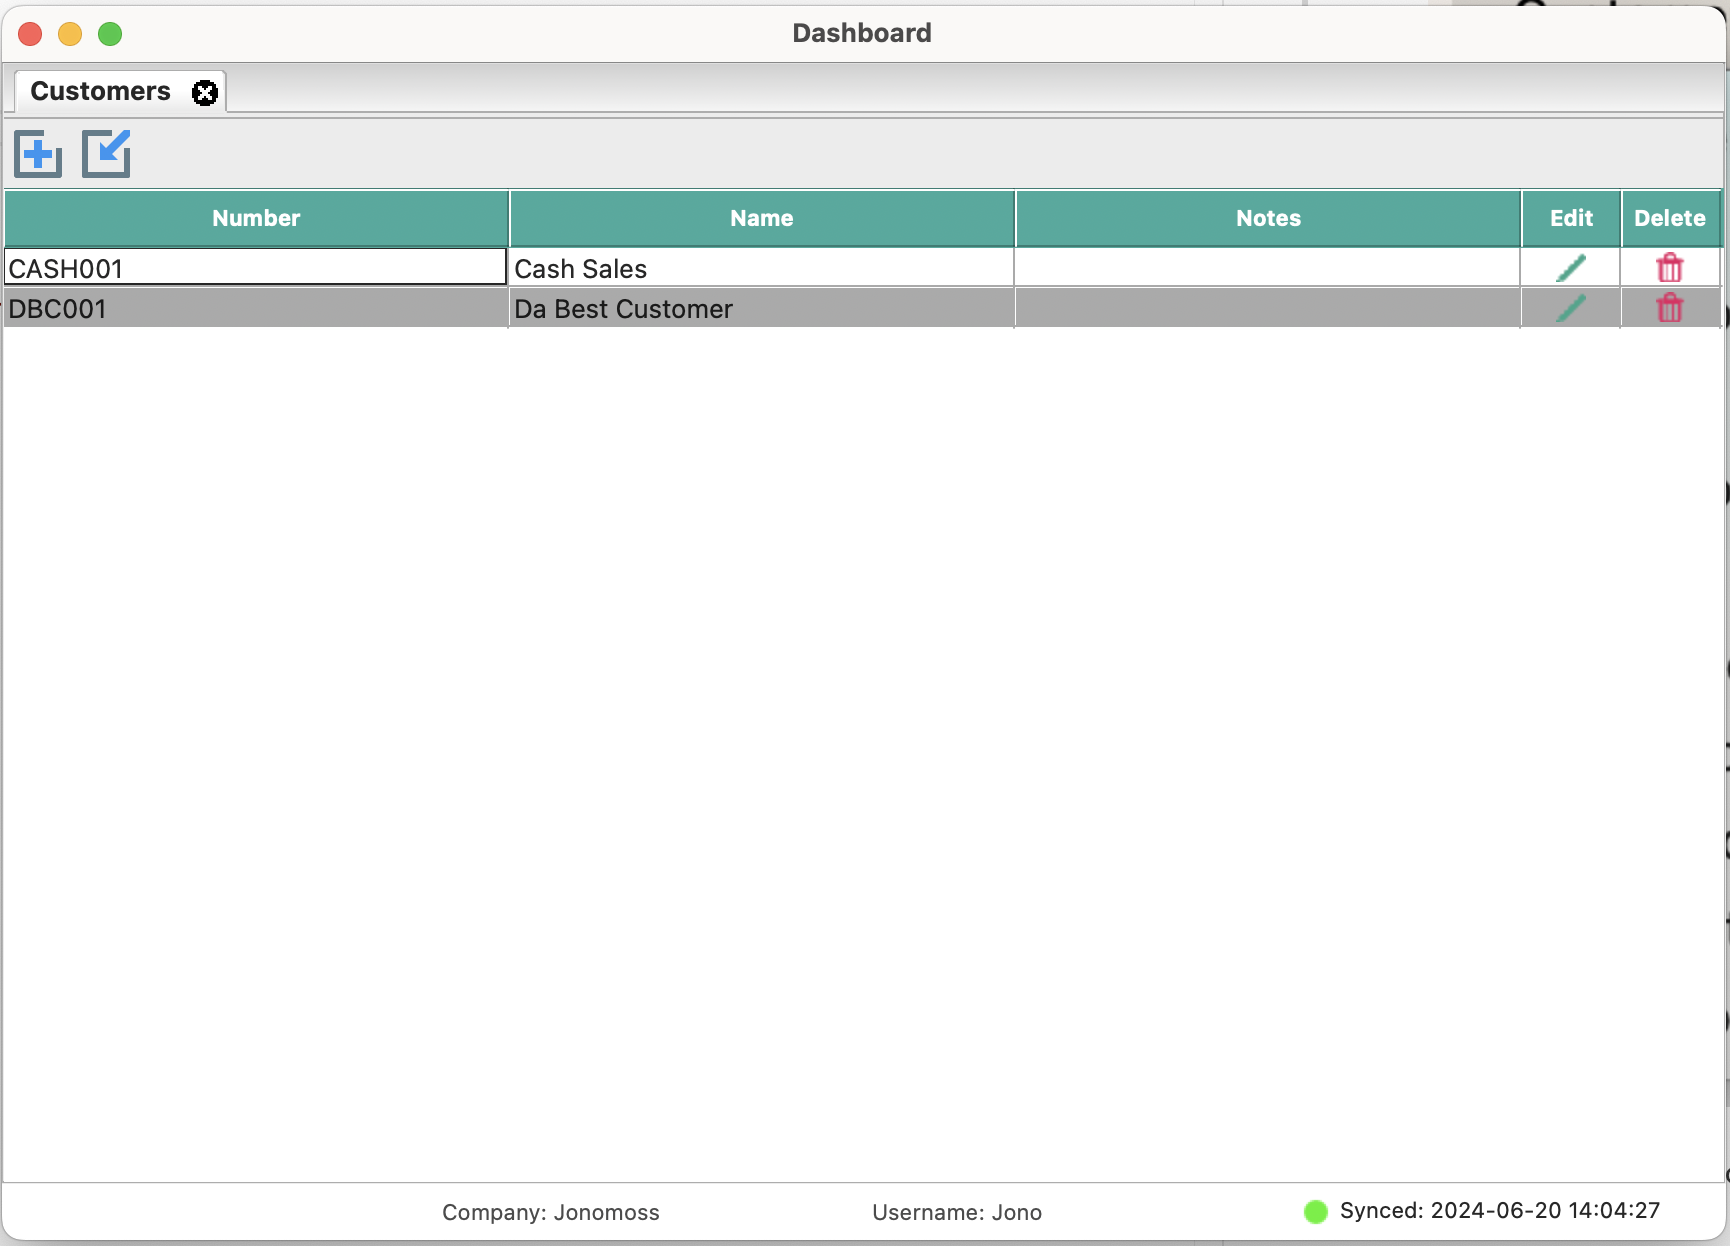
The Customers dashboard will open showing all existing Customers.

Create a new Customer
Click on the “Add” icon to open the “New Customer” window.
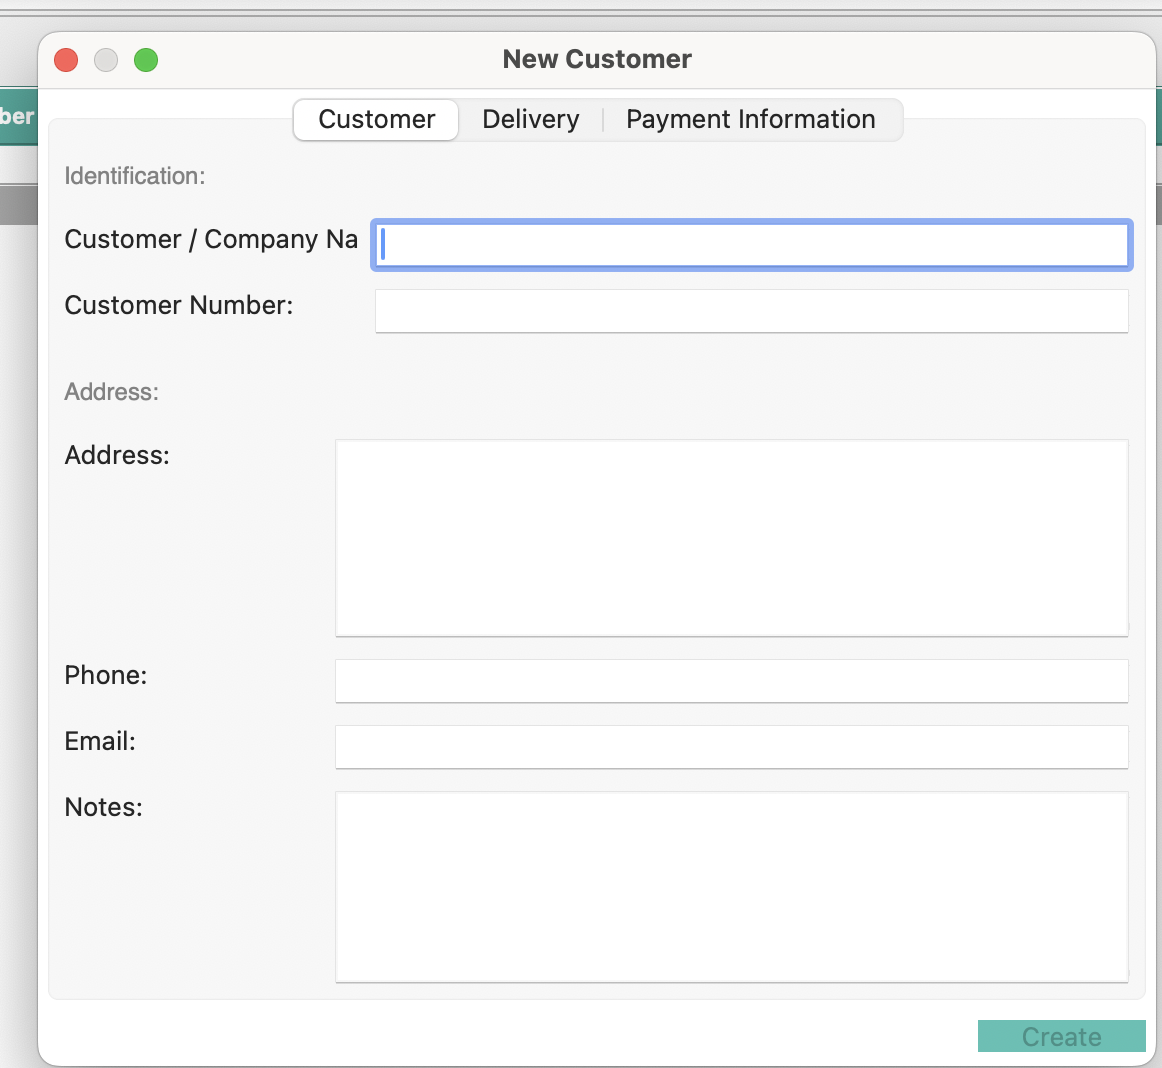

Fill in all the desired details for your new “Customer” and click on the “Create” button to complete and save the new customers.
Price Categories
Where to find all Price Categories
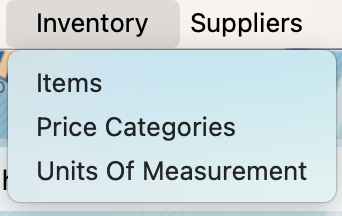
To access the “Price Categories” Click on the “Inventory” menu then select the “Price Categories” Option.

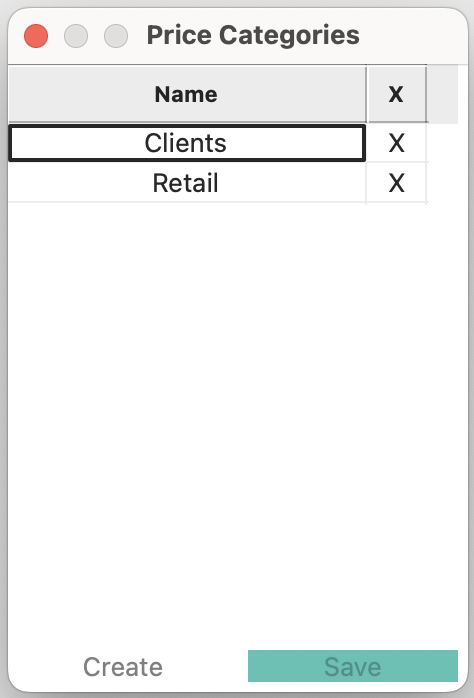
The Price Categories dashboard will open showing all existing Price Categories.

Create a new Price Category
Click on the “Create” button, a new row will be created for you to enter in the name of the new category you would like to create.
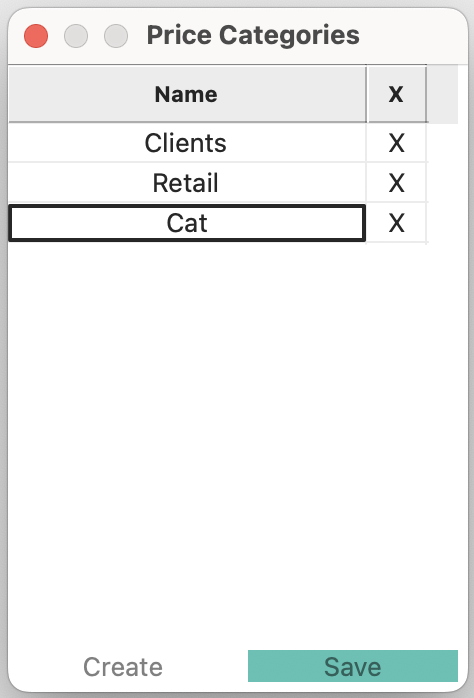

Click on the “Save” button to save the Price Categories.


Suppliers
Where to find all Suppliers
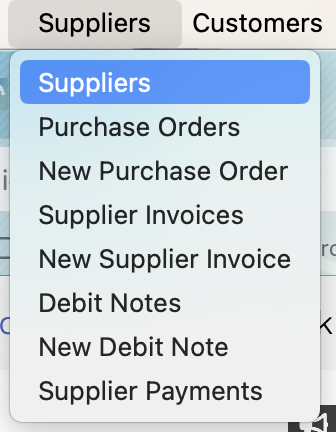
To access the “Suppliers” Click on the ““Suppliers”” menu then select the “Suppliers” Option.

The Suppliers dashboard will open showing all existing Suppliers.
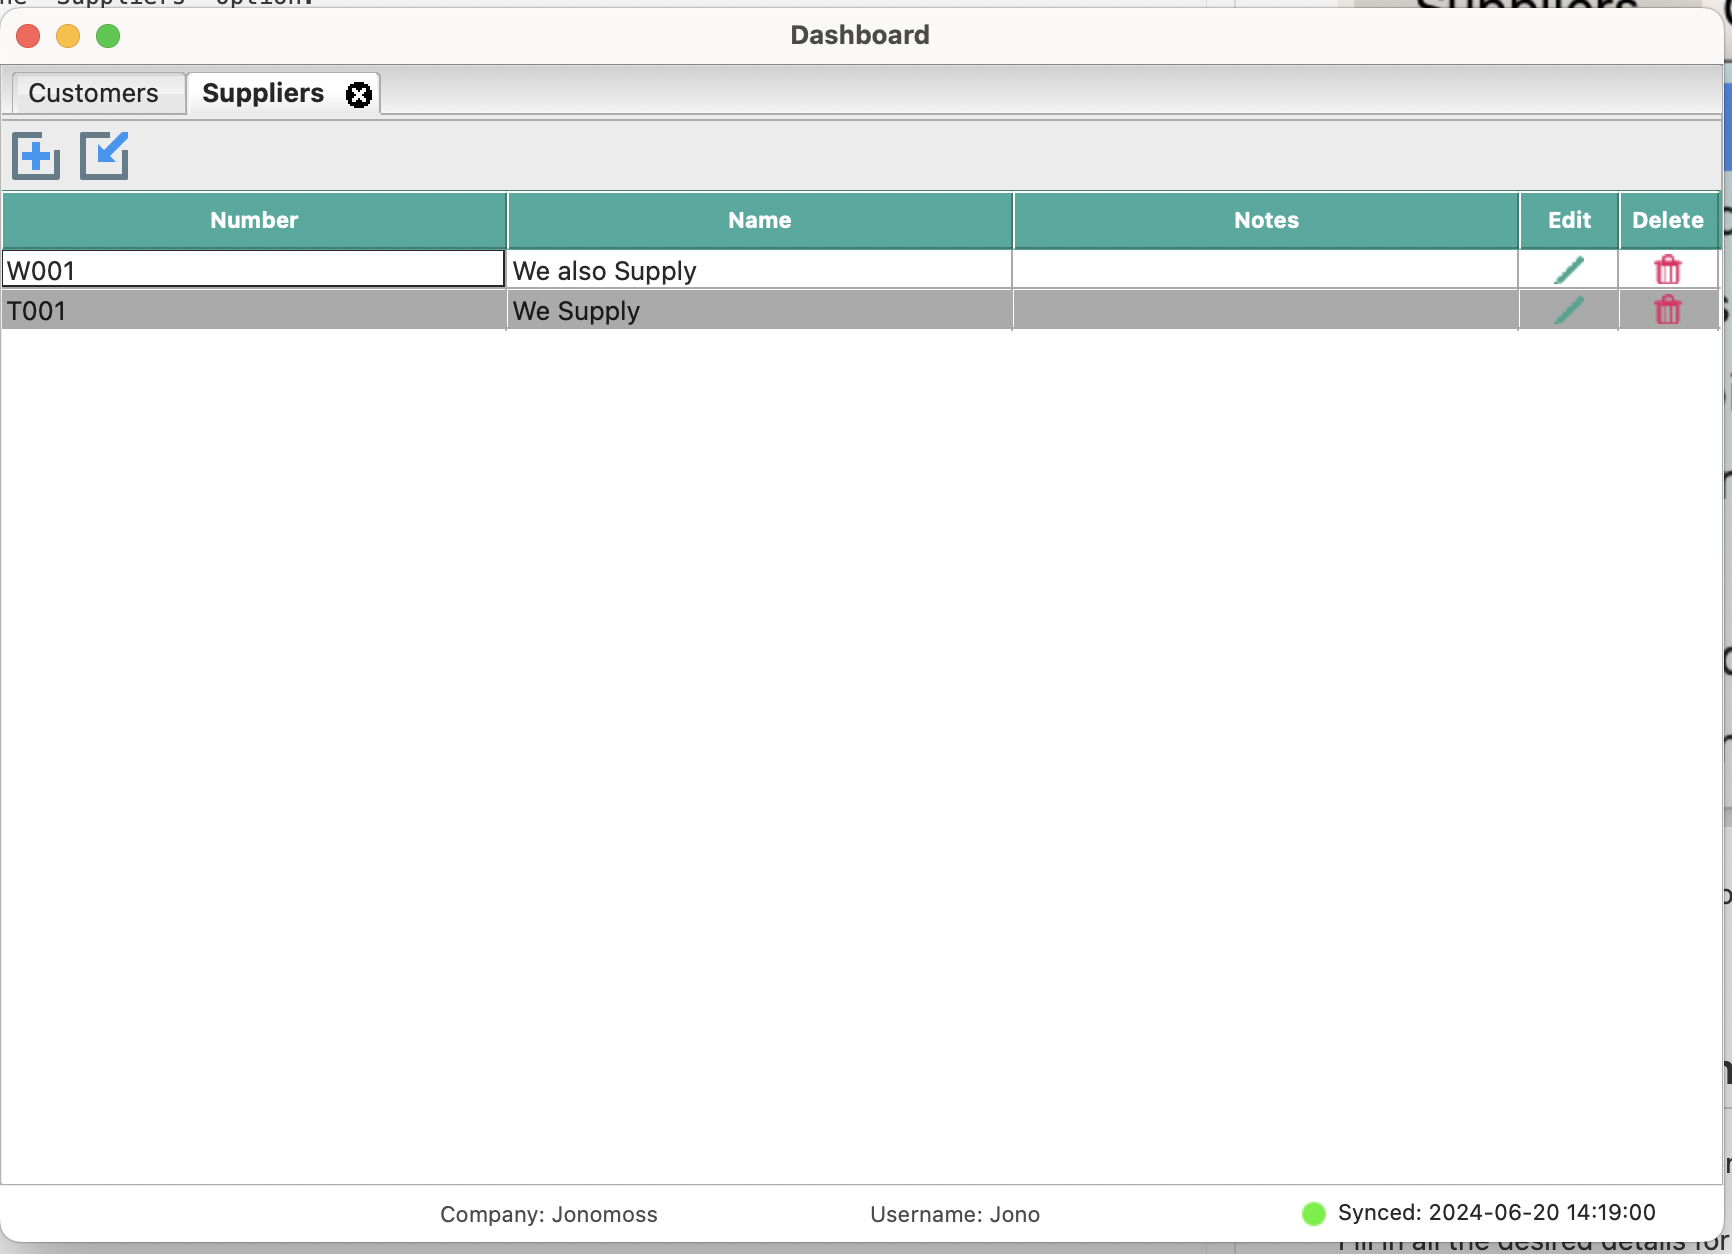

Create a new Customer
Click on the “Add” icon to open the “New Supplier” window.
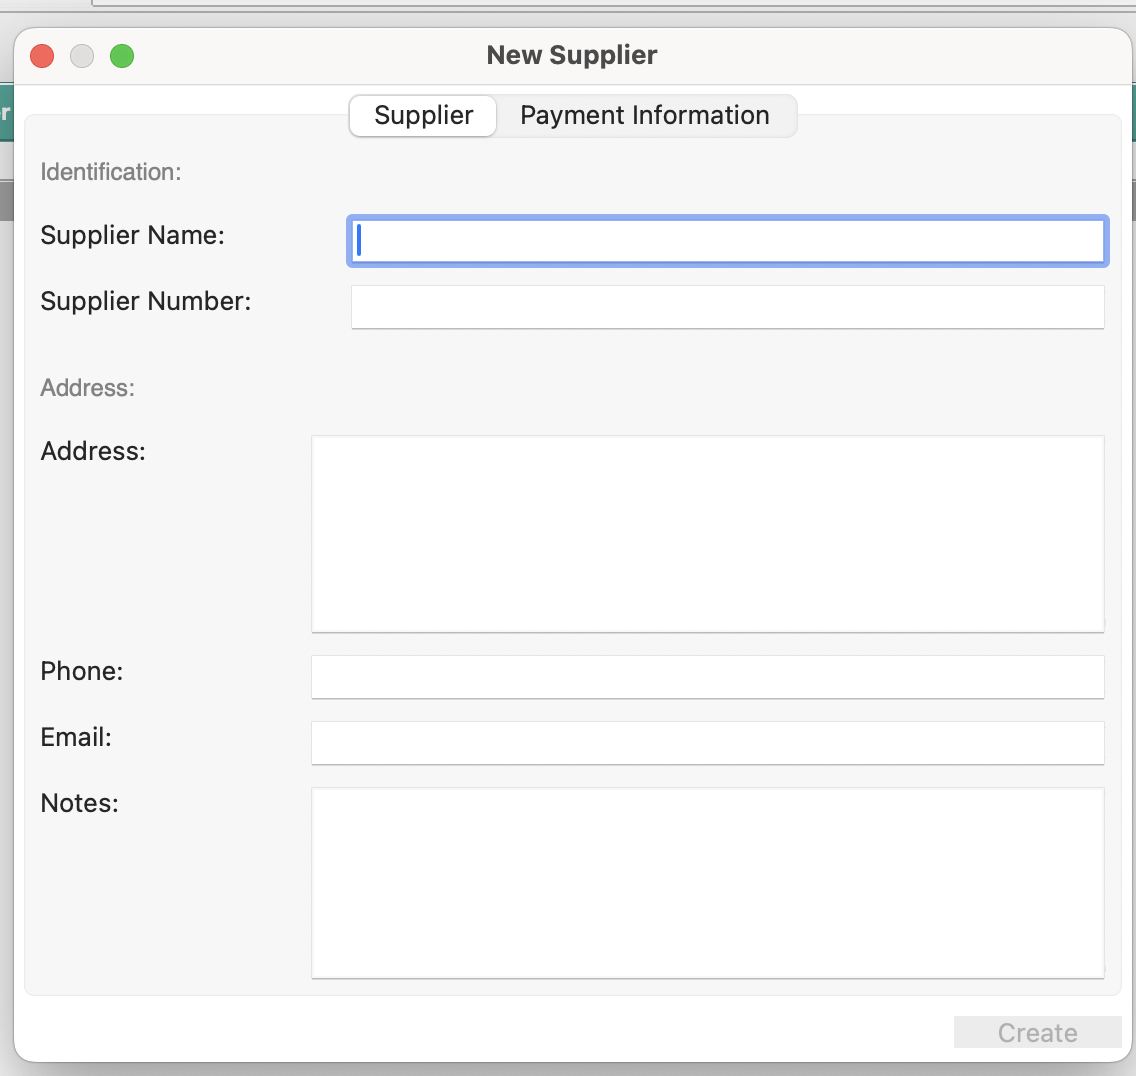

Fill in all the desired details for your new “Supplier” and click on the “Create” button to complete and save the new Supplier.
Billing Terms
Where to find all Billing Terms
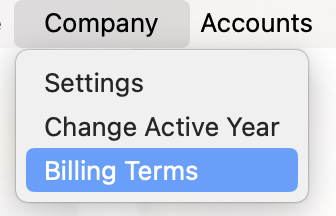
To access the “Billing Terms” Click on the “Company” menu then select the “Billing Terms” Option.

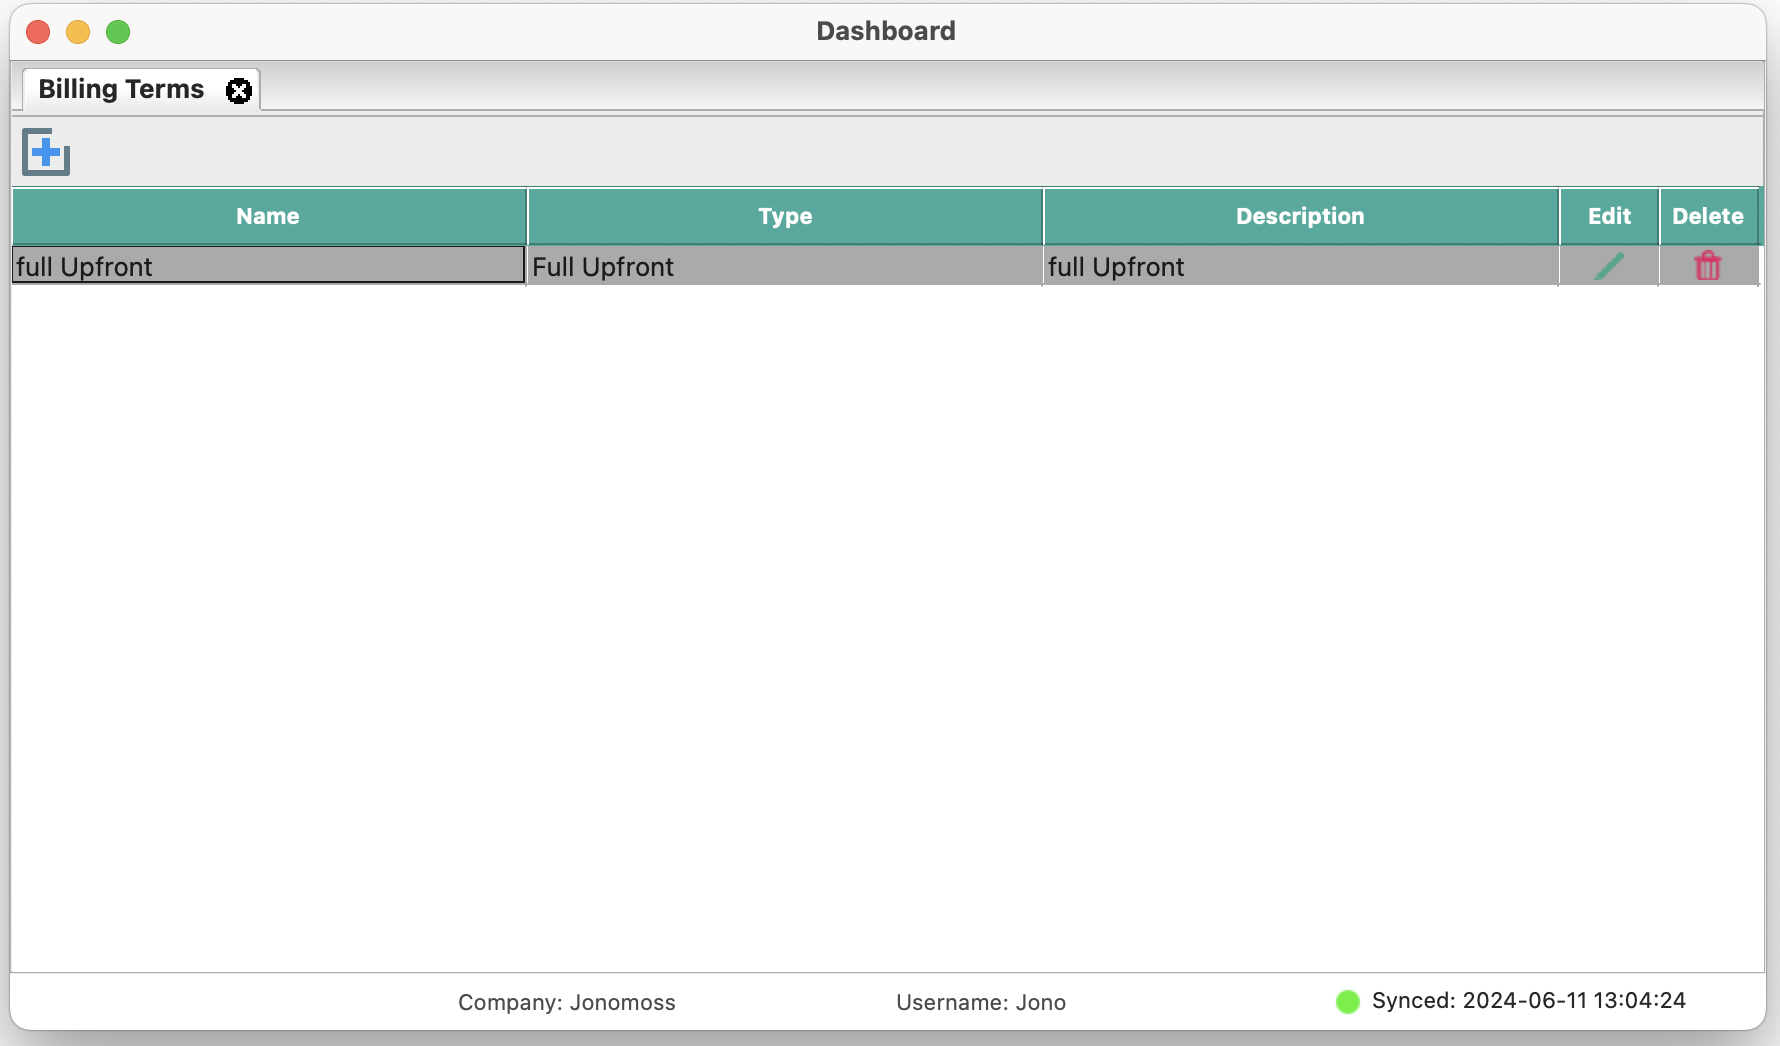
The Billing Terms dashboard will open showing all existing billing terms.

Create a new Billing Term
Click on the “Add” icon to open the “New Billing Term” window.


When selecting the “Type” filed. You will be presented with options and inputs for that specific “Type”.


Fill in all the desired details for your new “Billing Term” and click on the “Create” button to create the Term.

Server - Quick Start
Quick Start Guide
Show steps to setup a new company. eg
Create a video of a quick start guide and embed it here
Windows PostgreSQL Installation Tada server uses PostgreSQL as the database to store all data, we will need to first get that up and running before we can install Tada Server.
It is a very quick and easy process.
If you already have a PostgresSQL instance on your network, you can skip this step.
First we will need to download the latest Windows version from PostgreSQL website:
https://www.enterprisedb.com/downloads/postgres-postgresql-downloads
Once downloaded, run it to begin the installation.
Windows After installing Tada Server, you will need to setup the Windows firewall to let traffic and connections to be able to communicate with it.
These following steps will help guide you.
I will be using the default port that is set when installing Tada Server, If you have changed the port that it uses, you will need to use that port number instead.
For this guide we will use port: 8080 (The default port)
The server settings can be find under the “File” Menu.
Connection Settings These settings are used to fine tune how the server will listen to connections.
The options are as follows:
Use SSL - Although Tada already uses a peer-to-peer encrypted connection, we can add another layer of encryption / security by using an SSL connection. A valid SSL certificate is needed to be installed on the sever machine for this to work correctly.
Starting And Stopping the server To start the server, select the “Server” menu and select the “Start Server” option.
This will stop the server from accepting any connections to all companies.
To stop the server, select the “Stop Server” option.
This will allow the server to accept connections to all running companies.
Creating A New Company To create a new company, select the “Company” menu and select the “New Company” option.
A “New Company” window will open.
Fill in the following details:
Company Name - The name of the company that will be displayed in the server list. This name is only to identify the company in the server list. Create a new Shared Database - If this is an isolated / single company, enable this.
Creating Users To create a user, click on the “Users” menu ans select the “Create User” option.
A “create User” dialog will open.
Under the “General” Section. Fill in the users:
Login name - The name the user will use to login. Password - The password the user will use to login, needs to be 6 characters or longer. Full Name - The users full name. email address - The users email address.
Subsections of Server - Quick Start
Installation
Windows
PostgreSQL Installation
Tada server uses PostgreSQL as the database to store all data, we will need to first get that up and running before we can install Tada Server.
It is a very quick and easy process.
If you already have a PostgresSQL instance on your network, you can skip this step.
- First we will need to download the latest Windows version from PostgreSQL website:
https://www.enterprisedb.com/downloads/postgres-postgresql-downloads
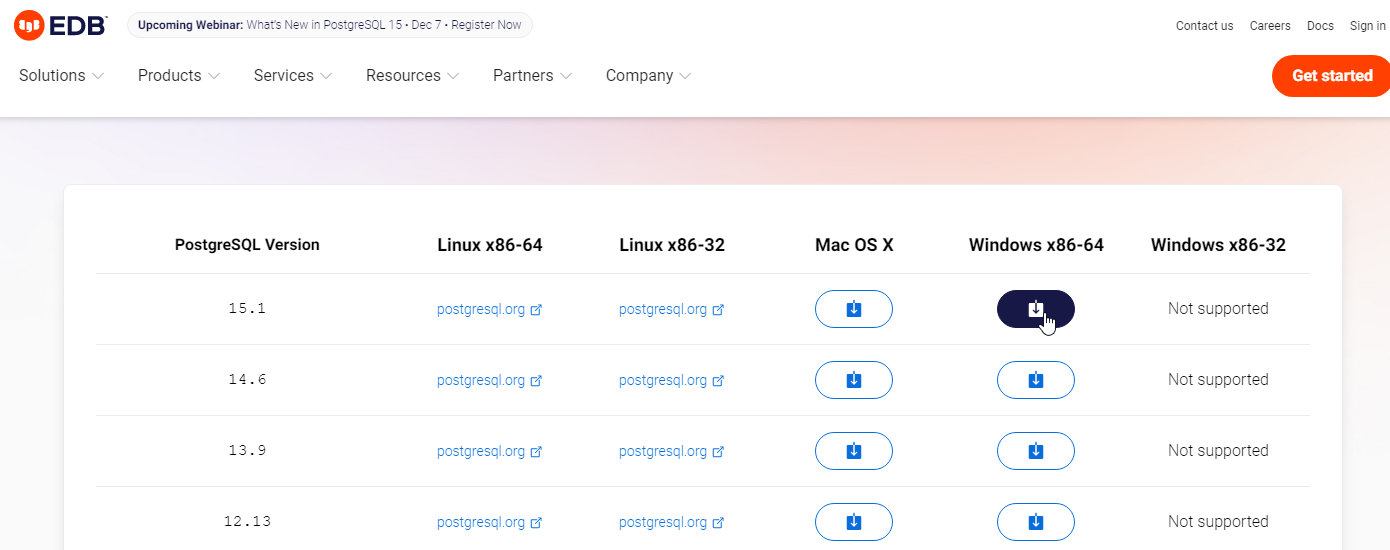

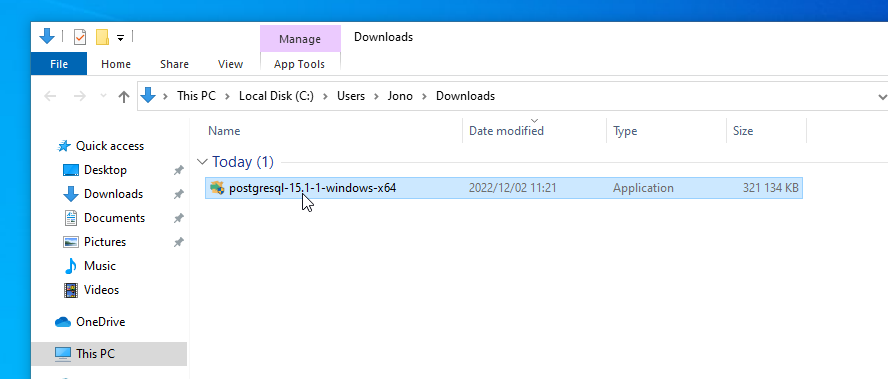
- Once downloaded, run it to begin the installation.
Follow the steps, we will leave all the options to their default.

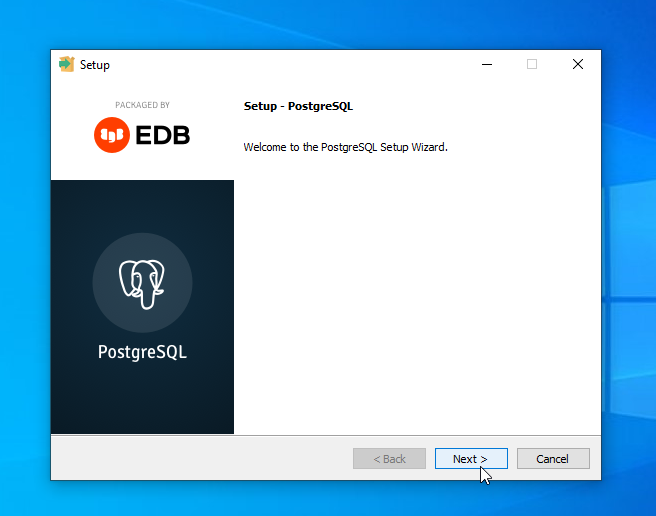

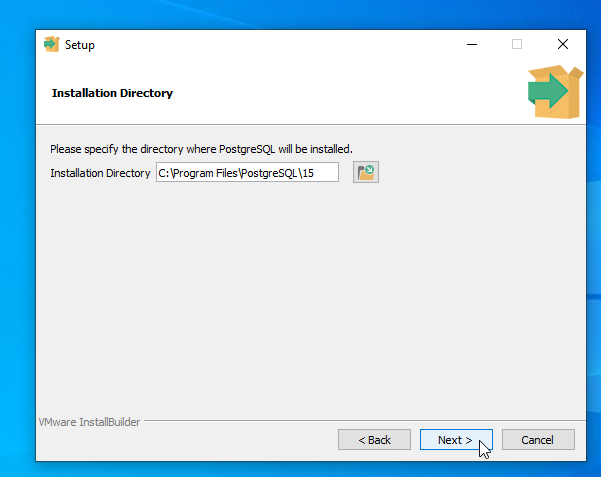

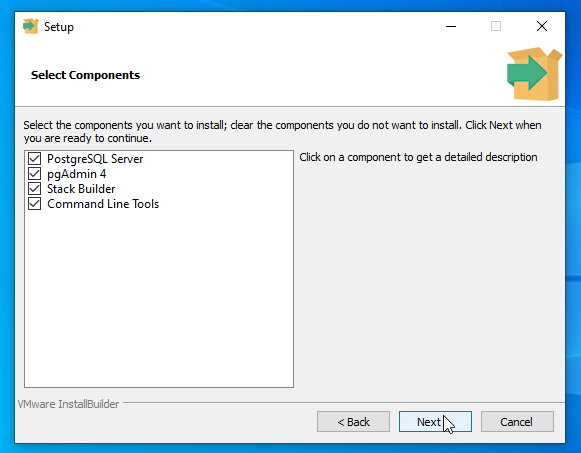

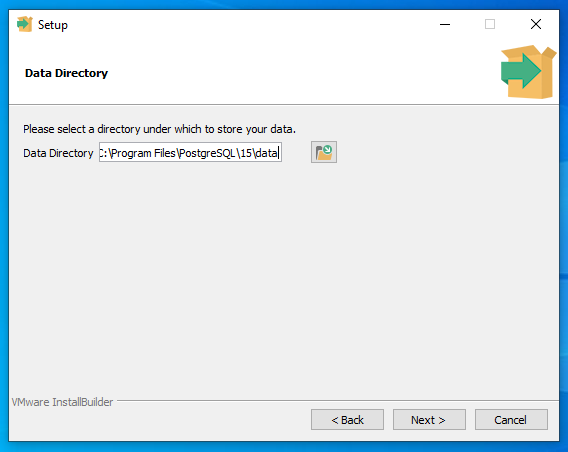

Make sure to use a secure long password that you will remember.
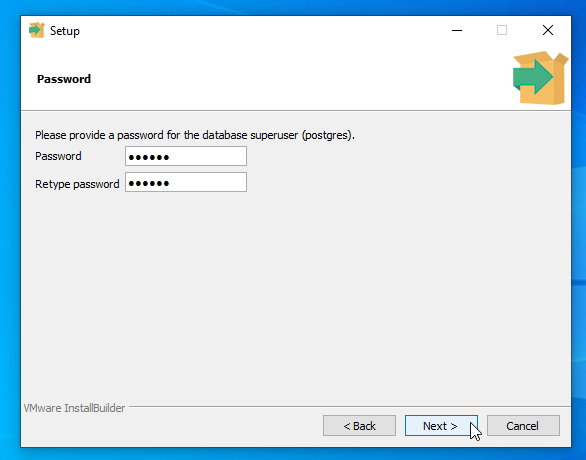

We will leave PostgreSQL to listen to connections using the default port of 5432
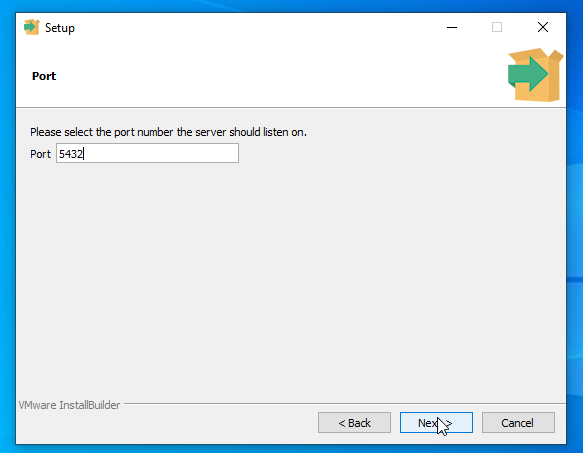

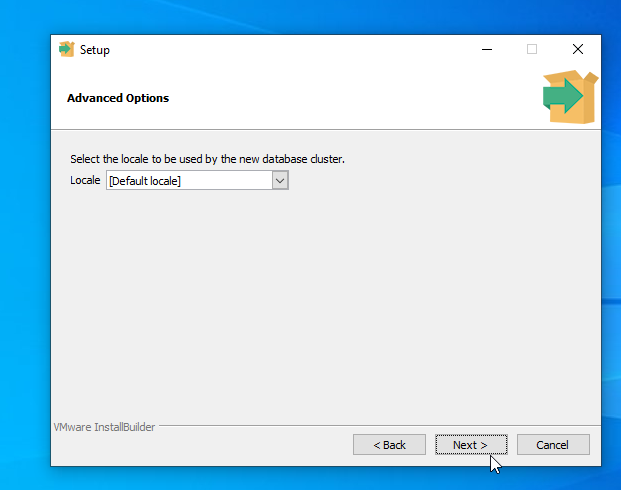

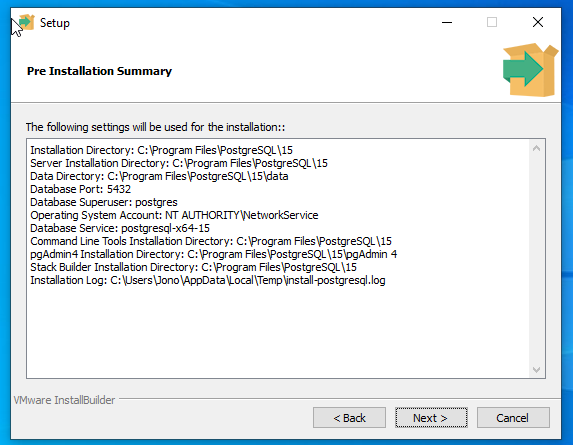

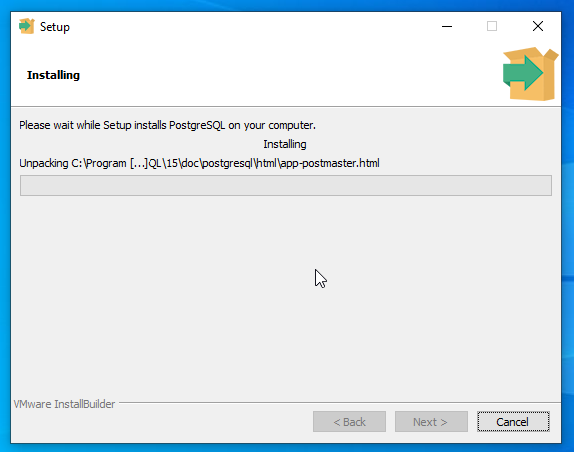

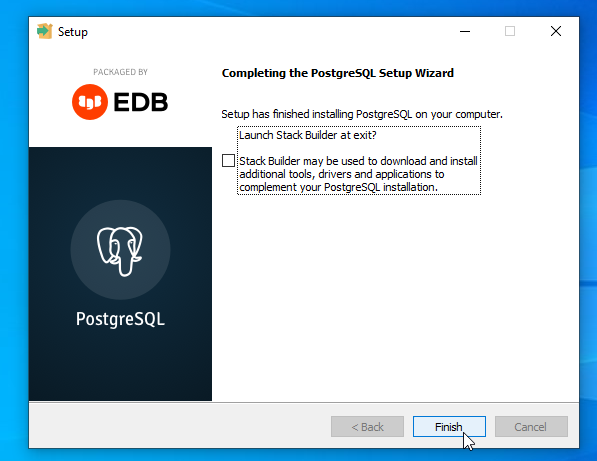

well-done, we now have a working PostgreSQL instance running and ready for us to use.
- For more information on PostgreSQL you can visit the following site to view the PostgreSQL documentations:
https://www.postgresql.org/docs/
PostgreSQL User Setup
It is not advisable to use the master / root PostgreSQL user for creating connections to the database.
We will create a new user that we will use for Tada Server connections:
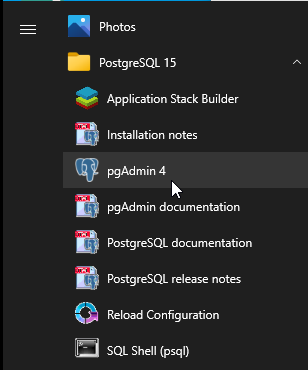
- Open the “pgAdmin 4” application. You can find it under the “PostgeSQL” folder in the application / start menu.

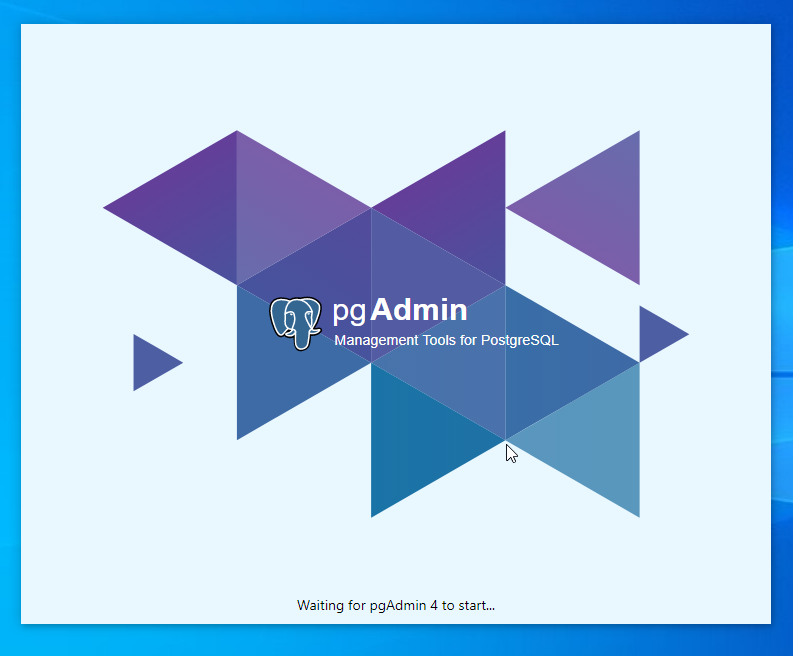
It can take a little while to start up and load.

- We will be asked to create a “Master password” to protect the pgAdmin application.
Create a strong password you will remember.
Please note this password will be used for pgAdmin only.
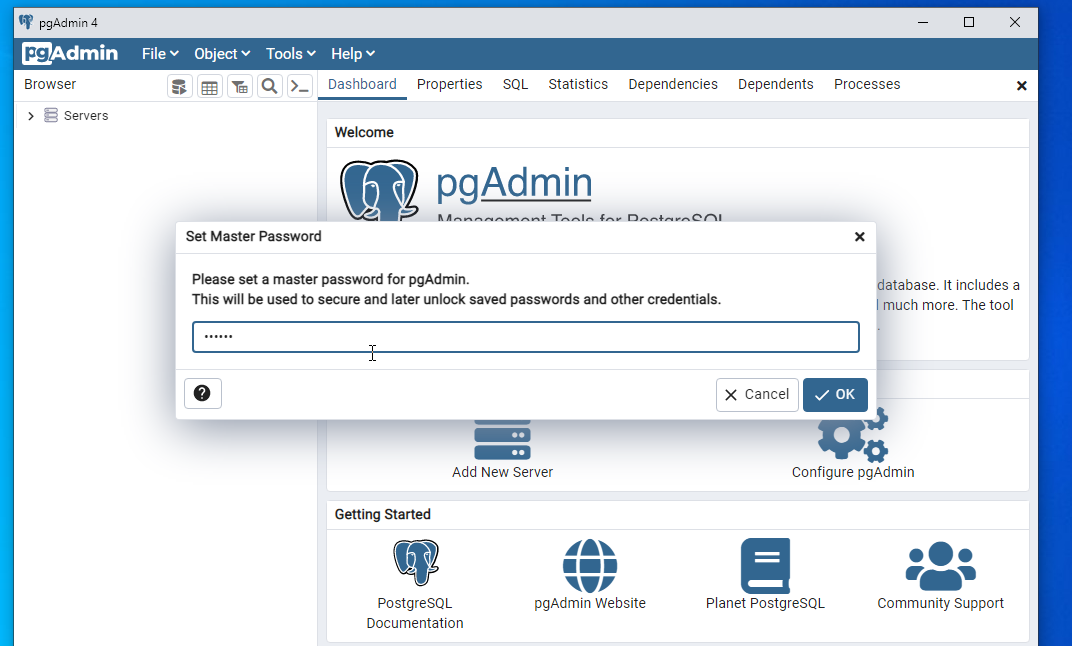

Click the “OK” button to confirm the passwod you want to use.
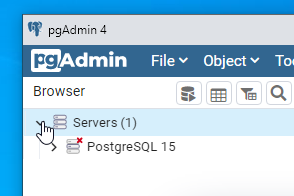
- On the left panel, we will see the server browser panel. Here you can manage and see all the databases on our PostgreSQL instance.
Click on the “Servers” tab to see the databases.

- We will be asked for the “postgres” user password.
It will the the password that you created when installing PostgreSQL.
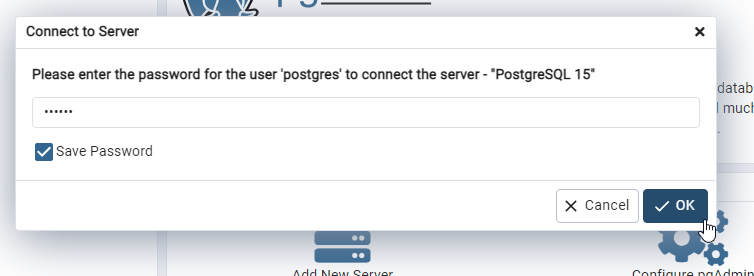

We can tell pgAdmin to “Save Password” so that we don’t need to enter it every time we need to work on the databases via pgAdmin.
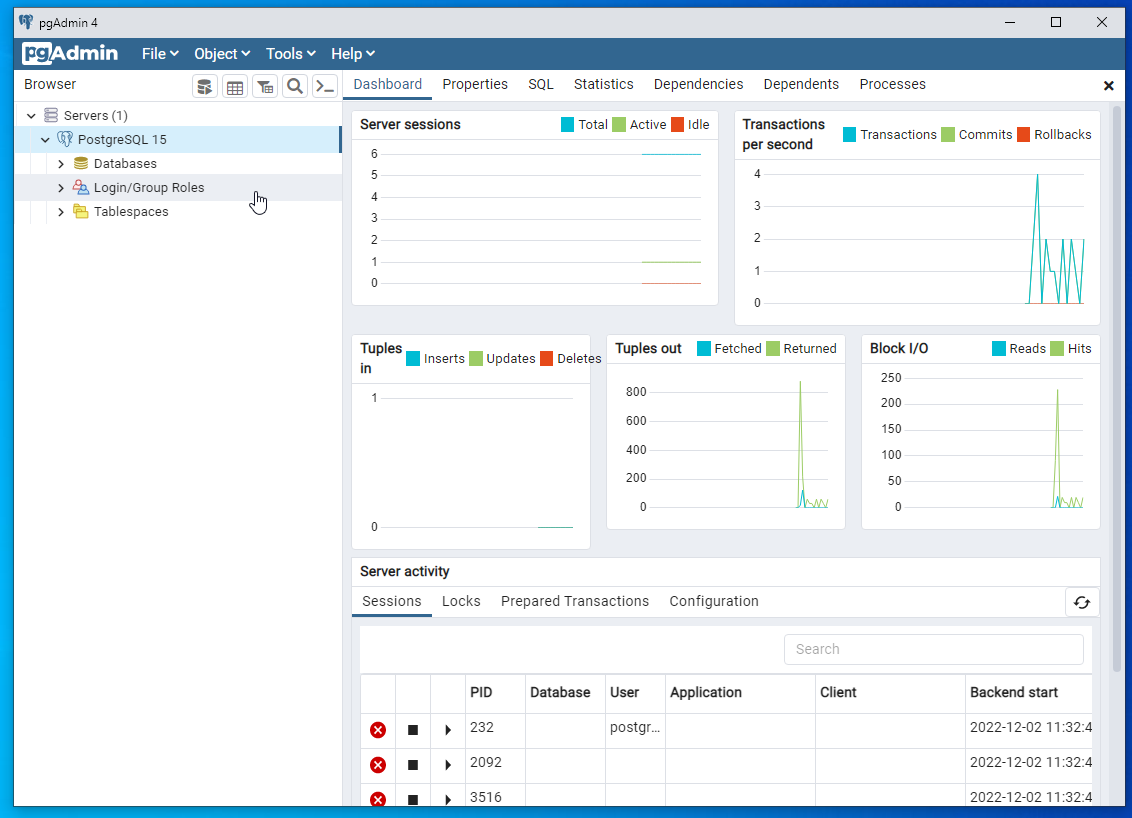
- Right click on the “Login/Group Roles” option.

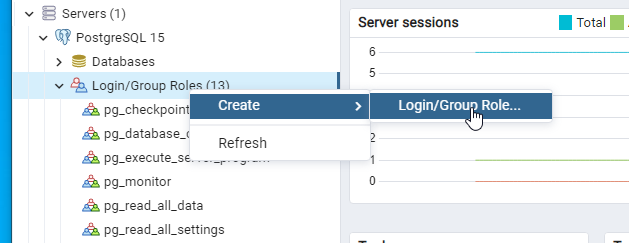
- Under the “Create” menu, Select the “Login/Group Roles” option.
A new window will open.

- Fill in the name of a user you would like to use and add a description to help escribe wat the user is for.
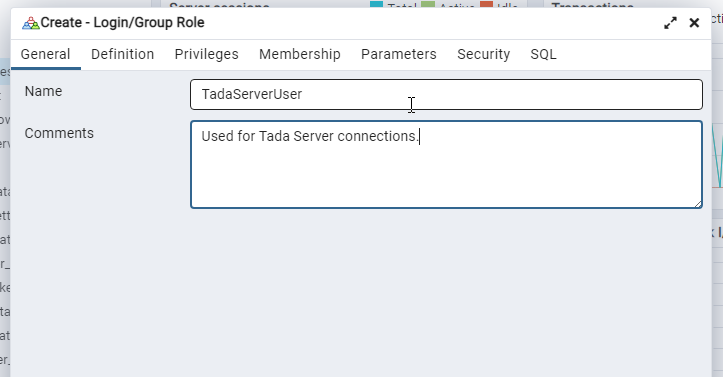

- Next, under the “Definition” tab. Fill in the password you would like to use for the user.
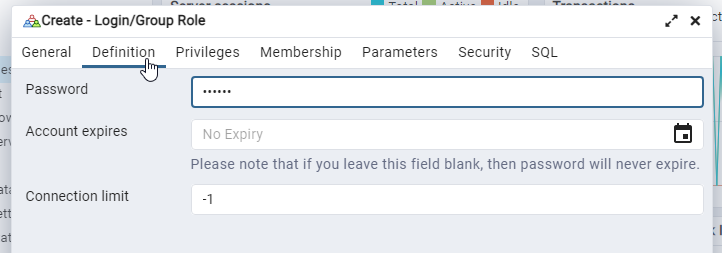

- Next, under the “Privileges” tab. Turn on the switches to match the image below.
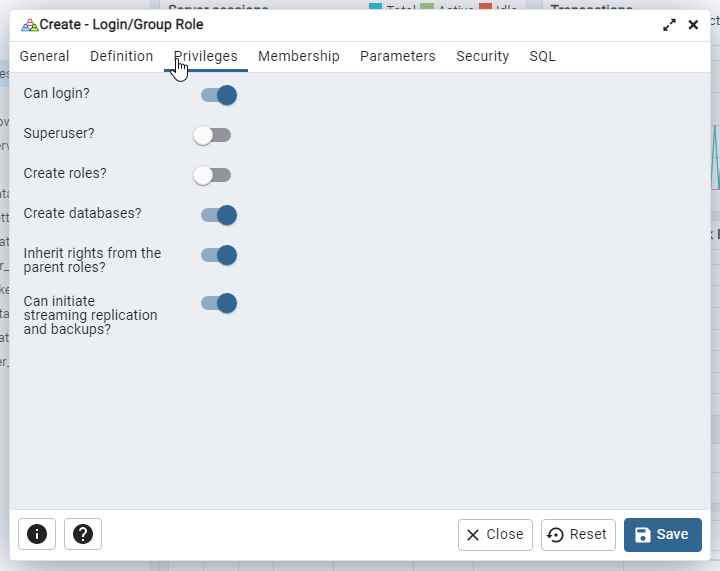

- Click on the “Save” button to complete the new user creation.
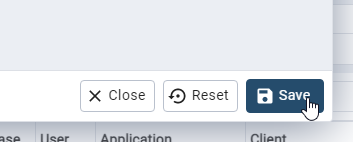

- We will close the pgAdmin application as it is not needed anymore.
Well-done, we have completed setting up PostgreSQL.
Tada Server
- Download the latest version of the “Tada Server” application from the following:
https://tada.center/
- Once downloaded, run it to begin the installation.
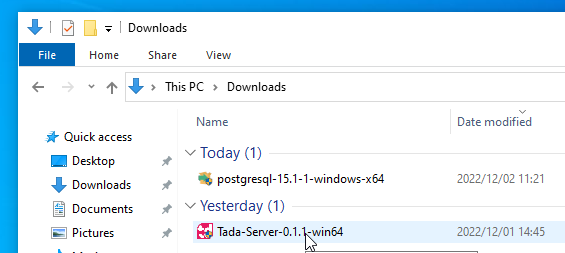

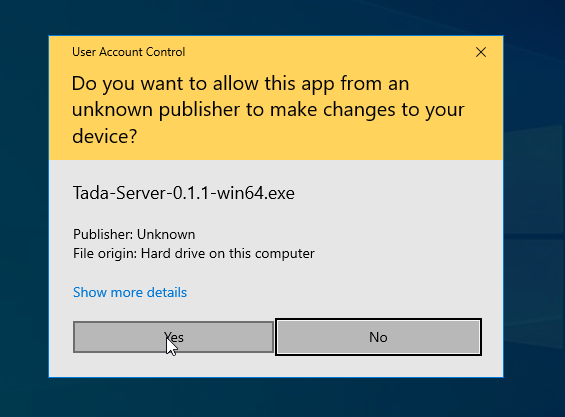
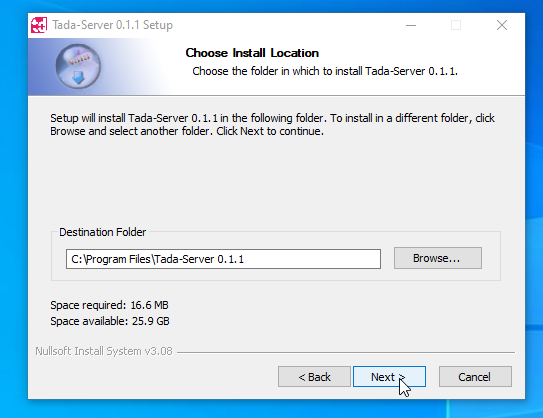
- Follow the steps. We will leave all the settings at their defaults


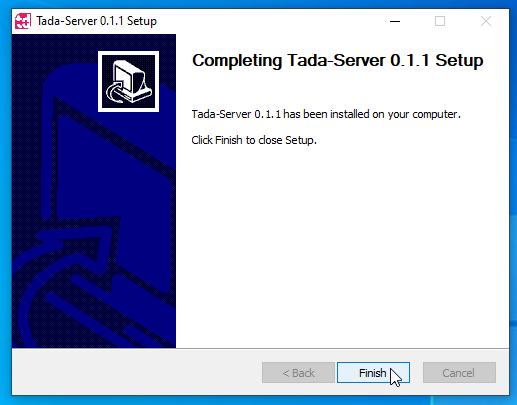

- Nice, Tada Server is now installed.
To see how to setup Tada Server. See the following guide:
server-settings
- From here you will need to add some firewall rules to allow Tada Clients to communicate to it.
Follow this guide to see how to achieve this:
Firewall Setup Guide
Ubuntu / Debian based distros
PostgreSQL Installation
The best way to install PostgreSQL is to follow the steps on the official PostgreSQL website:
https://www.postgresql.org/download/linux/ubuntu/
But you can do the following in the terminal (These steps are taken directly from the above link):
- Create the file repository configuration:
sudo sh -c 'echo "deb http://apt.postgresql.org/pub/repos/apt $(lsb_release -cs)-pgdg main" > /etc/apt/sources.list.d/pgdg.list'
- Import the repository signing key:
wget --quiet -O - https://www.postgresql.org/media/keys/ACCC4CF8.asc | sudo apt-key add -
- Update the package lists:
- Install the latest version of PostgreSQL.
sudo apt-get -y install postgresql
- Set “postgres” user password. First login to postgres in the terminal:
- Set the password for the user.
ALTER USER postgres PASSWORD 'myPassword';
Tada Server
- Download the latest version of the “Tada Server” application from the following:
https://tada.center/
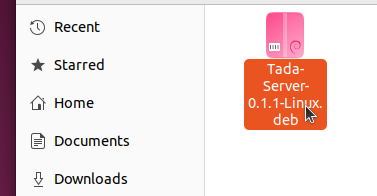

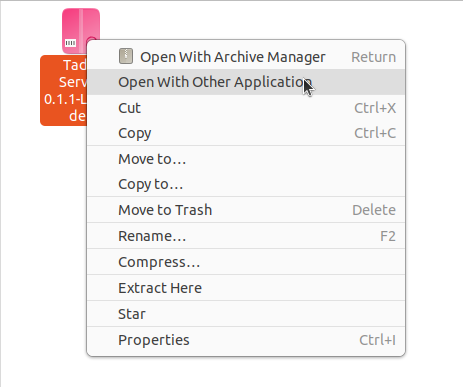
- Right click on the files and chose the “Open With Other Application” option.

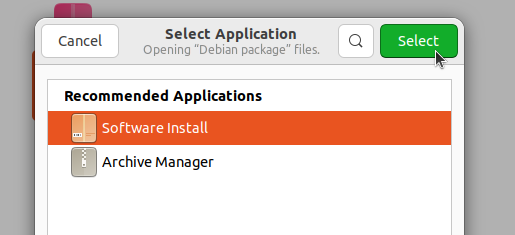
- Chose the “Software Installer” option, then click on the “Select” button.

- Click on the “Install” button.
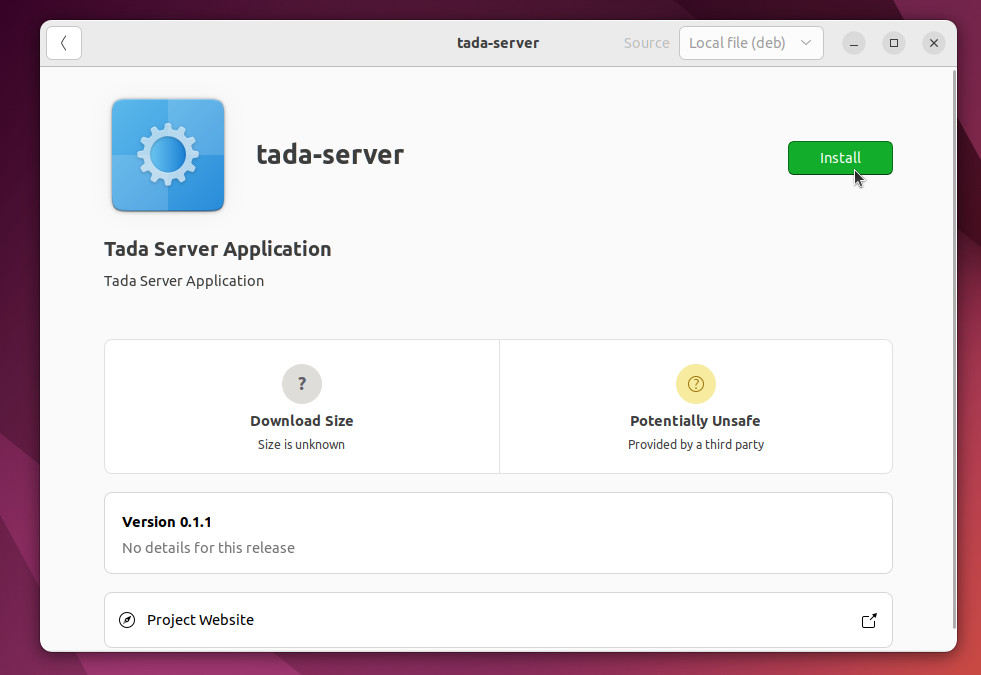

- Nice, Tada Server is now installed. you can now open Tada Server in the “Application” menu
MacOS
PostgreSQL Installation
Tada server uses PostgreSQL as the database to store all data, we will need to first get that up and running before we can install Tada Server.
It is a very quick and easy process.
If you already have a PostgresSQL instance on your network, you can skip this step.
- First we will need to download the latest Windows version from PostgreSQL website:
https://www.enterprisedb.com/downloads/postgres-postgresql-downloads
2.Once downloaded open the file and double click on the “.app” file to start the installation.
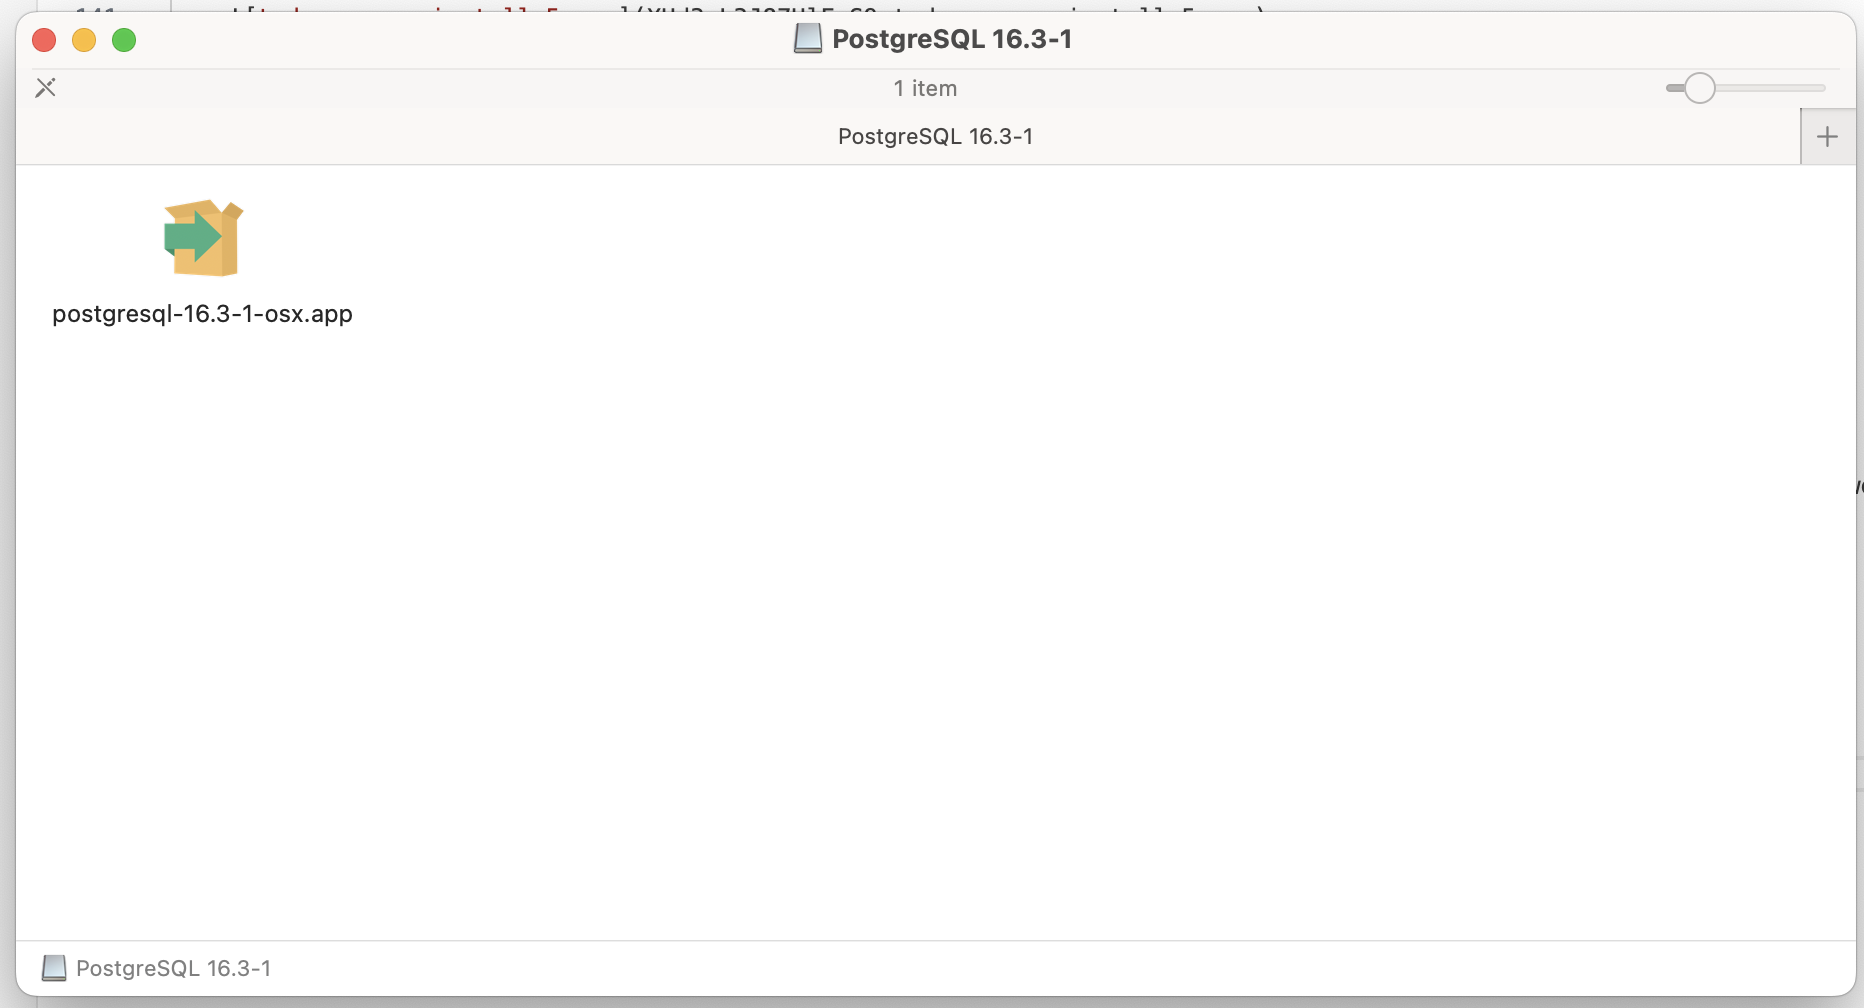

- You will be asked to input your password as PostgreSQL Installer needs that in order to install.
- Follow and go through the prompts to do the installation.
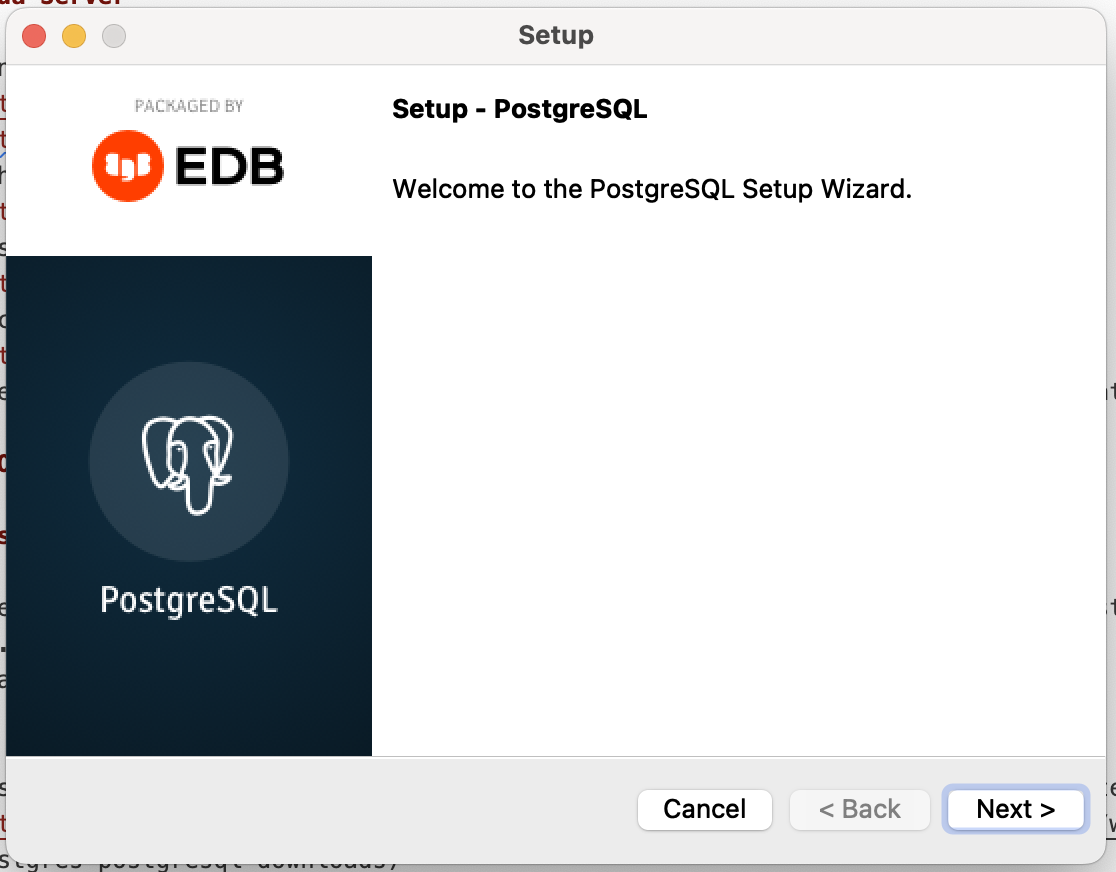

PostgreSQL User Setup
Follow the same steps that are used on the “Windows” guide above to create your PostgreSQL user.
PostgreSQL User Setup
Tada Server
-
Download the latest version of the “Tada Server” application from the following:
https://tada.center/
-
Once downloaded, double click on it to open it up.
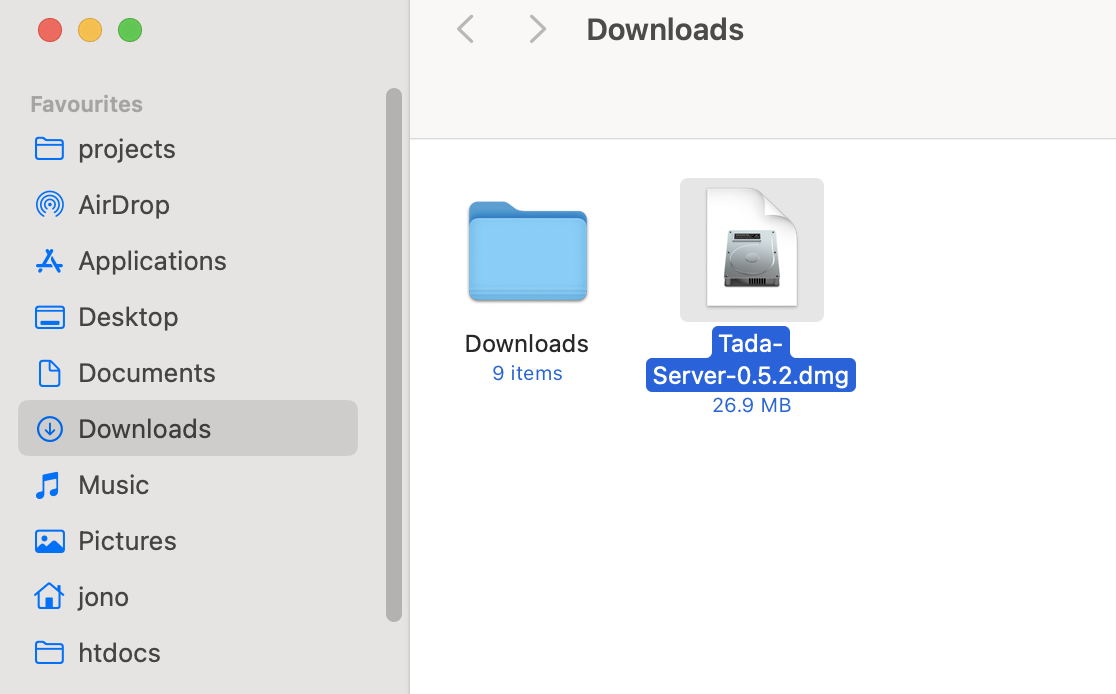

-
Drag and drop the “TadaServer.app” file on the “Applications” folder next to it. You have completed the installation, you will find the “TadaServer” app in your “LaunchPad”.
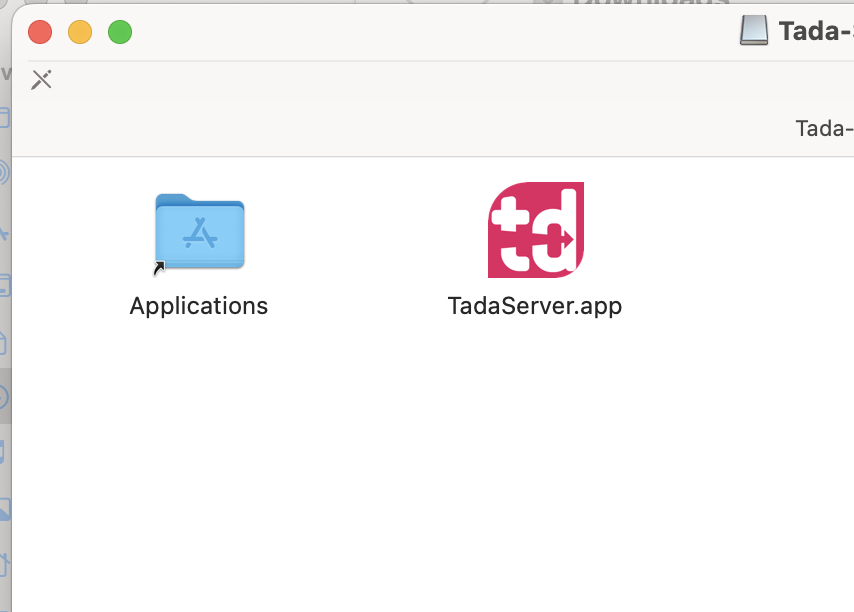

If you run into an issue where MacOS blocks you from opening the application.


You can do the following:
-
Open up your “Settings” and click on the “Privacy & Security” menu


-
Scroll to the bottom till you get to the “Security Section”


-
Click on the “Open Anyway” button. You will be asked to enter your password.


-
You can now click on the “Open” button to open the Application. You will not have to do this again until you upgrade the application


Firewall Setup
Windows
After installing Tada Server, you will need to setup the Windows firewall to let traffic and connections to be able to communicate with it.
These following steps will help guide you.
I will be using the default port that is set when installing Tada Server, If you have changed the port that it uses, you will need to use that port number instead.
For this guide we will use port: 8080 (The default port)
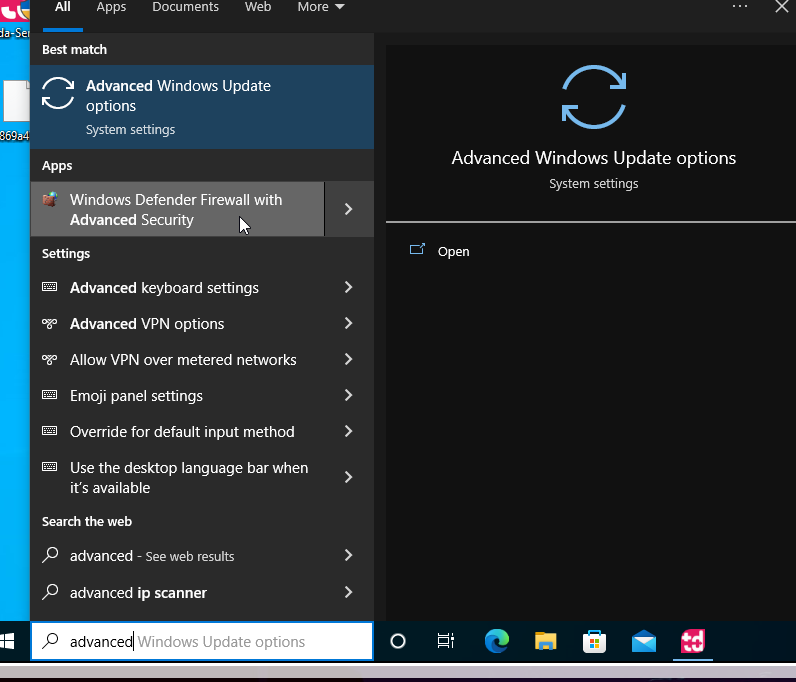
- Open up the “Windows Defender Firewall with Advanced Security” application

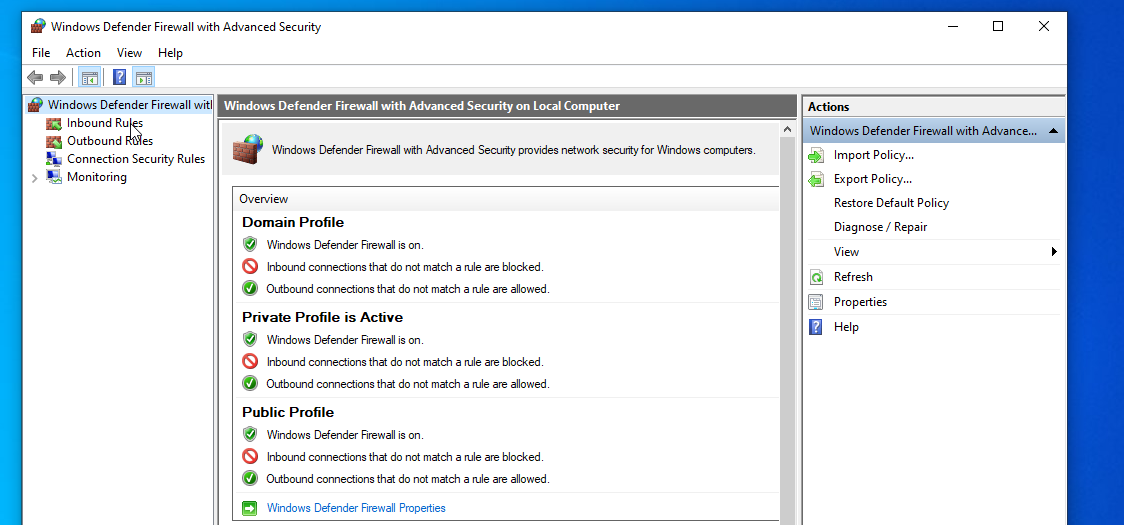
- Click on the “Inbound Rules” option in the left panel.

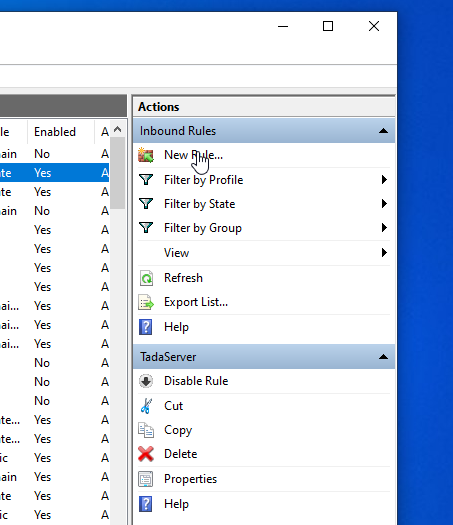
- Now on the right panel, Click on the “New Rule” button.

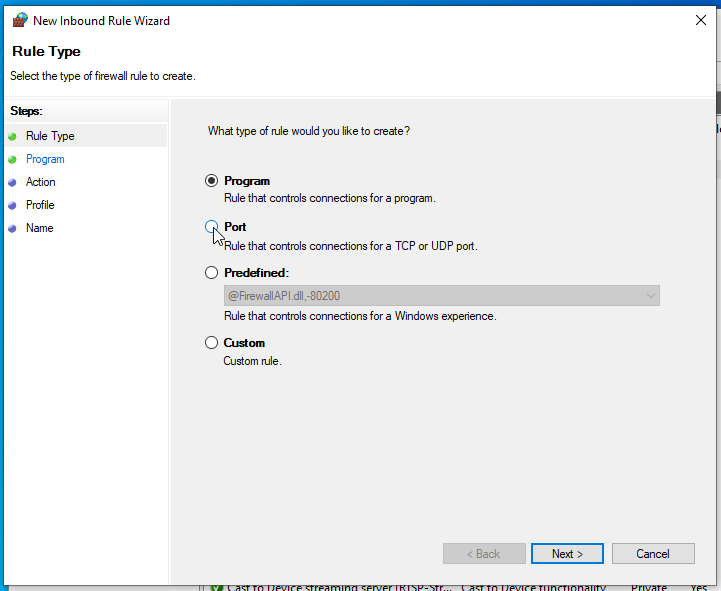
- Select the “Port” option and click the “next” button.

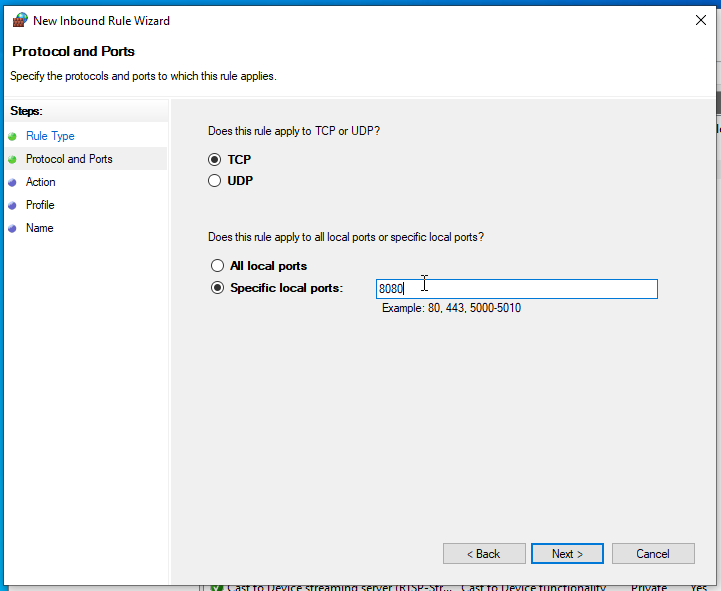
- Make sure the “TCP” option is selected and set the port to “8080”. If you are using a different port then the default, you will use that port instead. Click the “next” button.

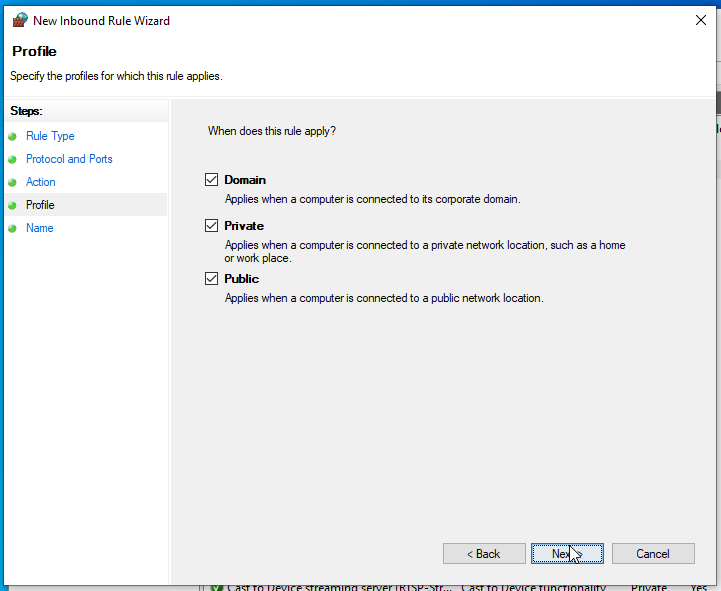
- Choose the “profile” you want to allow this rule to be enabled on. In this example we will select all, But depending on your network, you can specify the exact profile to increase security and control. For example, if it is on an company network using a Domain Controller. You can only enable the “Domain” profile and block the “Private” and “Public” profile. Click the “next” button.

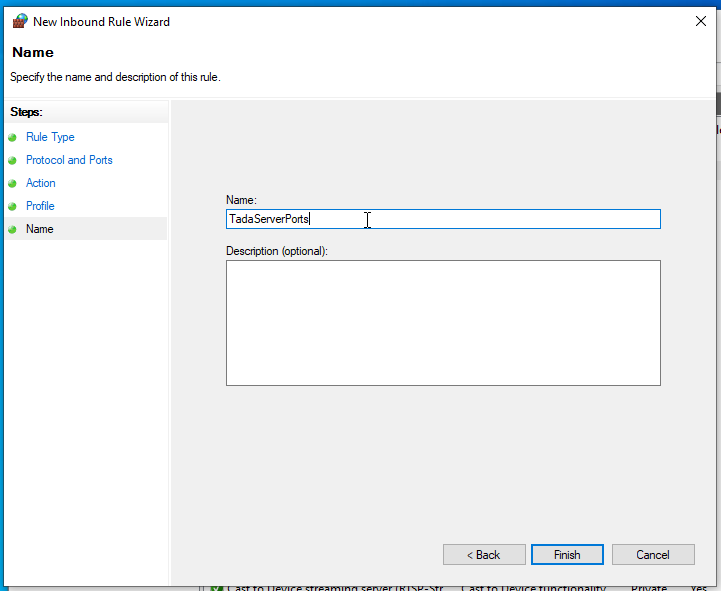
- Give the rule a name, for example “Tada Server Ports”. Click the “next” button.

- Repeat the above steps but with the “Outbound Rule” option.
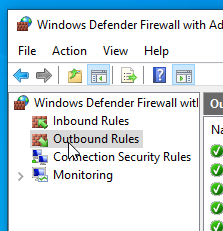

- Make sure to “Allow the connection” when you reach the “Action” section.
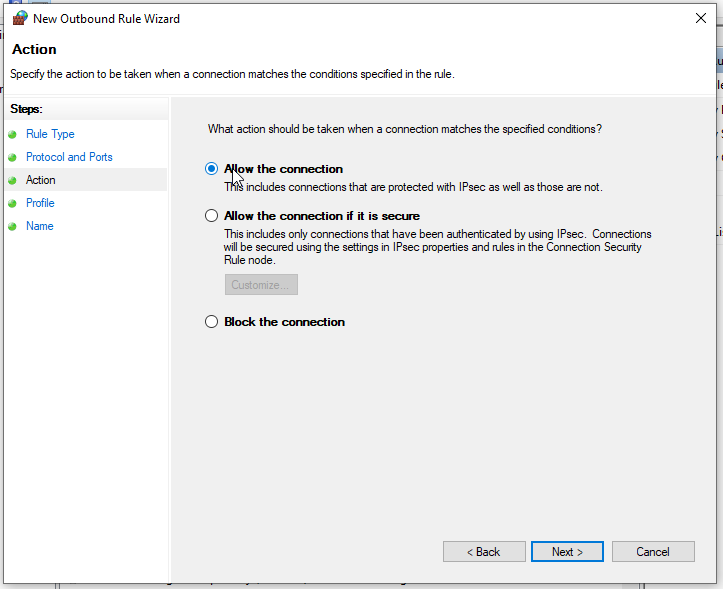

- Tada clients on the network should now be able to connect and communicate to the Tada Server.
Server Settings
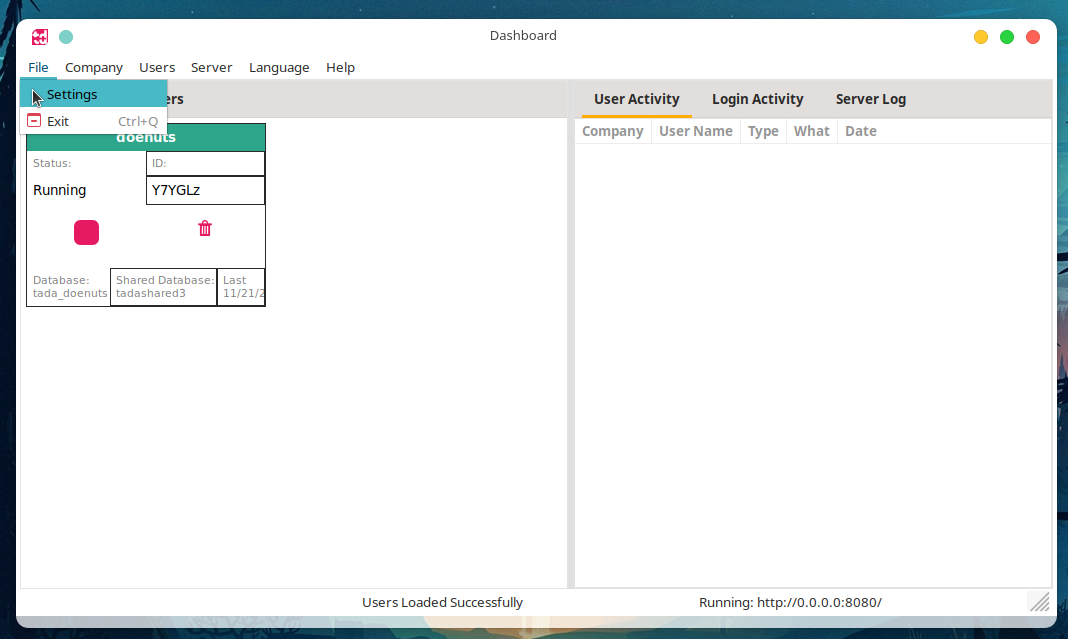
The server settings can be find under the “File” Menu.

Connection Settings
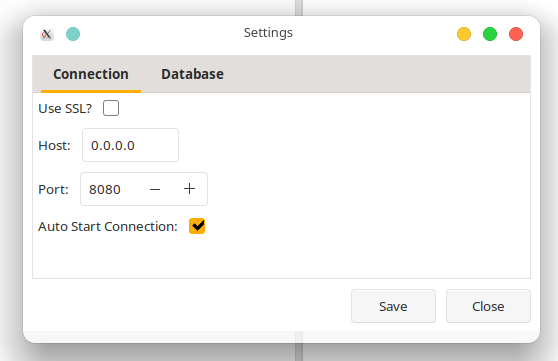

These settings are used to fine tune how the server will listen to connections.
The options are as follows:
Use SSL - Although Tada already uses a peer-to-peer encrypted connection, we can add another layer of encryption / security by using an SSL connection. A valid SSL certificate is needed to be installed on the sever machine for this to work correctly. More in depth guide on this will be released in the near future.
Host - This is the host IP address / Listening IP address that the server will use to listen for incoming connections. Use 0.0.0.0 to listen to connections from any location. 0.0.0.0 is the Default.
Port - The port that the server will uses to listen to connections. Default is 8080.
Auto Start - When the server is opened, a connection will automatically be started.
Database Settings
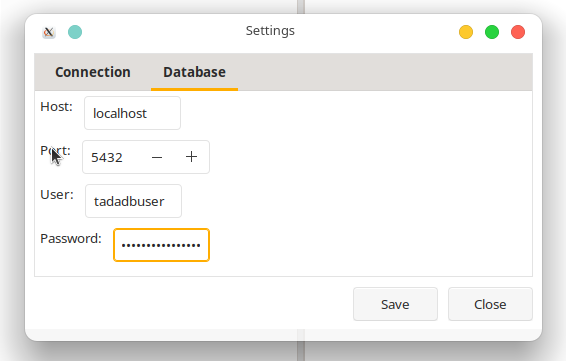

These settings are used to let the server connect to the PostgreSQL server.
The options are as follows:
Host - The host IP address of the PostgreSQL server. If the PostgreSQL instance is installed on the same machine as the Tada server, you can leave it as localhost.
Port - This is the port that the PostgreSQL server is listening to, the default is 5432, which is the default PostgreSQL server port.
User - The user that has permissions to access the PostgreSQL server to read, write and update data on it. It is recommended to create a new user on the PostgreSQL server and to not use the PostgreSQL server default administrator user.
See the following guide on how to create a new PostreSQL user: Create a PostgreSQL User
Password - The password for the above user to authenticate to the PostgreSQL server.
Server Management
Starting And Stopping the server
To start the server, select the “Server” menu and select the “Start Server” option.
This will stop the server from accepting any connections to all companies.
To stop the server, select the “Stop Server” option.
This will allow the server to accept connections to all running companies.
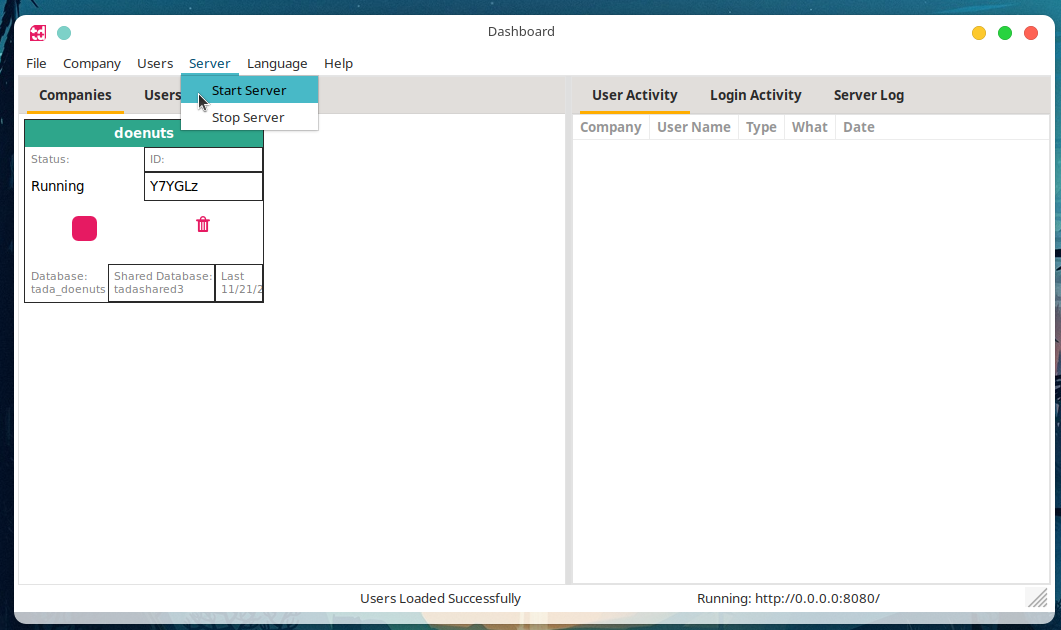

Company Management
Creating A New Company
To create a new company, select the “Company” menu and select the “New Company” option.
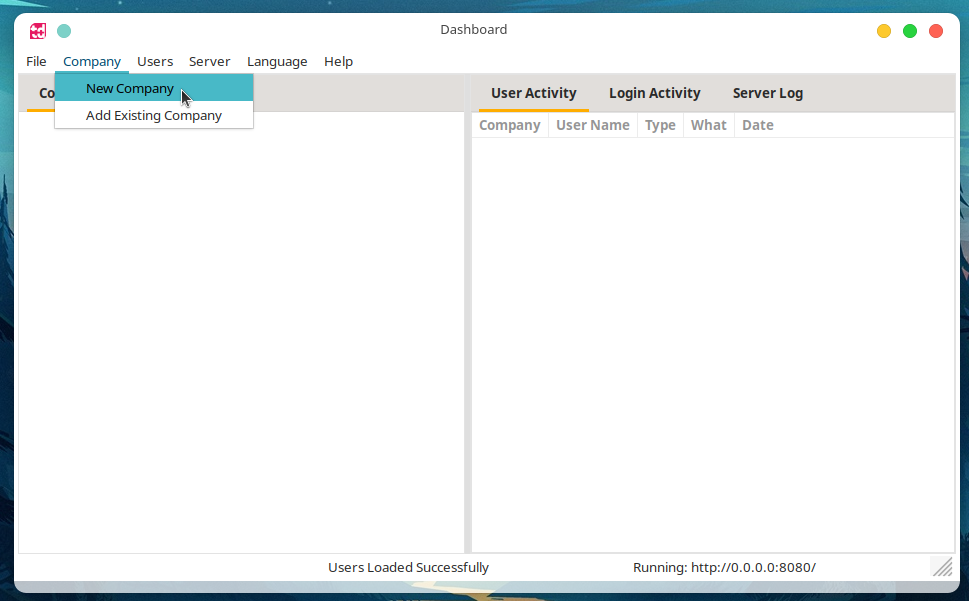

A “New Company” window will open.
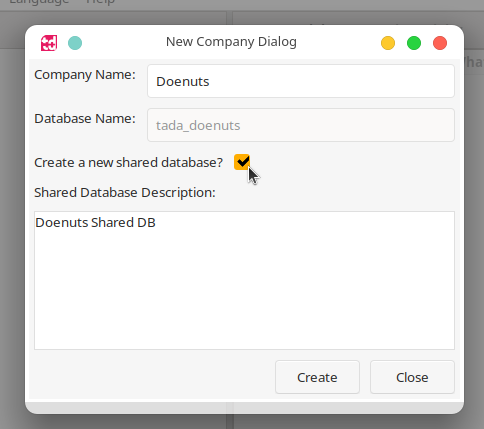

Fill in the following details:
- Company Name - The name of the company that will be displayed in the server list. This name is only to identify the company in the server list.
- Create a new Shared Database - If this is an isolated / single company, enable this. If your are creating a company that shares data from a another company. you can disable this and choose the database that you would like to share data with.
- Data that can be shared between companies are:
- Customers
- Suppliers
- Inventory Items
- Shared Database Description - Fill in a description of the shared database so that it is easy to know which shared database you are creating / using.
If you are using an existing shared database, selecting the database will present you with the description that was given to it on creation. This is why it is important to give shared databases a good description.
When you are completed filling in all the data, Click on the “Create” button.
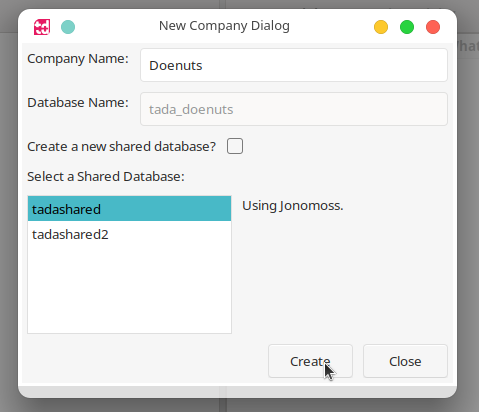

The server will start creating the company and will open a window letting you know if it was “Successful” or if it “Failed”.
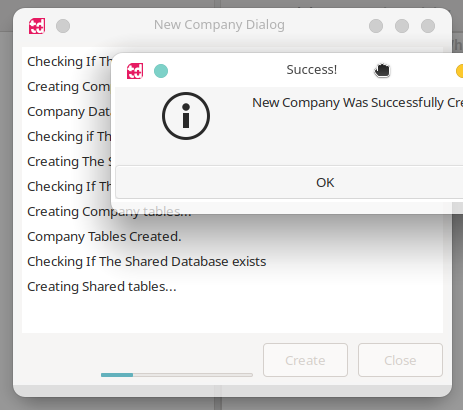

Click on the “OK” button. You will now see the new company loaded and running, ready for connections.
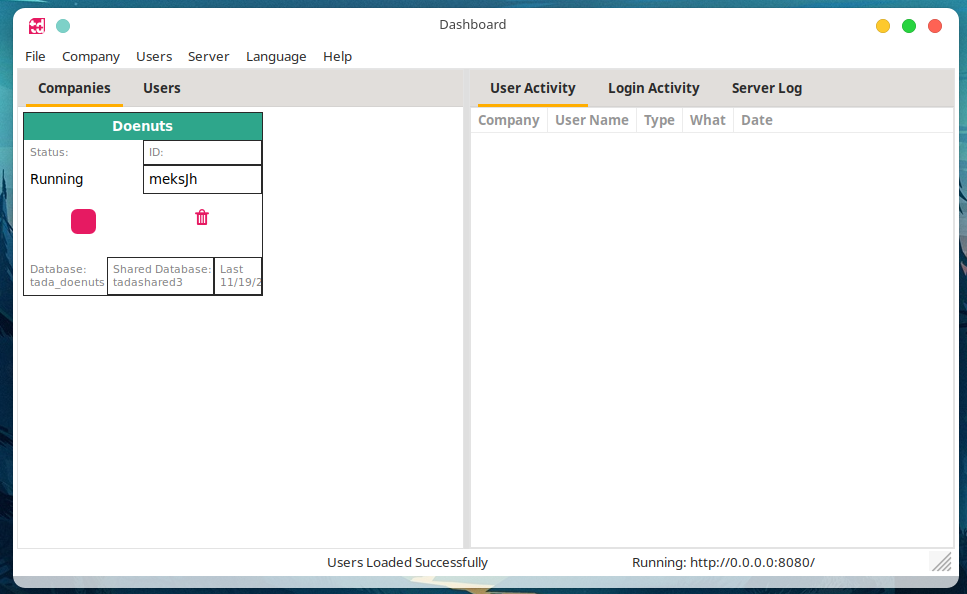

Stopping and Starting the company instance
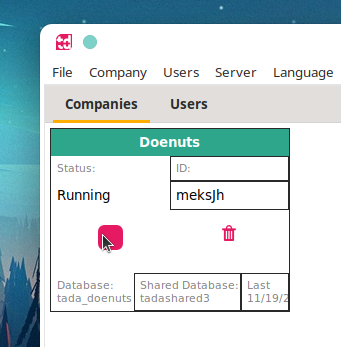
To “Stop or turn off” a company from receiving connections. Click on the stop “Square” icon on the desired company:

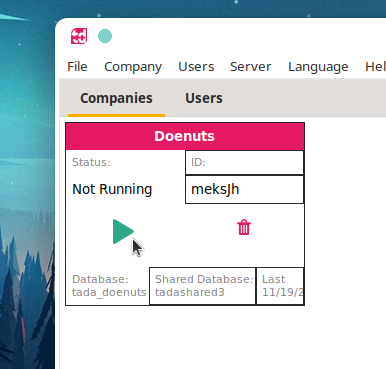
To “Start or Turn On” a company instance. Click on the “Triangle” icon on the desired company. The company can now receive connections:

Deleting A Company
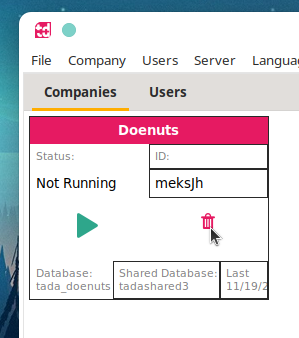
To delete a company, it needs to be stopped first. Once stopped, Click on the “Dustbin / Trash” icon to delete the company:
PS. this does not delete the company from the Postgres Database, it will only remove the instance from the server. No data will be lost.

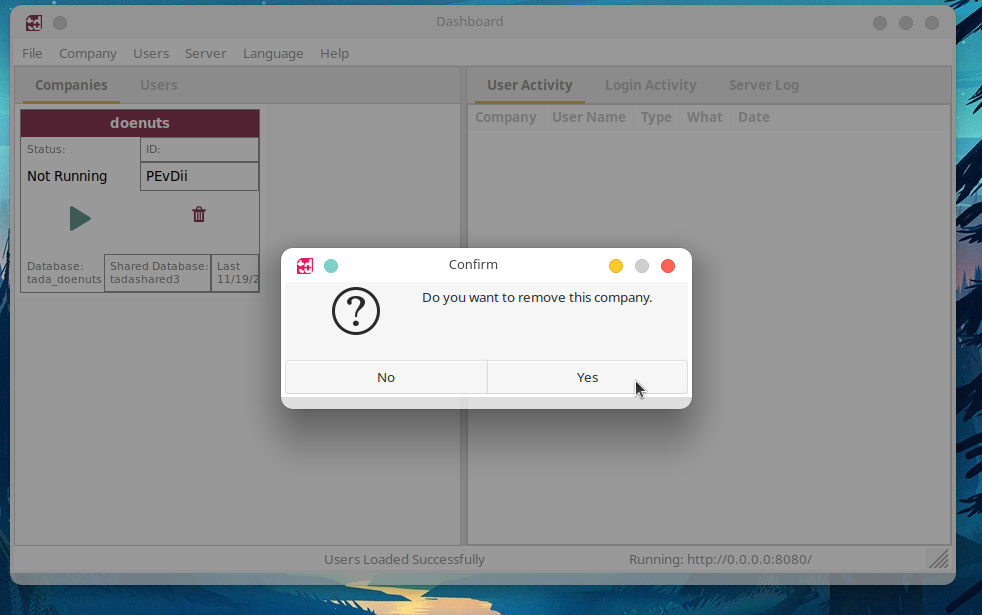
Confirm the deletion to remove the company from the server.

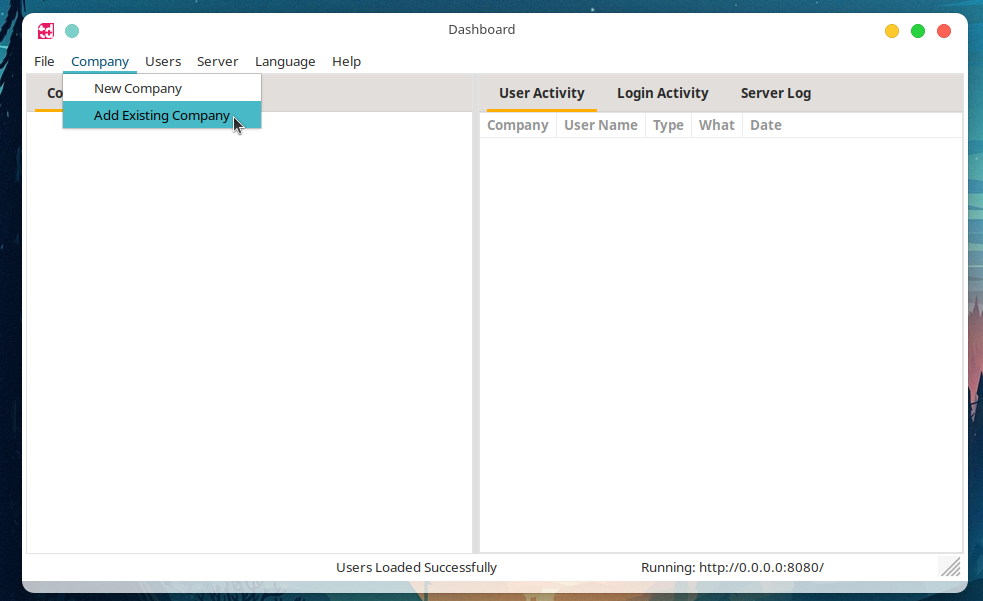
Adding an existing Company
If you have deleted a company or want to import an existing company. Click on the “Company” menu and select the “Add Existing Company” option.

A new window will open where you can chooses the desired company:
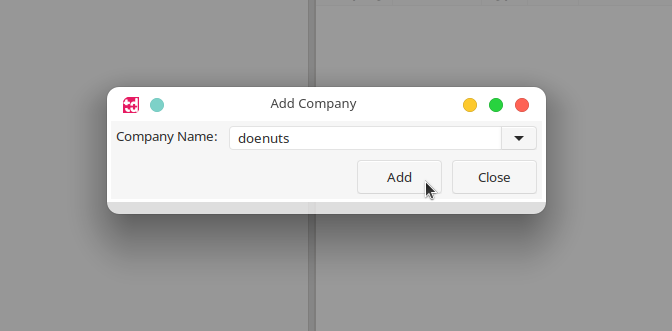

Click “Add” and a message will open to let you know if it was “Successful” or if it “Failed”.
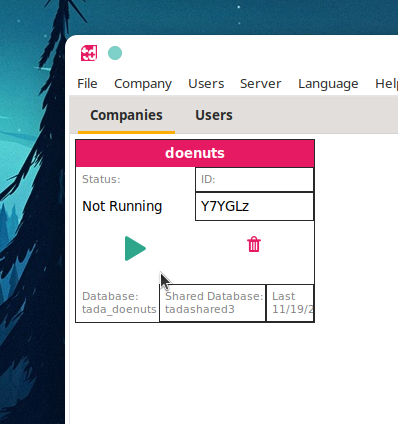
The company is added in an “Off / Not running” mode. Simply click on the “play” button to start it:

User Management
Creating Users
To create a user, click on the “Users” menu ans select the “Create User” option.
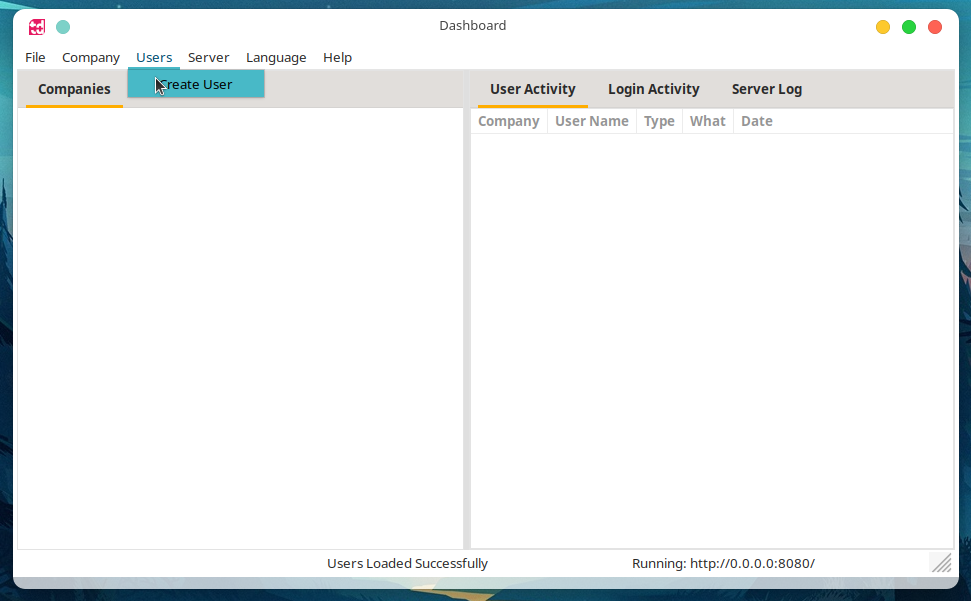

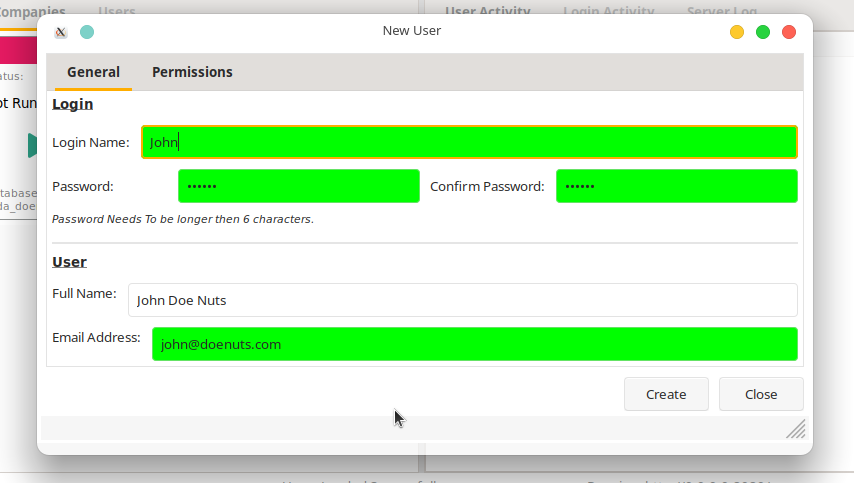
A “create User” dialog will open.
Under the “General” Section. Fill in the users:
- Login name - The name the user will use to login.
- Password - The password the user will use to login, needs to be 6 characters or longer.
- Full Name - The users full name.
- email address - The users email address.

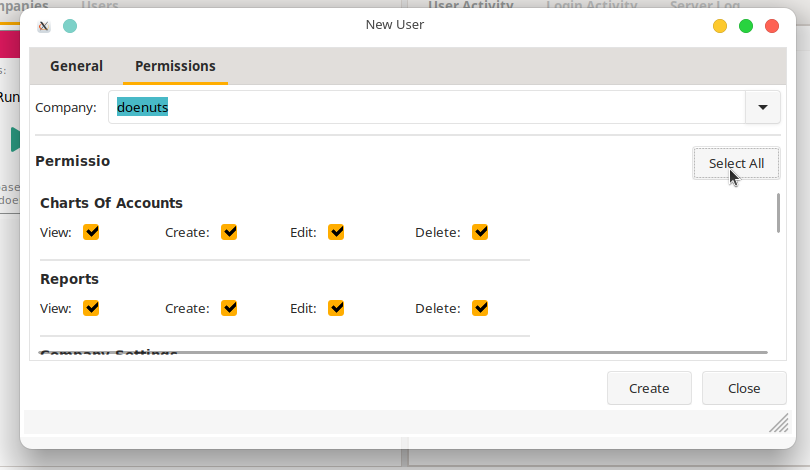
Under the “Permissions” tab. Select the users’ permissions for each company:
- First select the company in the drop down list.
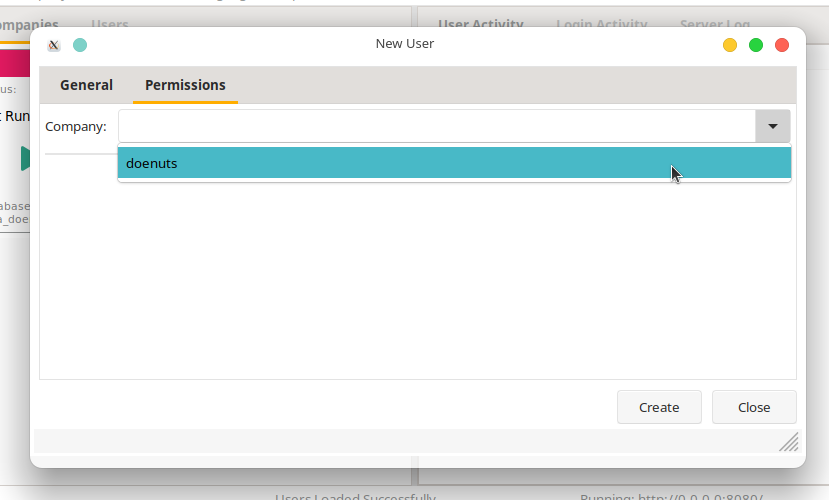

- Select the desired boxes to enable the specific permissions you want to give to the user. As this will be the Administrator account, we can give John full permission by clicking on the “Select all” Button.

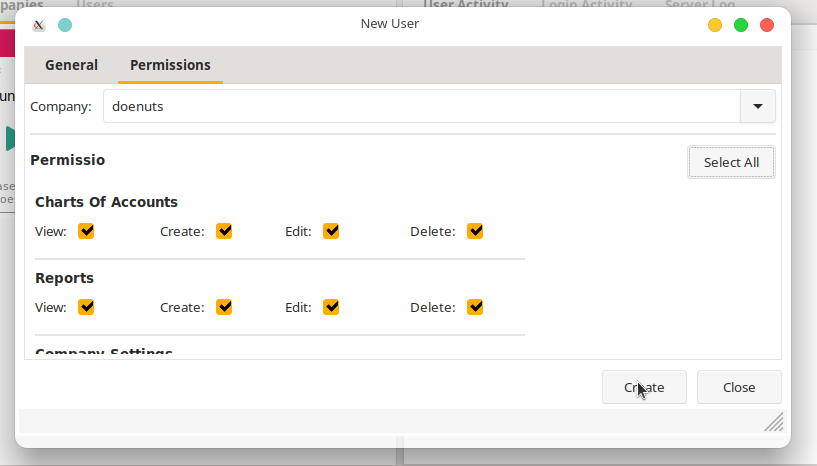
Click the “Create” button to confirm creation.

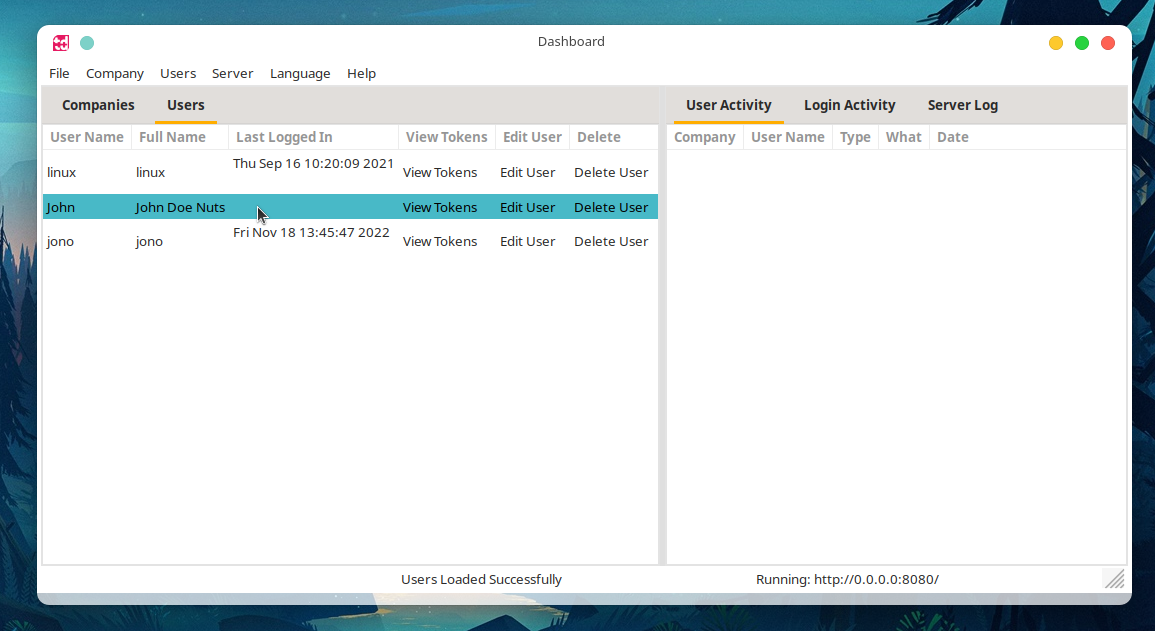
You will now see the new user under the users tab on the dashboard.

Editing A User
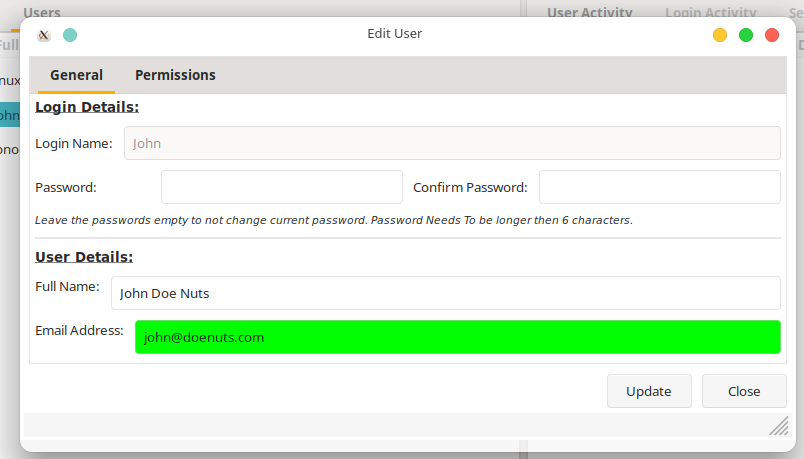
To edit a user, Click on the “Edit User” button under the “Users” tab in the dashboard.
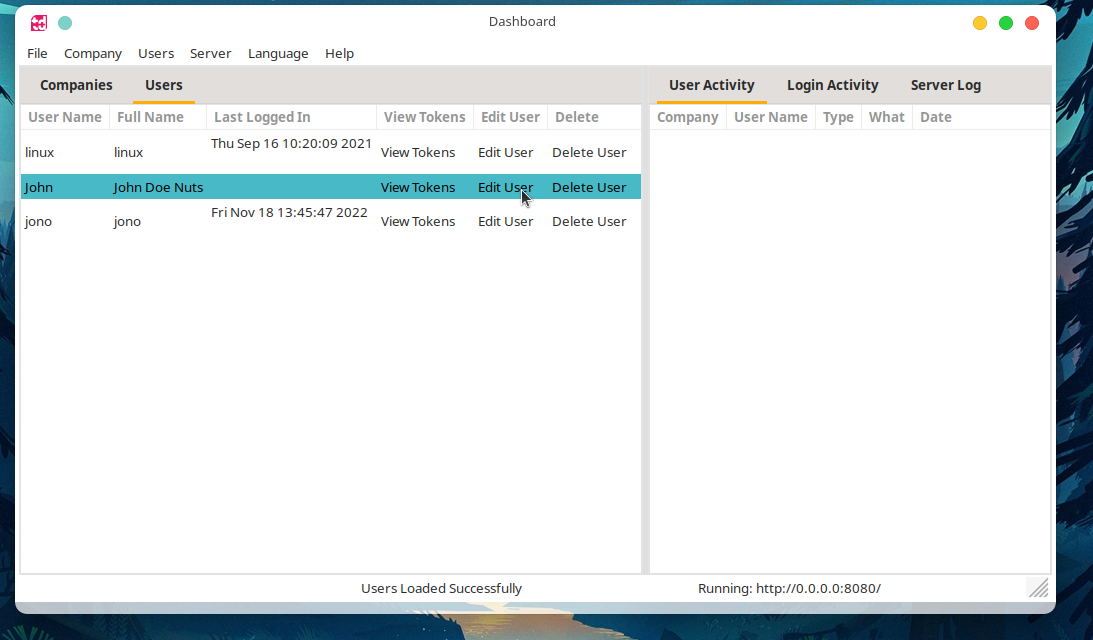

The edit user window will open where you can edit the users details and permissions.

Deleting A User
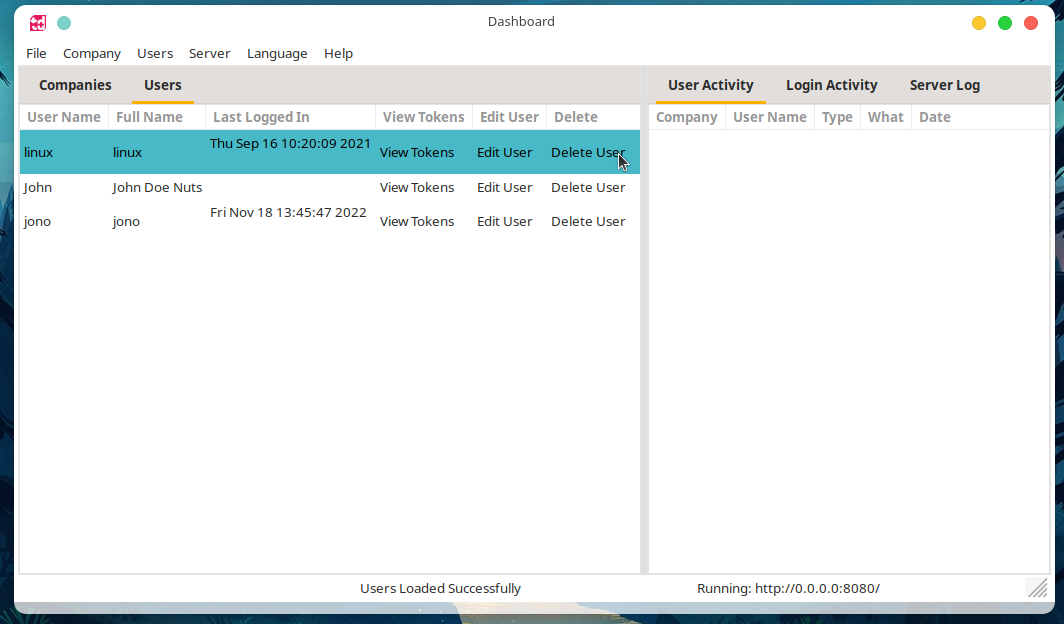
To delete a user, Click on the “Delete User” button under the “Users” tab in the dashboard. Confirm it to complete the deletion process.

Creating A User Access Token
Access tokens are used to join a client to your server. It is a unique token that is used to identify a user to the server.
A Token is only allowed to be activated once and can not be reused on multiple devices.
To see how to activate a token see login-window
So for instance, if a user needs to use Tada on a PC, Mac and a laptop, you will create three Tokens for the user.
The main reason behind this design choice is to isolate each connection to the server. So for example, if the users laptop is stolen or compromised, you just need to delete the access token that was used on that device to stop any connections from the device.
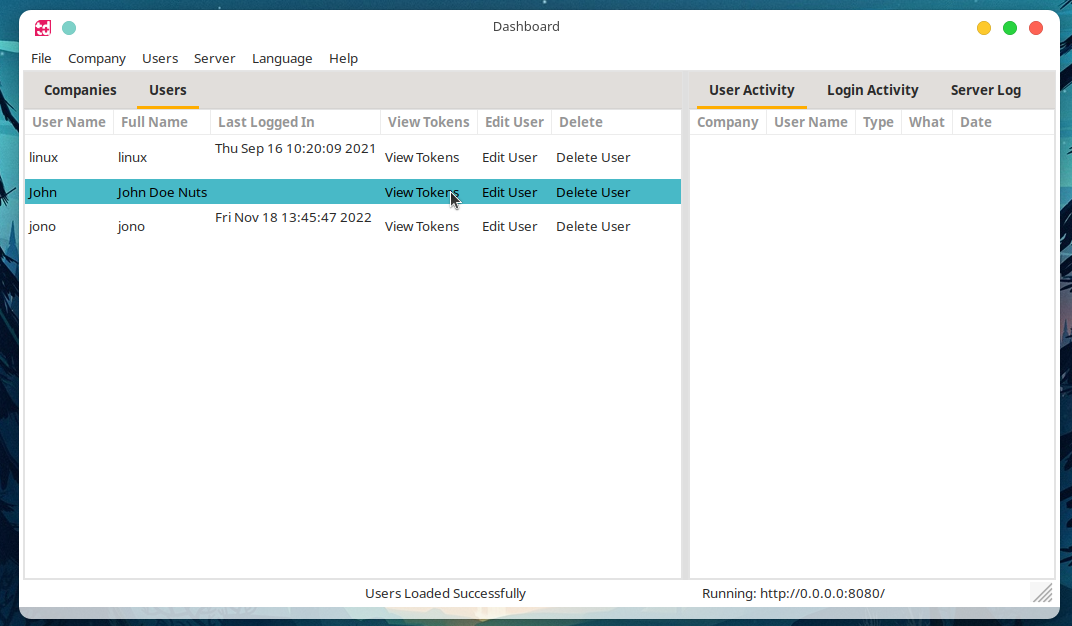
To create a user token, Click on the “View Tokens” button under the “Users” tab in the dashboard.

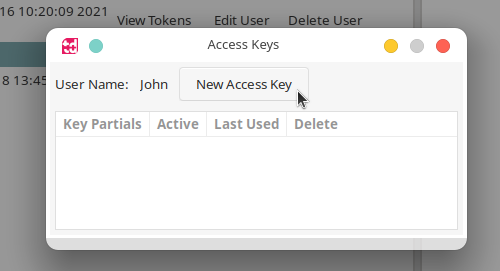
A new window will open where you will see all existing Tokens. Click on the “New Access Key” button.

A new window will open with password that will be used to open the “Token” when you import it into the users device. It is a one time password and will only be used to to open the Token. Once the Token has been activated, the password will not be used again.
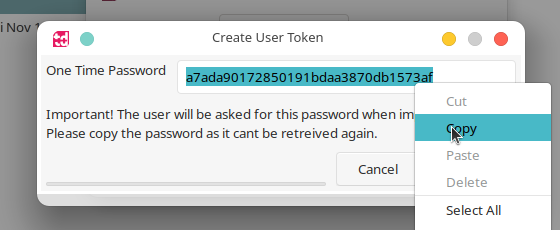

Once you have safely stored the Tokens password, Click on the “Create” button to continue. You will be asked where to save the “Access Token”. In this example, we will save it to the Desktop.
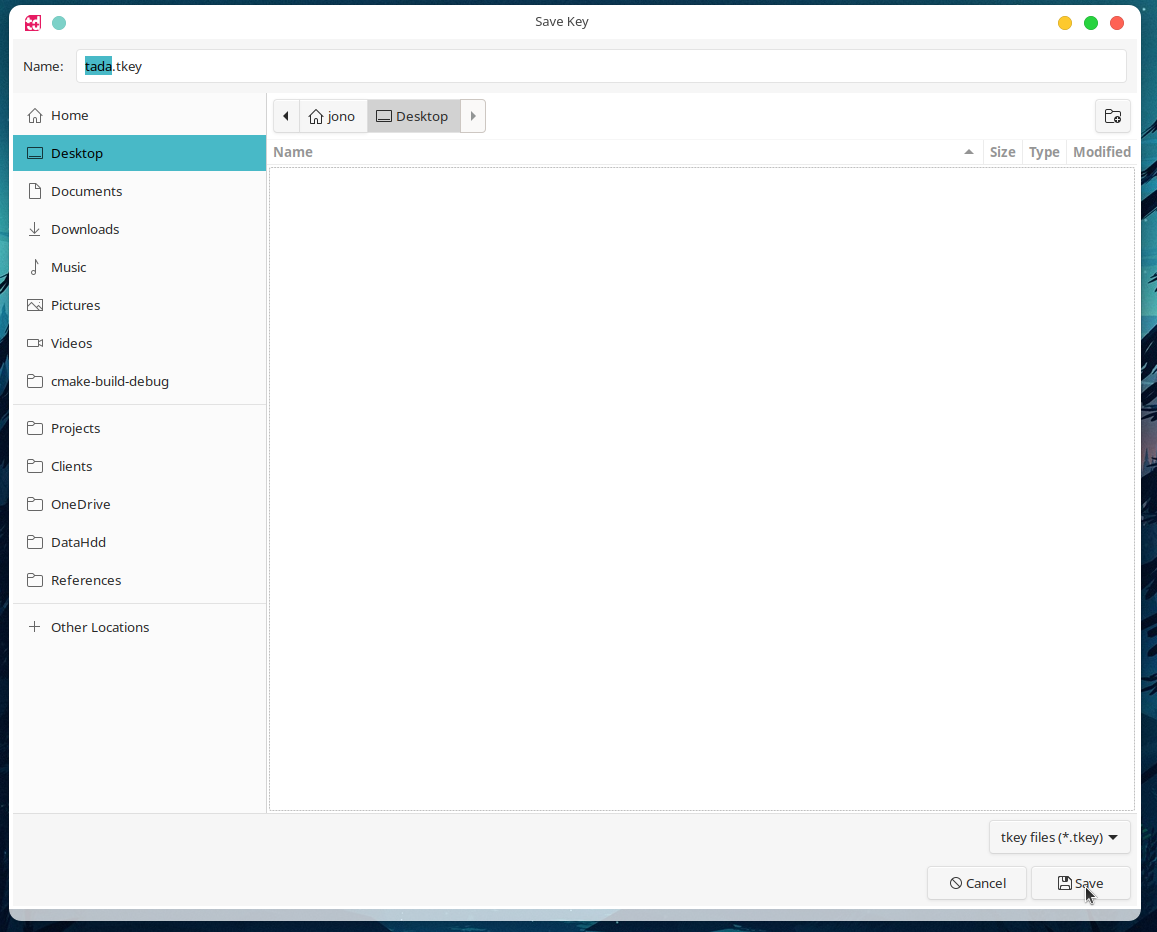

This will create a “.tkey” file, in this example we will save it as “tada.tkey”. This is the file that you will use to add users to client devices.
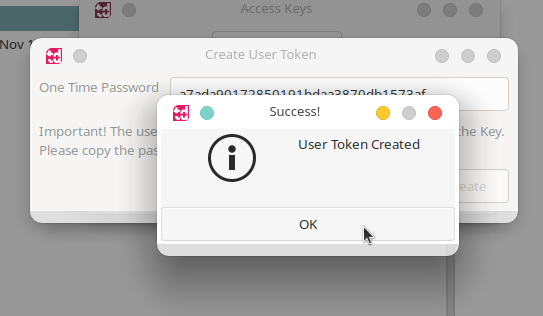
A “Success” or “Failed” window will open, click “OK” to continue.

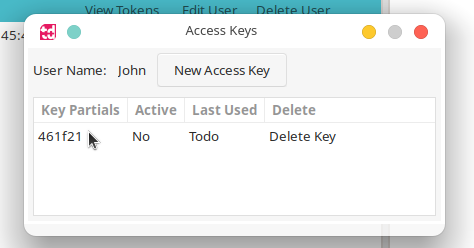
You will now see the new Token in the “User Tokens” window. It will be shown as not Active as it has just been created and has not been activated on a client device yet.

Deleting A User Access Token
To delete a user token, Click on the “View Tokens” button under the “Users” tab in the dashboard.


A new “User Tokens” window will open.


Click in the “Delete Key” button and confirm the deletion.
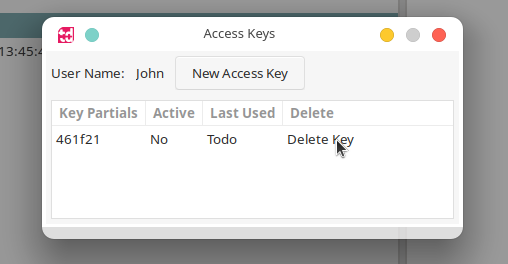

The Token will now be deleted and the device accosted with that token can’t connect anymore.


